

This article explains member management and roles for the Enterprise plans.
Applicable plans: Teams, Enterprise
- Admin: A billable role. Has full administrative permissions for the organization. They can access the admin console to manage billing and other settings. Can use all advanced features and the resources associated with their seat.
- Member: A billable role. Can use all advanced features and the resources associated with their seat. Cannot access the admin console.
The default role for new members is Member. Administrators can change this setting by navigating to Organization Settings > Member Configuration > Default Role.
Role Permissions
| Feature | Admin | Member |
|---|---|---|
| Use the client | ✓ | ✓ |
| Access seat Credits quota Teams only and advanced features | ✓ | ✓ |
| Basic organization settings (e.g., name, privacy mode) | ✓ | |
| Identity management configuration | ✓ | |
| Invite members | ✓ | |
| Manage member roles | ✓ | |
| Remove members | ✓ | |
| Usage management | ✓ | |
| Model management Enterprise only | ✓ | |
| Codebase policy Enterprise only | ✓ | |
| Enterprise knowledge base Enterprise only | ✓ | |
| Extensions & Marketplace Enterprise only | ✓ | |
| Analytics & Insights Enterprise only | ✓ | |
| IM channel management Enterprise only | ✓ | |
| Audit log Enterprise only | ✓ | |
| Billing & subscription management | ✓ | |
| Delete organization | ✓ | |
| Occupies a paid seat | ✓ | ✓ |
Add Members
You can add members to your organization using multiple methods:
- By approving applications from an invite link
- By email invitation
- By configuring Single Sign-On (SSO) for automatic joining
- By manual creation Enterprise only
Invite via Link
Administrators can navigate to Organization Settings > Member Configuration to enable the invite link feature, set an expiration period, and generate an invite link.
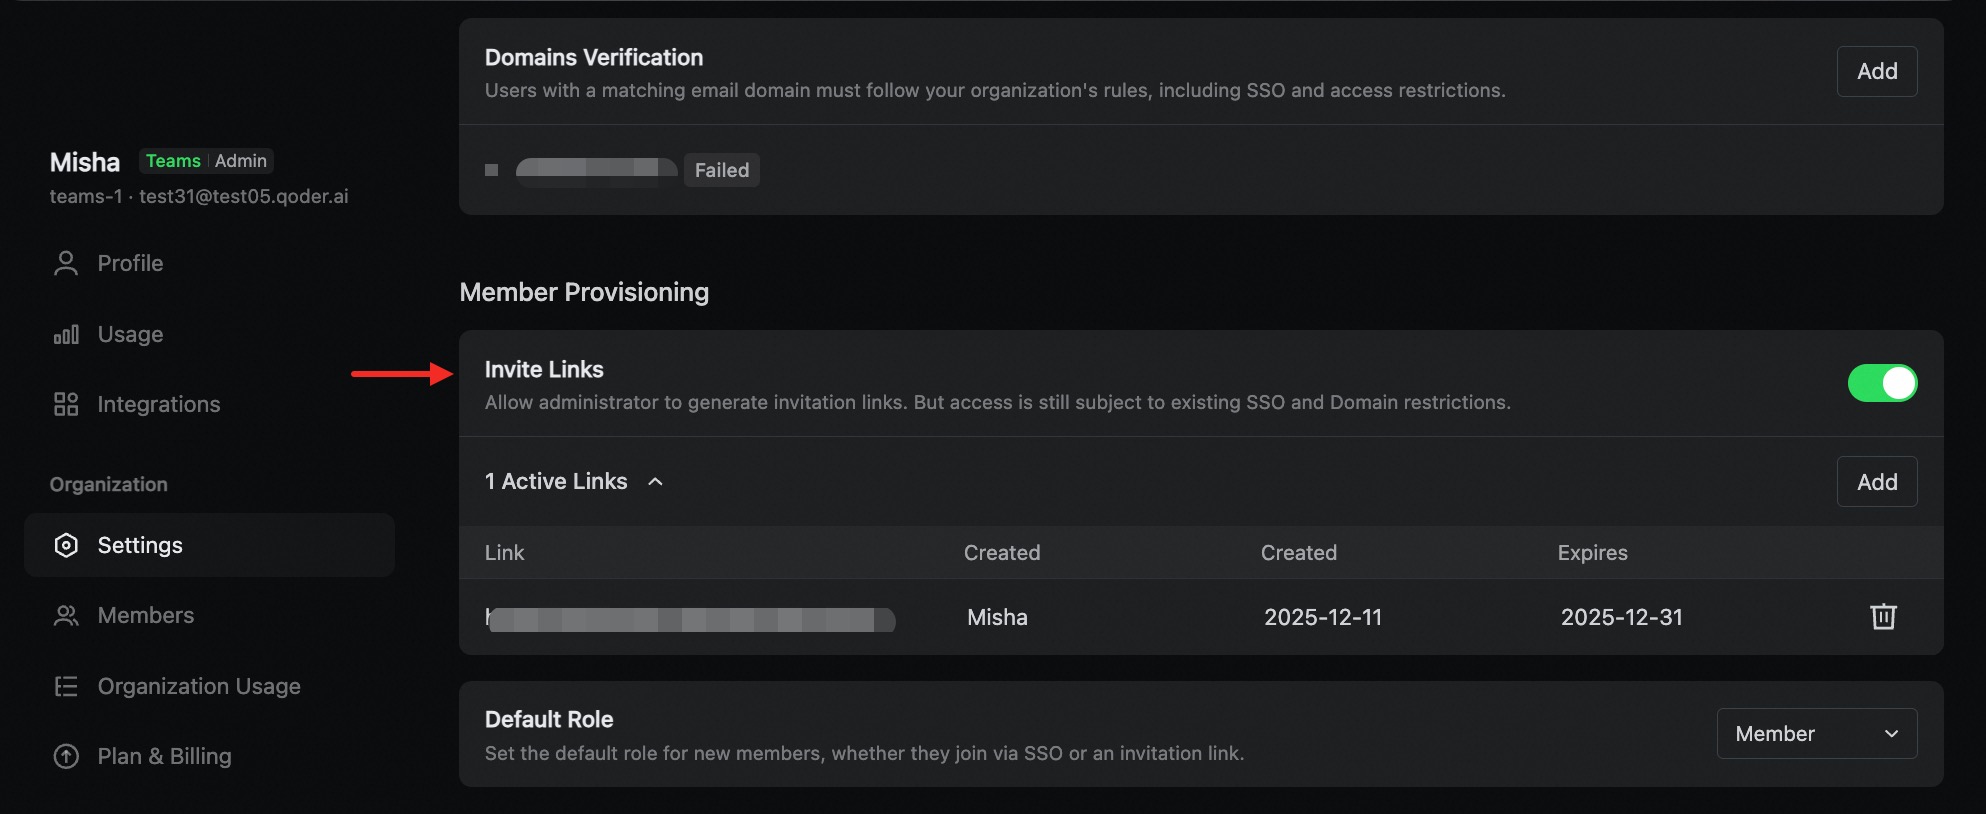
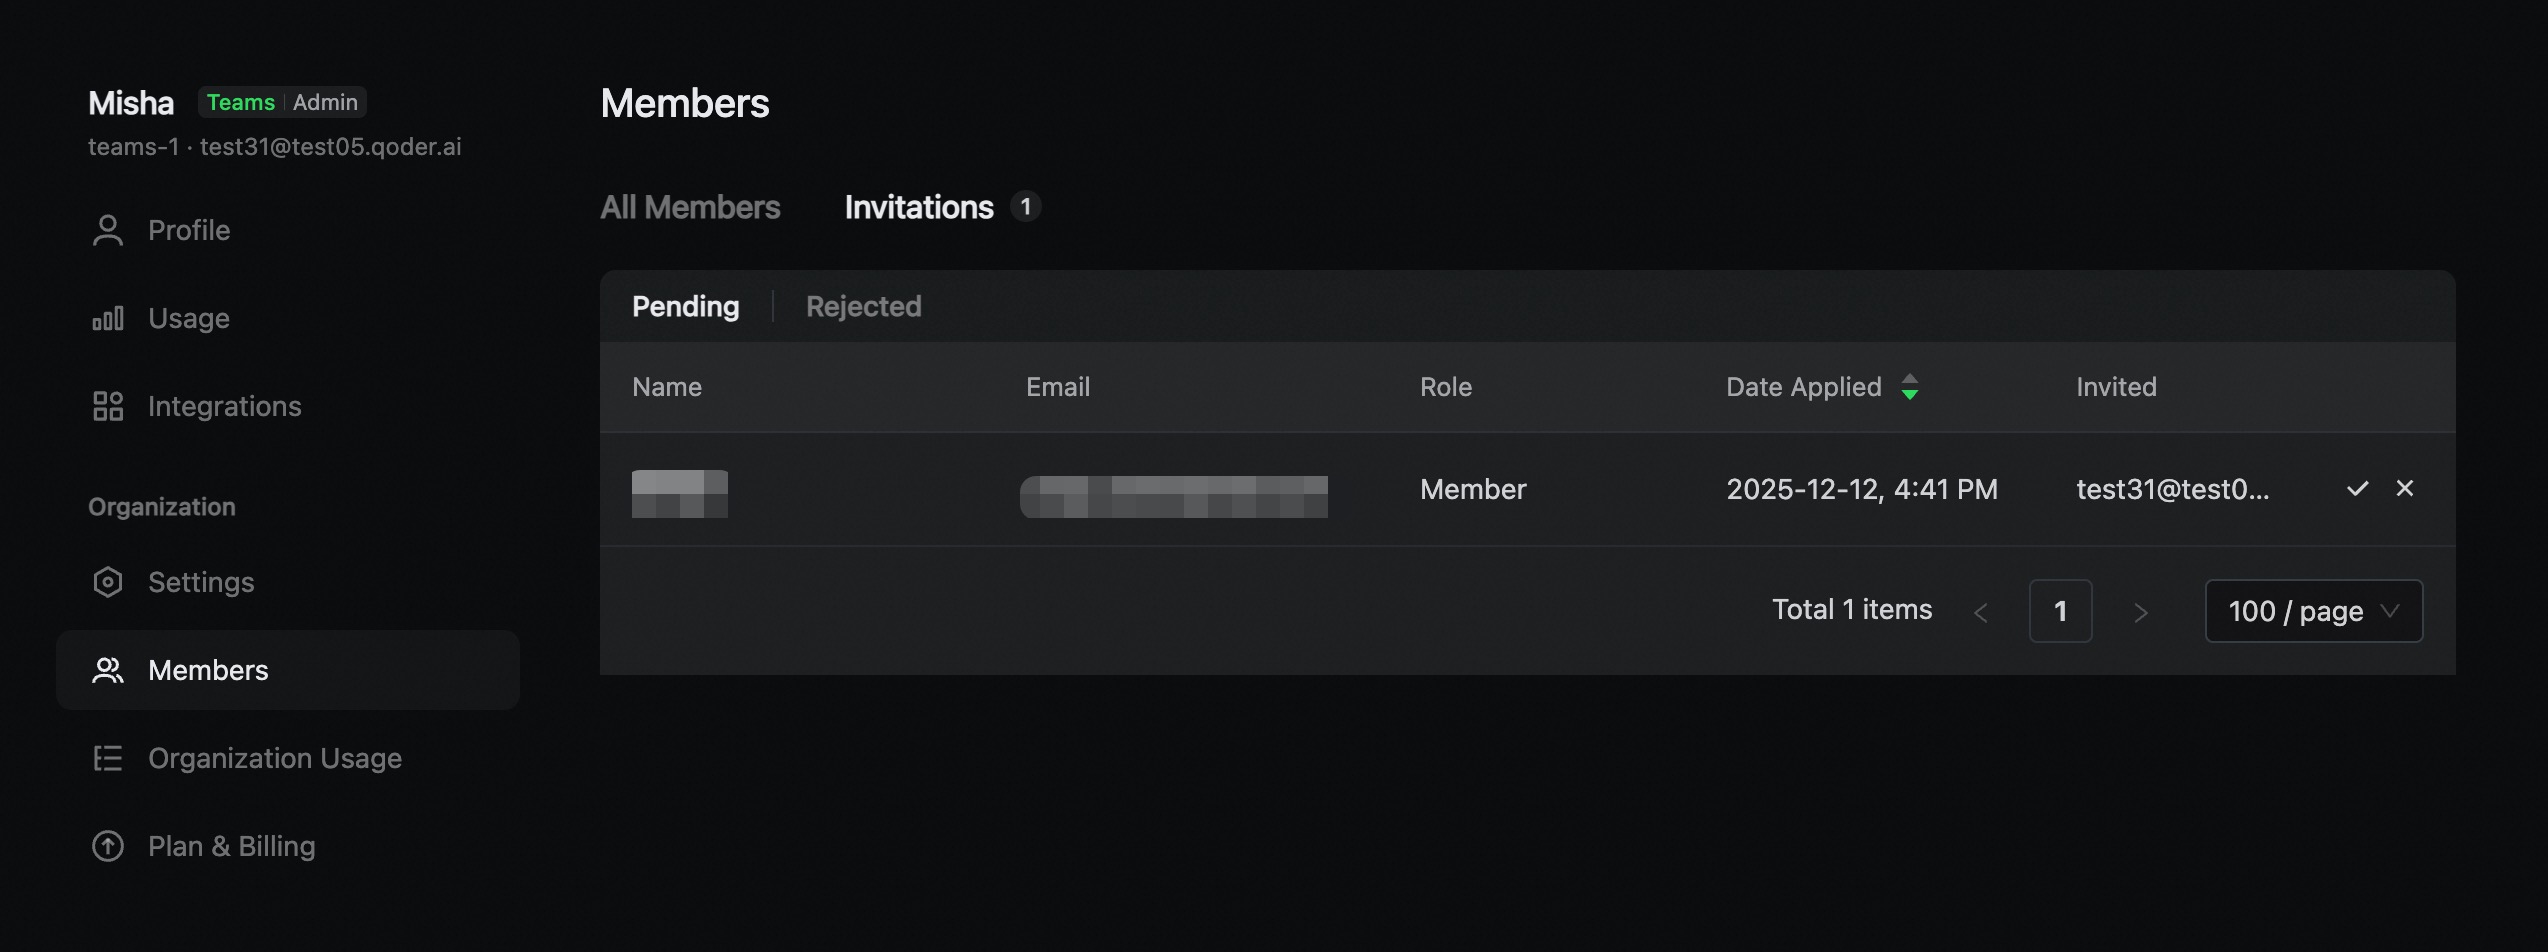
For security purposes, only Administrators are allowed to generate invite links.
Email Invitation
Administrators can navigate to Members > Add Members and select email invitation. Choose the invitation validity period and role, then enter the target recipients' email addresses. Multiple email addresses can be pasted at once and will be automatically recognized and populated.
Email invitations do not require additional admin approval — recipients can join the organization directly using the link in the email.
Join via Single Sign-On (SSO)
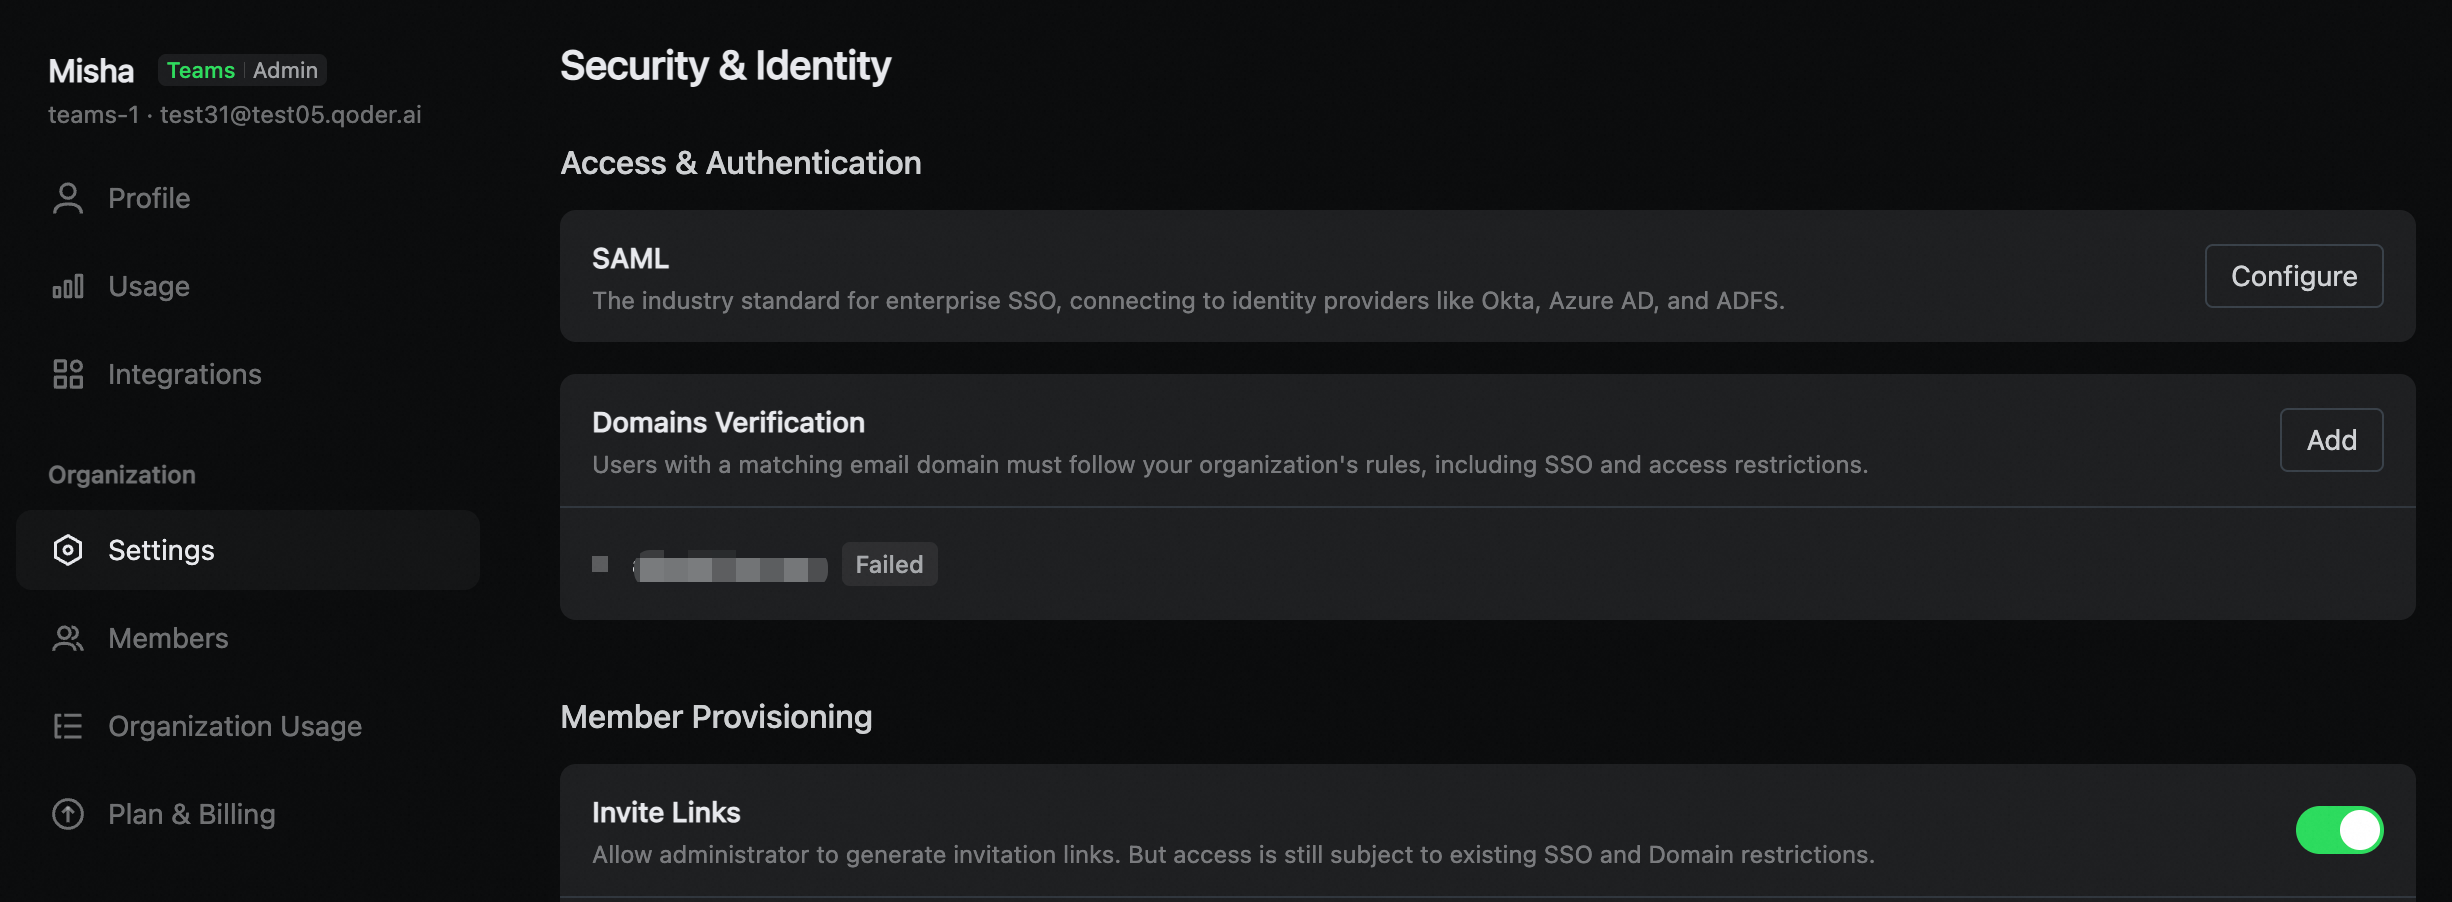
Administrators can navigate to Organization Settings > Security & Identity to configure Domain Verification and SAML Single Sign-On (SSO). See:
After SSO is configured and enabled, any user with an email address from a verified domain will be automatically added to your organization with the default role upon signing in.
When configuring SSO, please review the scope of your verified domains to ensure that users are added automatically as expected.
If the default role is a billable role, the user will immediately occupy a seat and be billed upon joining.If there are no available seats in the organization, users will be unable to join automatically via SSO. In this case, please contact your organization's administrator to purchase more seats, then try logging in again to re-trigger the automatic organization joining.
Modify Member Roles
Administrators can modify member roles at any time.
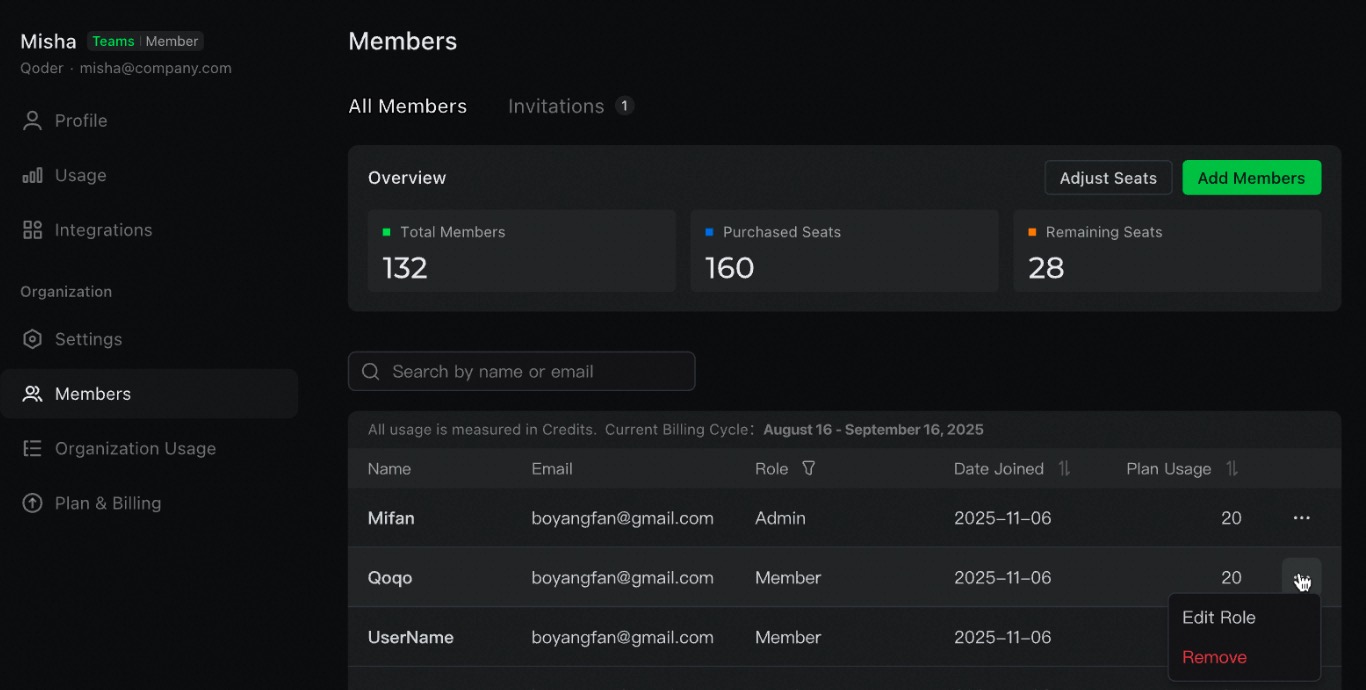
Navigate to Organization Settings > Member Management, select the target user, click the ... icon on the right side of the list, and choose the Edit Role option.
- Assigning a user to a billable role will immediately occupy a seat. Once assigned, the seat is billed for the entire current billing cycle. In Enterprise, the seat is automatically released and can be reassigned after the member is removed. See Remove Members.
An organization must have at least 2 billable members and at least one Administrator.
Remove Members
Administrators can remove members at any time, provided the organization's minimum member and role requirements are met. The removal is effective immediately.
Navigate to Organization Settings > Member Management, select the target user, click the ... icon on the right side of the list, and choose the Remove Member option.
After removal, the member leaves the organization and is downgraded to the trial plan. Note the following:
- Enterprise: The seat is automatically released and returned to the unassigned pool. It can be reassigned to another member within the current billing cycle. Seats are assigned automatically in the background, so you do not need to select one manually. A seat can be occupied by only one member at a time.
- Releasing a seat does not increase the organization's resource quota or Credits.
- Knowledge in the enterprise knowledge base belongs to the organization and is not deleted or transferred when a member is removed.
- Teams: Because each seat includes a Credits quota, removing a member clears the remaining Credits on that seat. If the member has not used any Credits during the current billing cycle, the seat is returned and can be reassigned to another user.
- If SSO is enabled, you must also remove the user from your identity provider (IdP). Otherwise, the user is automatically added back to the organization the next time they try to sign in.
Members and Seat Billing
When a new member joins the organization, they are added with the default role:
- An Admin or Member will immediately occupy a seat. For seat pricing, please refer to the Plans & Pricing.
- When adding a new seat during a billing cycle, you will be charged on a prorated basis for the remainder of the cycle. If the seat includes Credits (Teams plan), the included Credits will also be allocated proportionally.