Core capabilities
Multi-task parallel scheduling
Supports parallel advancement of multiple projects and tasks, completing coordination, command, and execution in a unified interface, significantly improving R&D collaboration efficiency and resource utilization.
Multi-agent expert collaboration
Through multi-agent division of labor and collaboration, it supports end-to-end execution from coding to delivery, enhancing complex task processing capabilities and overall delivery quality.
Knowledge and memory accumulation
Continuously accumulates project knowledge, task experience, and context memory during use, driving capability reuse, experience inheritance, and continuous optimization of results.
Customize expert teams
Flexibly defines expert roles, workflows, and capability boundaries according to your needs, creating an exclusive team of agent experts tailored to your own scenarios.
How to use
Quest is built into Qoder. Click the Open Quest button in the top right corner of the Editor to enter the Quest window. Before you start a task, choose Agent mode or Experts mode based on the work you want to delegate:- Agent mode: A single agent works autonomously to deliver tasks end-to-end.
- Experts mode: Multiple agents collaborate in parallel—best for full-stack development, technical research, and complex debugging.
Feature overview
Quest uses a three-column layout: the left column contains the task management area and extensions, the center is the conversation area, and the right is the function area.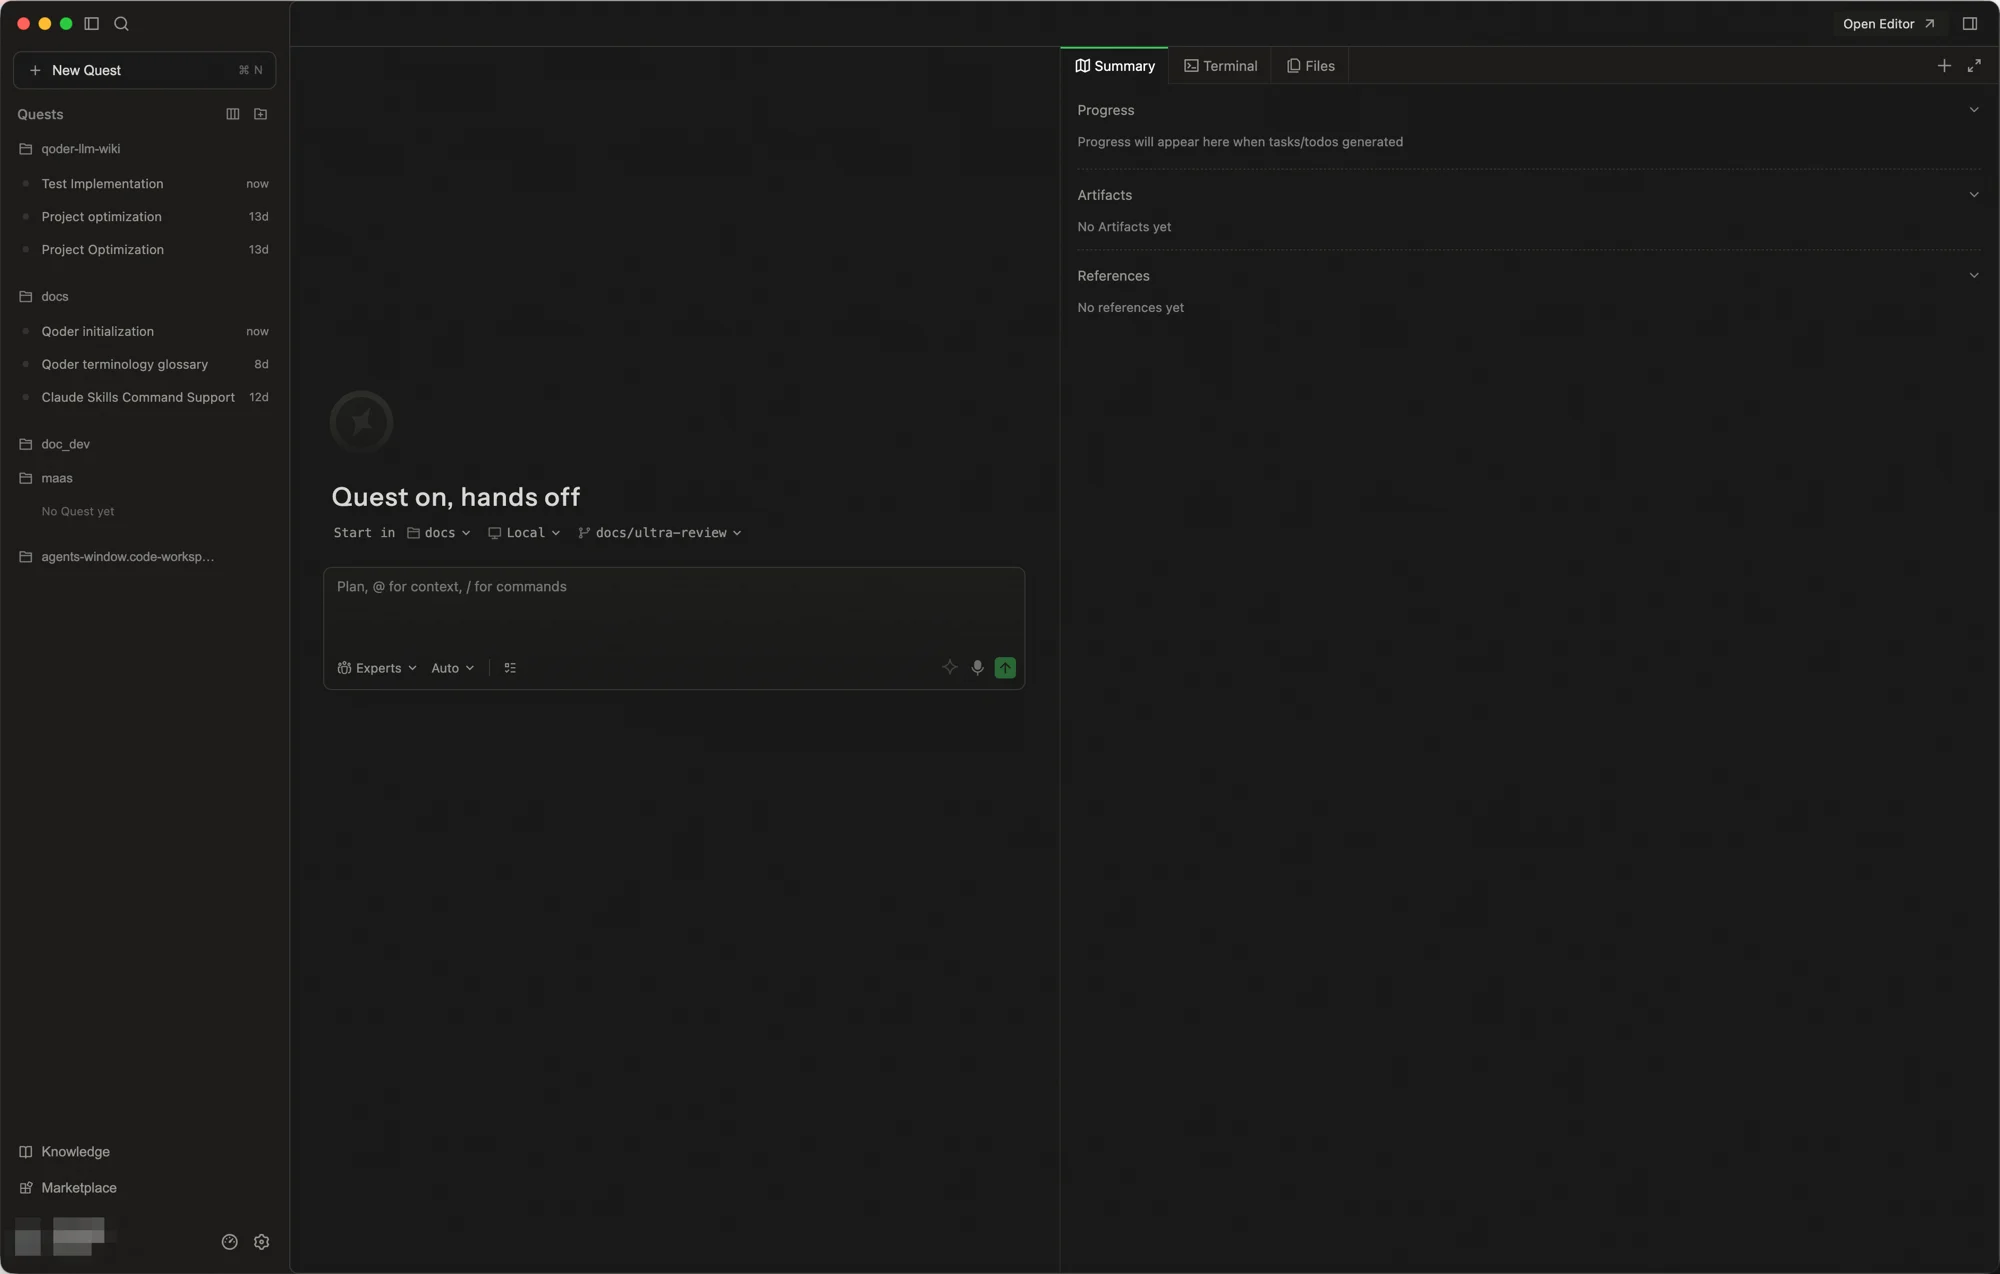
Task management area
The task management area is organized by workspace. After you open a workspace, you can create and manage Quests there, or open the same workspace in the Editor to keep coding. Quests in the workspace support Pin, Fork, rename, and delete. Each Quest shows a status: Running, Action Required, Ready, or Error. For quick questions or tasks not tied to a specific project, you can start a conversation without binding to a project.My Quests board
My Quests is a global task board that aggregates all Quest tasks across workspaces, grouped by status, so you can quickly assess the state of your work. Click the board icon next to the Quests heading to enter.- Search bar: A search box at the top lets you filter tasks by keyword
- Workspace filter: Tab-based filtering by workspace (e.g. All, or individual workspaces with task counts) to quickly narrow scope
- Three-column kanban: Tasks are automatically sorted into three status columns
- Running (blue): Tasks currently being executed
- Waiting (orange): Tasks awaiting user action (e.g. Action Required)
- Completed (green): Finished tasks
- Task cards: Each card shows the task name, description, workspace, and status badge — click to jump directly into the corresponding Quest conversation
Extensions
A tools strip at the bottom of the left column provides global entry points Quest relies on—so you can reuse project knowledge, extensions, and preferences across tasks:- Knowledge hub: Central place for knowledge Quest can use during runs, including auto-generated Repo Wiki, Knowledge Cards distilled from code and discussion, and Memory captured from conversations.
- Plugin marketplace: Browse and install official plugins to extend what Quest can do; installed plugins can be invoked by agents in tasks, see Plugins.
- Settings: Open system and preference settings—account, models, shortcuts, proxy, appearance, and Quest-specific execution behavior.
Conversation area
The conversation area is Quest’s main surface for dialogue, execution, and input:- Conversation flow: Full transcript—your instructions, model replies, intermediate steps, and outputs.
- Execution steps: While a task runs, shows step-by-step progress, command output, and status, with rich content such as code blocks, logs, and file references.
- Input box:
@references for files, folders, and symbols; model selection; microphone for voice input; context compression at the bottom. - Changes entry point: After a run, a review entry appears above the thread; click it to open the Review panel on the right.
- Quick conversation locator: The Quest window adds a side-rail locator to jump quickly to a target part of the conversation.
Function area
The function area expands and collapses from the side rail and includes:- Summary: Progress for run status, summary files for the current Spec and code changes, and references to knowledge and tools used in the task (e.g. Repo Wiki, Memory, Skills, MCP), with clickable links.
-
Review and submit
- Diff view: Detailed side-by-side diff for code changes.
- Review and reject: In View changes, inspect every modified file; reject per file or reject all.
- Go to file: Jump from a change to the corresponding source for a closer read.
- Commit and push: With a local Git repo, use Commit; when a remote is linked, push or open a PR.
-
Other panels: Beyond summary and review, Quest surfaces built-in panels as needed for dev, debug, and backend work:
- Terminal and file tree: Workspace tree plus integrated terminal for structure and manual commands.
- Browser: In-IDE browser for previews or docs, see Browser and Browser Agent.
- Spec panel: Shown when Spec-driven mode is on, see Spec-driven mode.
- Supabase panel: Connect and manage Supabase projects and preview schema, see Supabase integration.
Tiled layout
Split the current view into multiple panes by dragging Quest tasks, so you can run and manage multiple tasks in parallel without constantly switching between tabs. Tiled layout makes it easier to work on several tasks at once and compare outputs from different agents. You can expand a pane to focus on a single conversation, drag agents into different tile zones, and use keyboard shortcuts for quick navigation and arrangement. Your layout is preserved across sessions.How to use
Drag Quest tasks into different pane zones.Use cases
- Monitor multiple agents’ progress simultaneously and compare outputs from different approaches
- Review code changes in one pane while continuing to iterate in another
- Reduce context-switching overhead when running several tasks in parallel
Important notes
- Cannot switch scenarios after start: Please confirm your scenario selection before starting a task.
- Editing messages triggers rollback: Resubmitting an edited message rolls back workspace files to the state before the current conversation.
- Mode selection sets execution strategy: Agent and Experts modes are determined at task creation; subsequent conversations execute based on that mode’s characteristics and cannot be switched.