

Complete the installation, open the console, create a Waker, and send your first task. Covers system requirements, macOS / Linux / Windows installation, sign-in, service management, and FAQ.
System requirements and pre-installation checks
| Item | Recommendation |
|---|---|
| Operating system | macOS 13.0+, mainstream Linux distributions, Windows 10+ |
| Memory | 4 GB+ recommended |
| Disk space | At least 500 MB free |
| Network | Access to model services, code repositories, and connectors required; enterprise networks must allow relevant outbound HTTPS connections |
Installation
- macOS
- Linux
- Windows
macOS supports installation via either a package installer or the command line.Do not close the terminal during execution. When the authorization page appears, complete authorization and return to the terminal to wait for completion.Verification:
Option 1: Package installer
- Open the QoderWake website.
- Select "MacOS", then choose "ARM64 (Apple Silicon)" or "X64 (Intel)" based on your chip.
- Download and open the
.dmg, then drag QoderWake into "Applications". - Open QoderWake from "Applications", complete account authorization when prompted, and wait for the service to start and the Web Console to open.
Option 2: Command line
Open a terminal and run:- The browser opens the Web Console, or the terminal prints the console address.
- Running
qoderwake statusin a new terminal returns the service status.
qoderwake is not found, open a new terminal. If it still doesn't work, use the full path:Package names change with each version — always download from the official website. If installation already completed sign-in, started the service, and opened the Web Console, you do not need to repeat the sign-in and startup commands below. Proceed directly to creating a Waker.
Sign in, check account, and sign out
Browser authorization
Run the following commands:
login again.
Verification: qoderwake whoami displays the current account, and cloud or remote features no longer prompt for sign-in.
Token-based sign-in
When no GUI desktop is available or browser authorization is not possible, sign in with a Personal Access Token (PAT):
qoderwake whoami.
Switch accounts or sign out
To clear the current sign-in state:
logout, login, and whoami in sequence, then refresh the Web Console. When not signed in, local mode remains available; cloud and remote capabilities require a valid account.
Start the service and open the console
Start and open
If the service is not running:
portal reads the actual port. The default address is http://127.0.0.1:19820; if the port is occupied, it increments automatically.
To print the actual address without opening the browser:
portal --no-open is accessible.
Check status, restart, and stop
| Command | When to use | Expected result |
|---|---|---|
qoderwake status | Unsure whether the service is running | Returns the current service status and related information |
qoderwake restart --open | Page is abnormal, or configuration/version was updated | Service restarts and reopens the console |
qoderwake stop | Normal shutdown of the background service | Service stops, but sign-in state is preserved |
qoderwake stop --force | Normal stop is not working | Force stops; running tasks may be interrupted |
Create your first Waker
1
Open Waker Management
Run
qoderwake portal, open "Waker Management", and select "New Waker".2
Choose a role in the marketplace
Choose the preset role closest to the job. If no role fits, select "Custom Waker".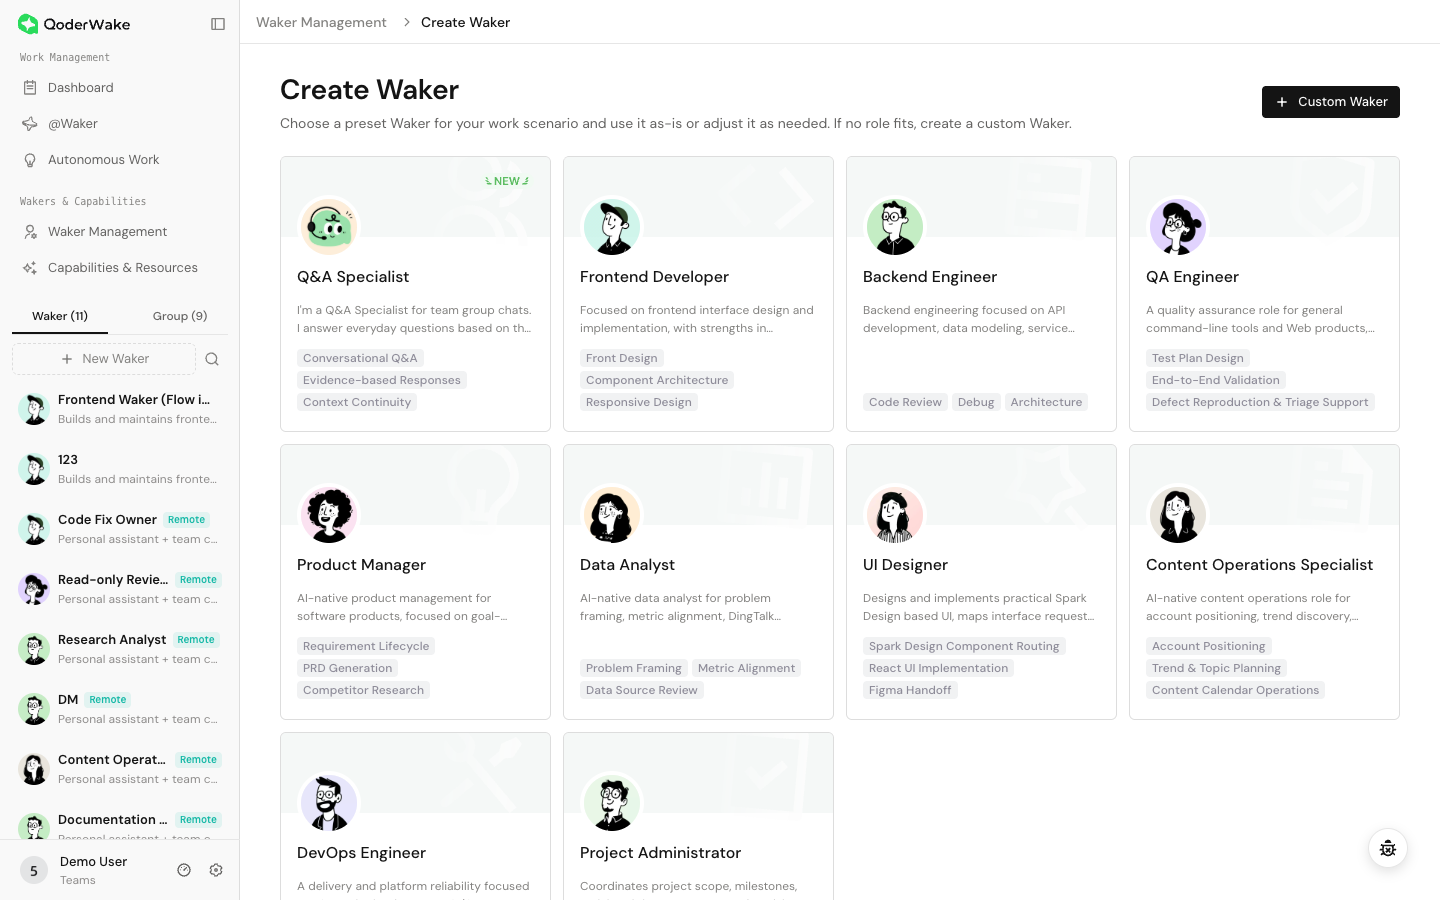
3
Review the role
Open the role card and check its core capabilities, work style, work methods, and bundled Skills, then select "Create Waker".
4
Complete details
Enter a name and verify "What I own" and the runtime environment. Keep only the Skills, knowledge bases, and connectors needed for the first task.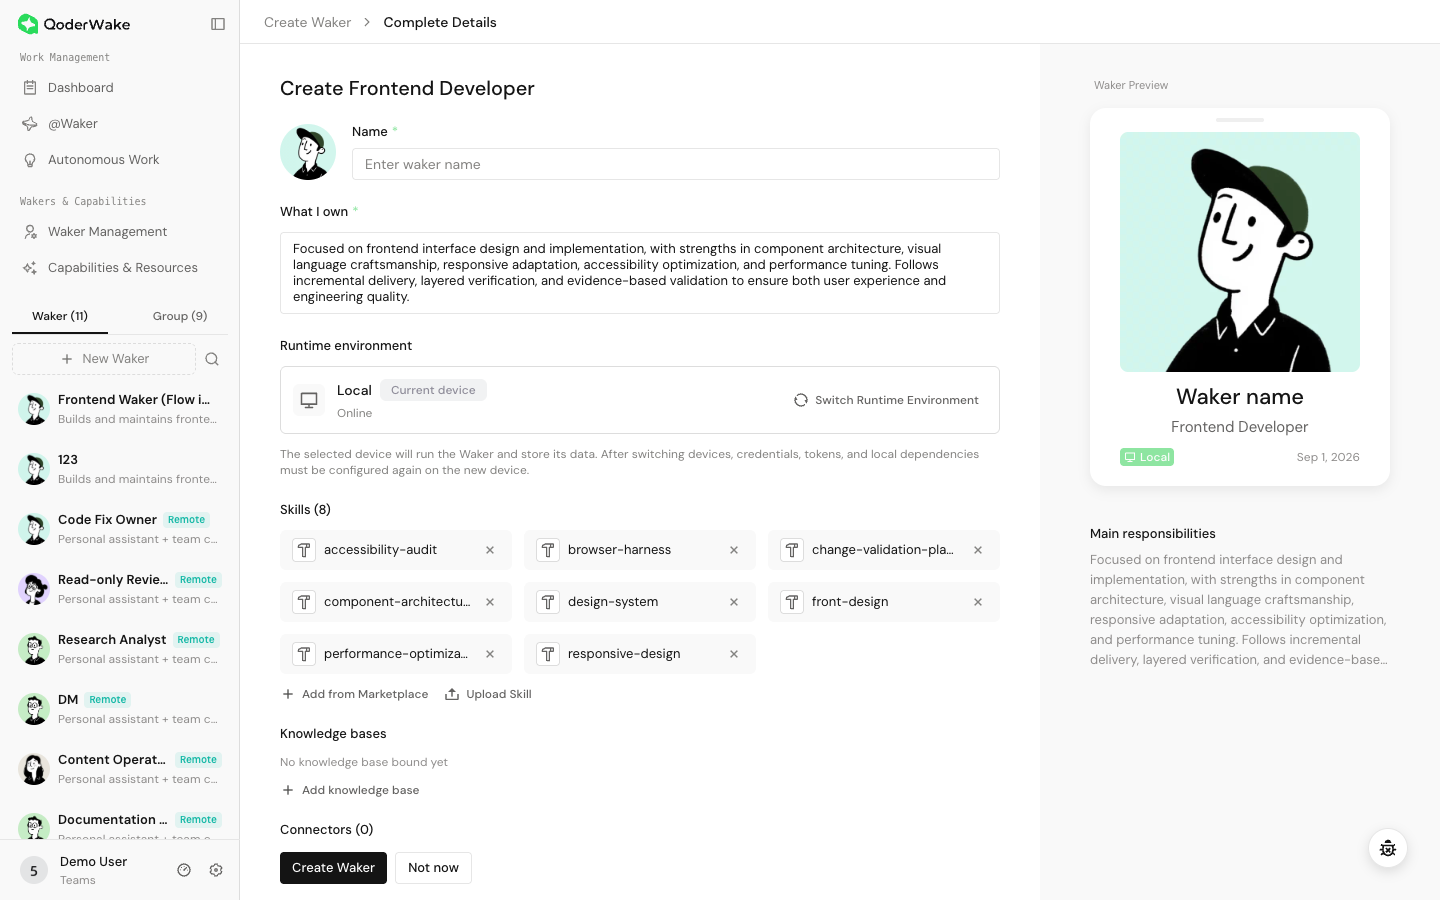
5
Create the Waker
Select "Create Waker".
- The new Waker appears in the Waker list.
- The card shows the correct name, description, environment, and status.
Send your first chat task
1
Enter the chat
Click "Create Chat Task" on the new Waker card and confirm the correct Waker is shown on the chat page.
2
Select the working directory
When working with files, select the correct working directory. Add attachments or use
@ to reference context as needed.3
Send a dry-run task
Keep the model on "Auto" and send a read-only dry-run task, for example:
4
Handle authorization prompts
Send the task. If an authorization or confirmation prompt appears, review the operation details before proceeding.
5
Verify the result
Wait for the final reply and check that the result comes from the selected directory and does not exceed the scope of your request.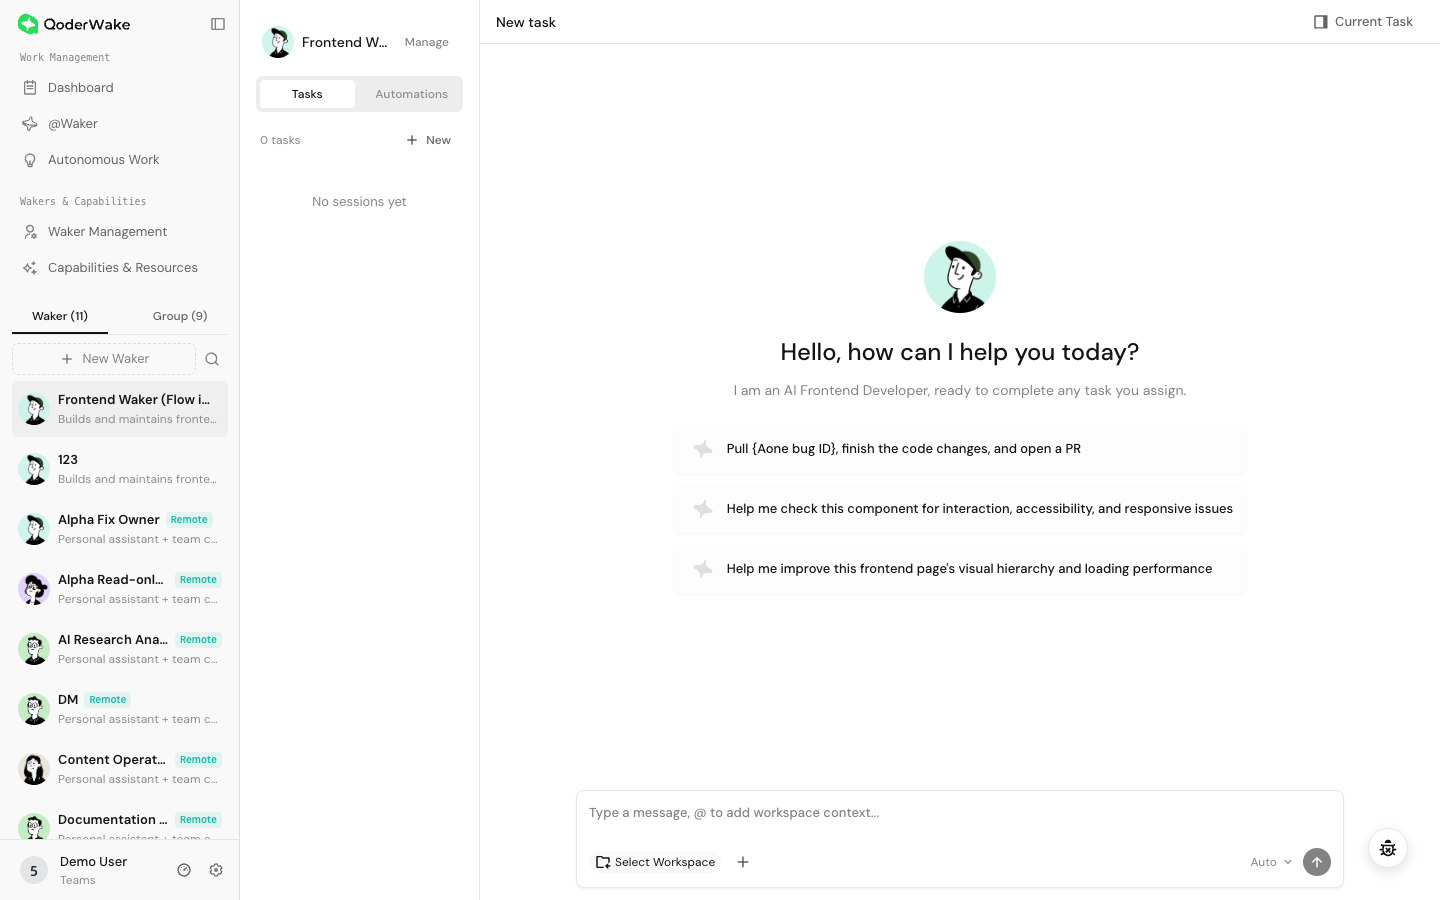
- The Waker enters a processing state and eventually returns a result.
- The result comes from the selected directory or attachments and does not exceed the task scope.
Quick start FAQ
| Symptom | Check first | Suggested fix |
|---|---|---|
Terminal says qoderwake not found | Whether a new terminal has loaded the command path | Reopen the terminal; if needed, use ~/.qoderwake/bin/qoderwake |
| Browser did not open automatically | Whether the terminal printed an address | Copy the address to a browser, or run qoderwake portal --no-open |
| Default address is not accessible | Whether the service is running and the actual port has changed | Run qoderwake status and qoderwake portal |
| Cloud or remote capabilities unavailable | Whether the current account is valid | Run qoderwake whoami; re-sign-in if needed |
| Waker cannot access local files | Whether the correct working directory is selected | Go back to the input area, select the directory, and retry the task |