

Start, continue, validate, and manage tasks for a Waker or Group with the correct work context.
Chat tasks are best for work that needs discussion, follow-up questions, or iterative refinement. Each task has its own context. Continue the same task when the goal is unchanged; start a new one when the primary goal, workspace, or executor changes.
Before sending a message, confirm that the Waker is enabled, its runtime device is online, the correct project or directory is available, and required Skills, connectors, or knowledge are assigned.
Use the default workspace for general analysis. For code or file changes, explicitly select a directory or project instead of expecting the Waker to guess.
For complex work, ask for a plan first and approve it before execution. Avoid combining unrelated objectives in the first message.
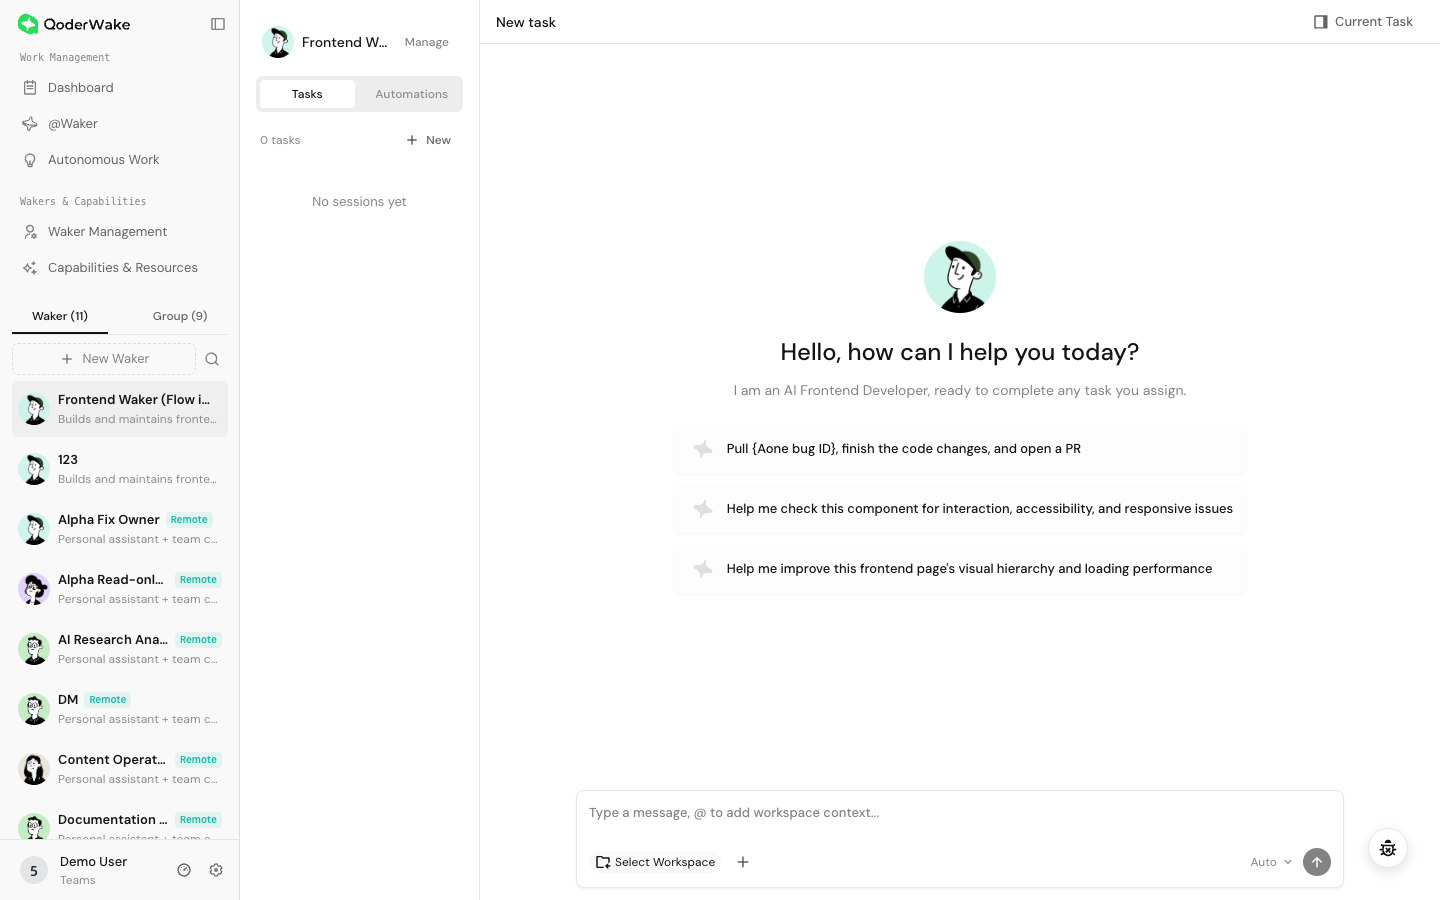
The workspace controls where work happens; an attachment is only message input. Provide credentials and sensitive data only through a protected connector or approved data path.
After sending, the page shows task status, steps, tool activity, and responses.
Stopping a task prevents later steps but does not undo files or external actions that already happened.
Continue the current task to add input, refine the same artifact, ask for evidence, or resume after approval. Be explicit, for example: “Keep the first two conclusions and recheck only the third.”
Start a new task when the objective, project, main directory, primary Waker, customer, release, or environment changes. This prevents stale context from affecting the result.
Before approving an operation, verify the target file or external object, permission scope, expected impact, and rollback plan. Deletion, overwrite, publishing, external sending, payment, and production changes should remain human-gated.
When unsure, reject the operation or ask the Waker to return a read-only analysis first.
A Group is a reusable collaboration unit made up of several Wakers. Use it for recurring multi-role work such as project coordination + implementation + QA; use one Waker for short work owned by a single role.
Create and maintain Group members, Leader, models, and workspaces in Waker Management. This page focuses on starting and continuing work in an existing Group.
Before a chat, confirm at least two complementary Wakers, one clear Leader, and valid models, workspaces, and resources. The Leader interprets the request, assigns members, and consolidates results; avoid overlapping it completely with another member.
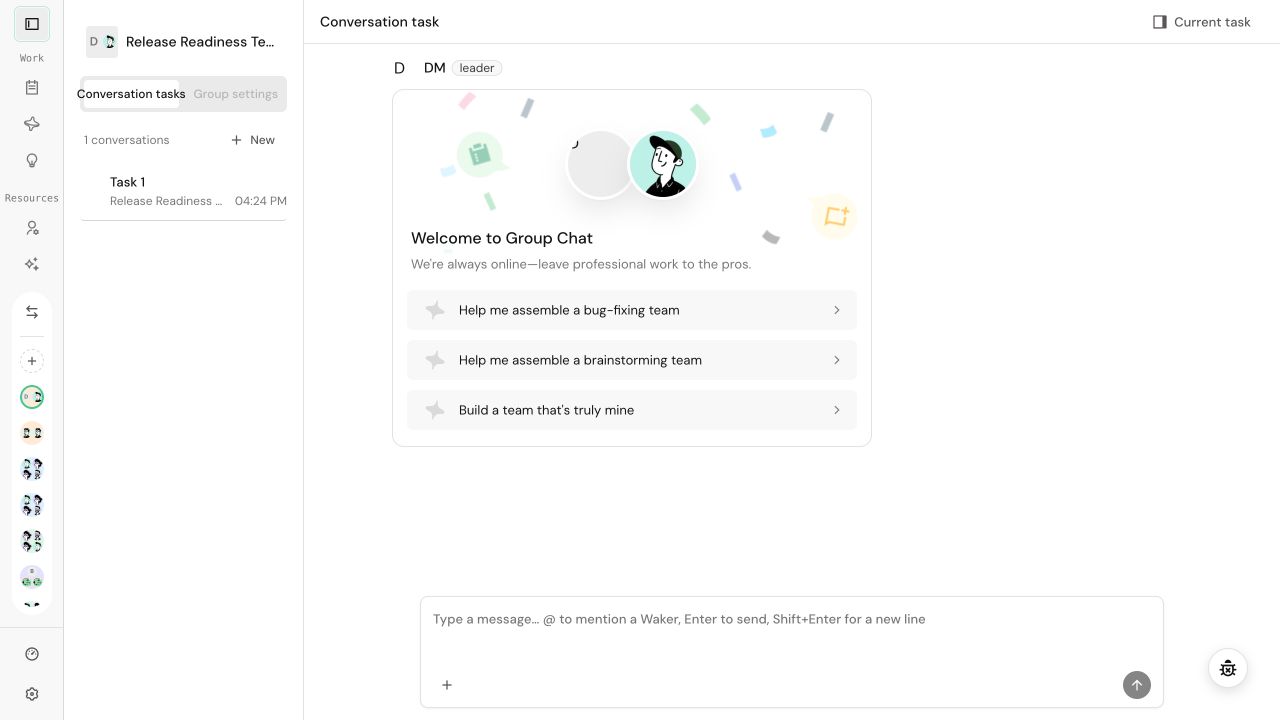
Open the Group chat and select Group settings in the task panel. These settings apply to future team chats, not only the current task.
A “completed” message is not business acceptance. Confirm that the artifact exists at the agreed location, the diff or external object matches the response, no out-of-scope change occurred, and approval gates were not bypassed.
Review code diffs and run risk-appropriate tests; open documents, images, and pages to inspect layout; inspect the target service directly for external changes.
Prepare the task
Before sending a message, confirm that the Waker is enabled, its runtime device is online, the correct project or directory is available, and required Skills, connectors, or knowledge are assigned.
Use the default workspace for general analysis. For code or file changes, explicitly select a directory or project instead of expecting the Waker to guess.
Start a Waker chat
- Select a Waker from the employee list.
- Select New task, or use the empty composer when already on a new task.
- Confirm the model. Use
Autowhen you do not need a specific model. - Choose a workspace: default, local directory, or project.
- Add files or images when needed, or use
@to reference workspace content. - Describe the objective, scope, inputs, constraints, deliverable, and acceptance criteria.
Choose work context
| Context | Best for | Key consideration |
|---|---|---|
| Default workspace | General analysis without fixed files | Do not assume a local repository exists |
| Local directory | Local documents or an unregistered workspace | The device must be online; start read-only |
| Project | A maintained code or documentation repository | Verify visibility, path, and branch |
| Attachment | Logs, screenshots, spreadsheets, or requirements for this message | Explain what each attachment is for |
@ context | Specific files or directories in the current workspace | Include only context relevant to the task |
Follow task execution
After sending, the page shows task status, steps, tool activity, and responses.
| Status | Meaning | Action |
|---|---|---|
| Running | The Waker is analyzing or using tools | Wait for progress; investigate only if it stalls |
| Waiting for approval | An operation requires a human decision | Check the target, scope, and impact before approving |
| Needs information | The input is incomplete | Reply in the same task |
| Completed | This run ended | Open and validate the actual artifact |
| Failed | The run cannot continue | Inspect the first error, workspace, permissions, and connectors |
Continue or start a new task
Continue the current task to add input, refine the same artifact, ask for evidence, or resume after approval. Be explicit, for example: “Keep the first two conclusions and recheck only the third.”
Start a new task when the objective, project, main directory, primary Waker, customer, release, or environment changes. This prevents stale context from affecting the result.
Handle approvals safely
Before approving an operation, verify the target file or external object, permission scope, expected impact, and rollback plan. Deletion, overwrite, publishing, external sending, payment, and production changes should remain human-gated.
When unsure, reject the operation or ask the Waker to return a read-only analysis first.
Work with a Group
A Group is a reusable collaboration unit made up of several Wakers. Use it for recurring multi-role work such as project coordination + implementation + QA; use one Waker for short work owned by a single role.
Create a Group
Create and maintain Group members, Leader, models, and workspaces in Waker Management. This page focuses on starting and continuing work in an existing Group.
Before a chat, confirm at least two complementary Wakers, one clear Leader, and valid models, workspaces, and resources. The Leader interprets the request, assigns members, and consolidates results; avoid overlapping it completely with another member.
Start and continue team work
- Open a Group from the
Grouplist and select New to create an isolated chat task. - In the first message, state the shared goal, allowed scope, deliverable, and acceptance criteria. Type
@to select a specific member; otherwise the Leader assigns the work. - Watch the member and status shown with each message. Work for an offline Waker remains queued. If a remote runtime is unavailable, restore that device or remote Waker before retrying.
- Continue in the same task for added constraints, review feedback, or rework. Start a new task when the goal, project, or primary team changes.
- Open shared files from Artifacts and switch task history from Task List. A chat message that says “completed” is not a substitute for validating the artifact.
Maintain the collaboration model
Open the Group chat and select Group settings in the task panel. These settings apply to future team chats, not only the current task.
- Group members: add or remove members and confirm the Leader. Resolve active work before removing an executor.
- Group skills: add Skills shared by every member. Keep capabilities needed by only one member on that Waker.
- Member collaboration SOP: define how the Leader splits work, how members hand off, who consolidates the result, and when human confirmation is required.
- Member runtime settings: verify each member's model, workspace, and write scope. If several members share one directory, keep one primary editor and use the others for analysis or review.
Manage task history
- Name tasks with “project + task + stage or date.”
- An unread marker means there is new activity, not that the task is complete.
- Continue the original task for the same objective; create a new one for a new context.
- Save required artifacts before deleting history.
- Deleting a chat does not undo file changes or external actions.
Validate results
A “completed” message is not business acceptance. Confirm that the artifact exists at the agreed location, the diff or external object matches the response, no out-of-scope change occurred, and approval gates were not bypassed.
Review code diffs and run risk-appropriate tests; open documents, images, and pages to inspect layout; inspect the target service directly for external changes.
Common issues
| Symptom | Check |
|---|---|
| Files cannot be found | Workspace, device status, and file permissions |
| Response does not match the role | Selected Waker, role files, and whether this is an old task |
| Task waits indefinitely | Approval card, missing information, and permissions |
| Group routing is unclear | Check the Leader, member responsibilities, Group skills, and workspace ownership |
| A member remains queued | Bring that Waker's runtime device online, then continue the original task |
| A remote member fails to run | Confirm the remote Waker is available for Group execution and can access the Project, then retry |
| Completed but no artifact exists | Output location and the actual file or external object |