

Create Wakers from presets or custom roles, then manage resources, permissions, runtimes, and Groups.
A Waker is a digital employee with a defined responsibility. A production-ready Waker needs more than a name: it needs a clear role, a runtime environment, an explicit work boundary, the right resources, and human gates for risky operations.
Start with a small validation task, then add Skills, connectors, knowledge, and projects gradually. If responsibilities conflict, create separate Wakers or use a Group instead of overloading one role.
Path: left navigation → Waker Management. Use the tabs at the top of the page to switch between 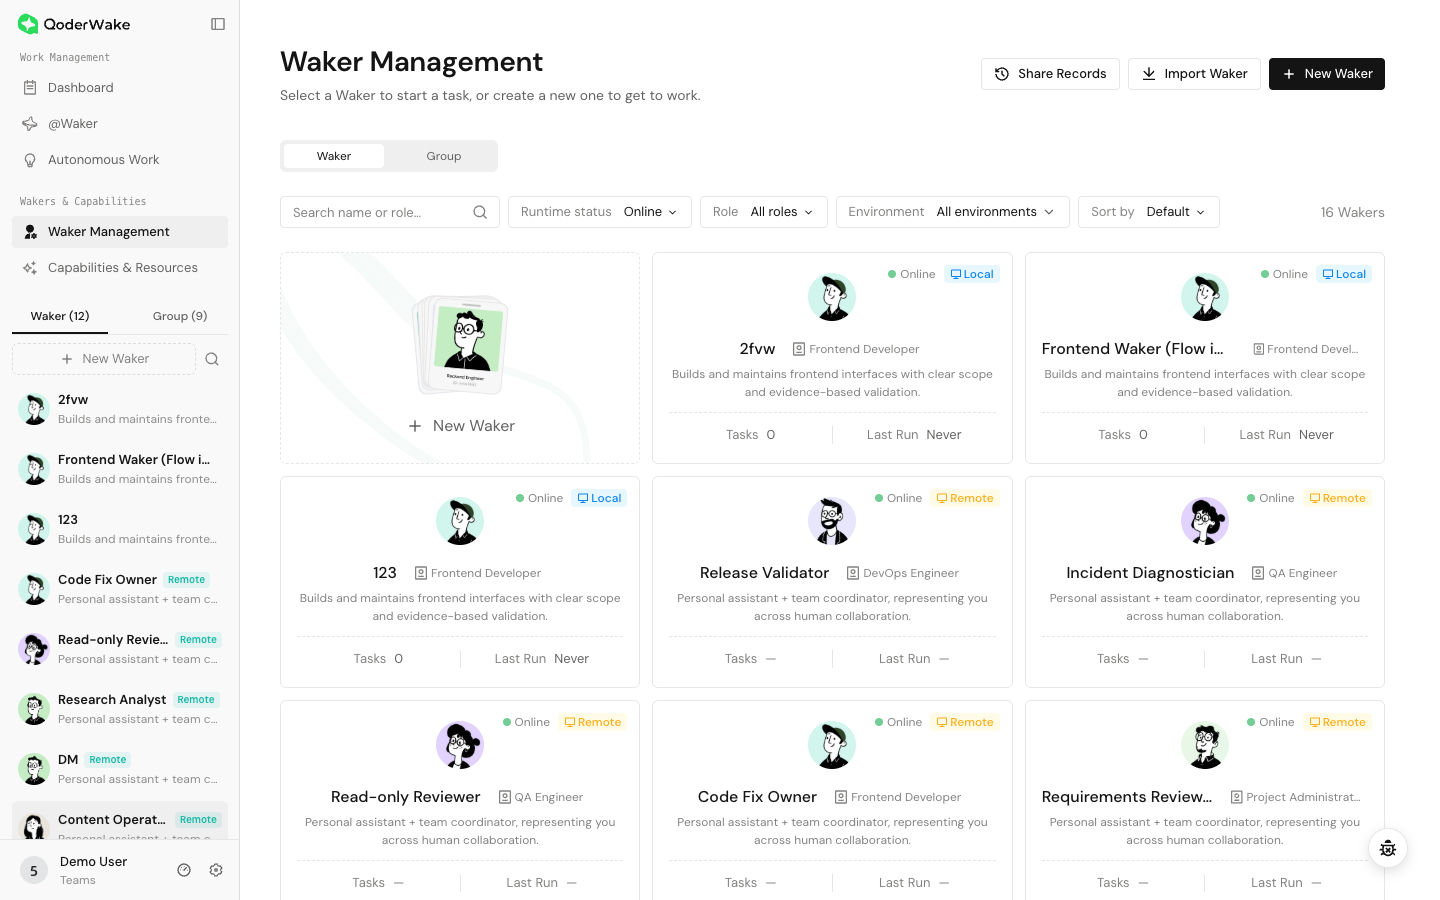 Use the list to verify:
If a Waker is missing, clear search and filters and confirm that you are viewing the 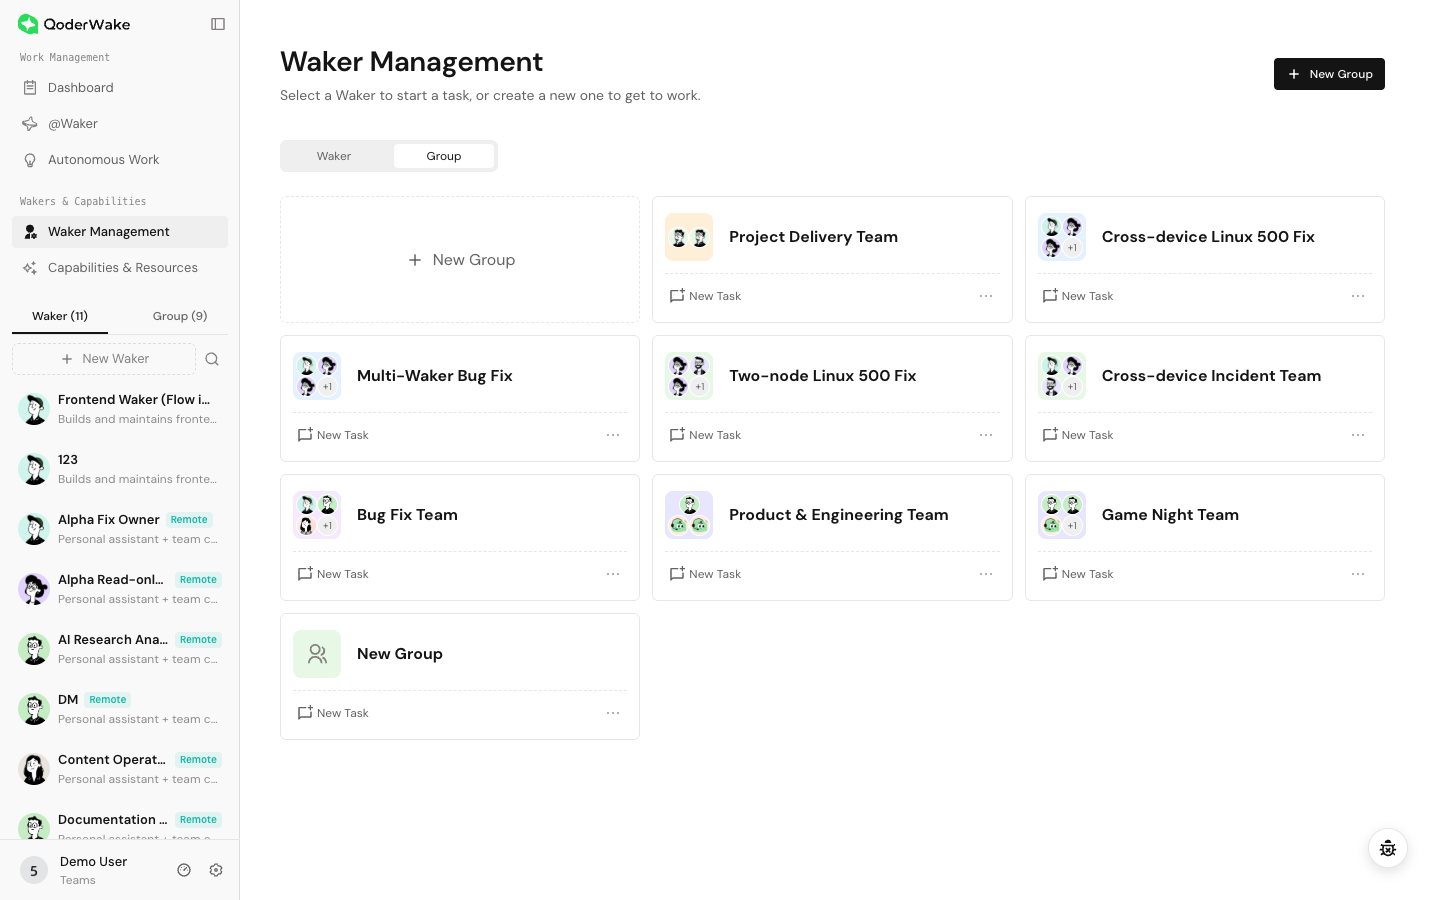
Each Waker card identifies
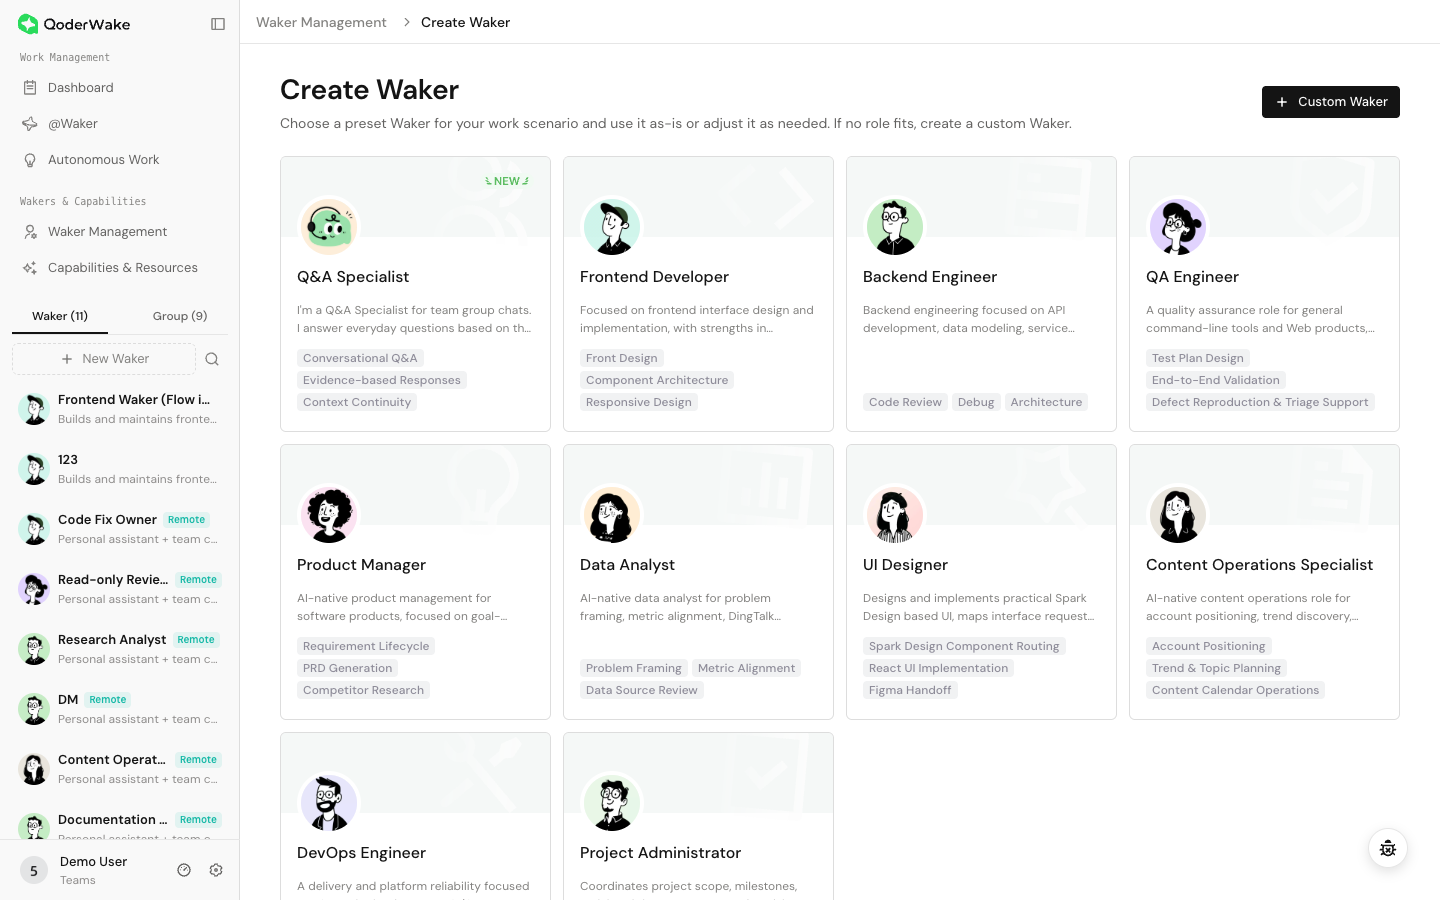
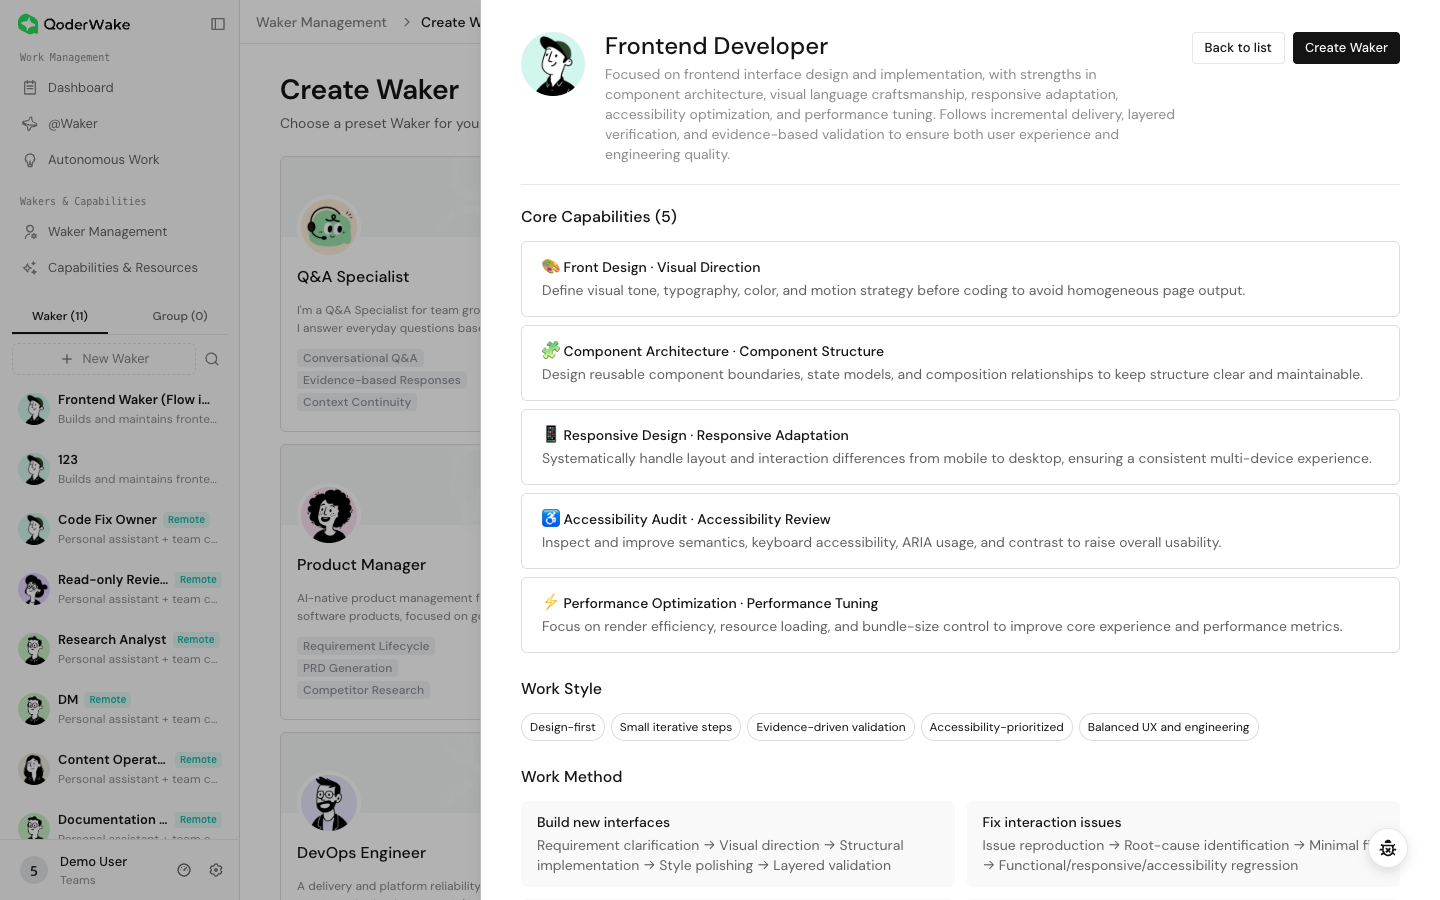
 If a preset is mostly correct, create from it and refine the role files later. Use a fully custom role only when the structure differs substantially.
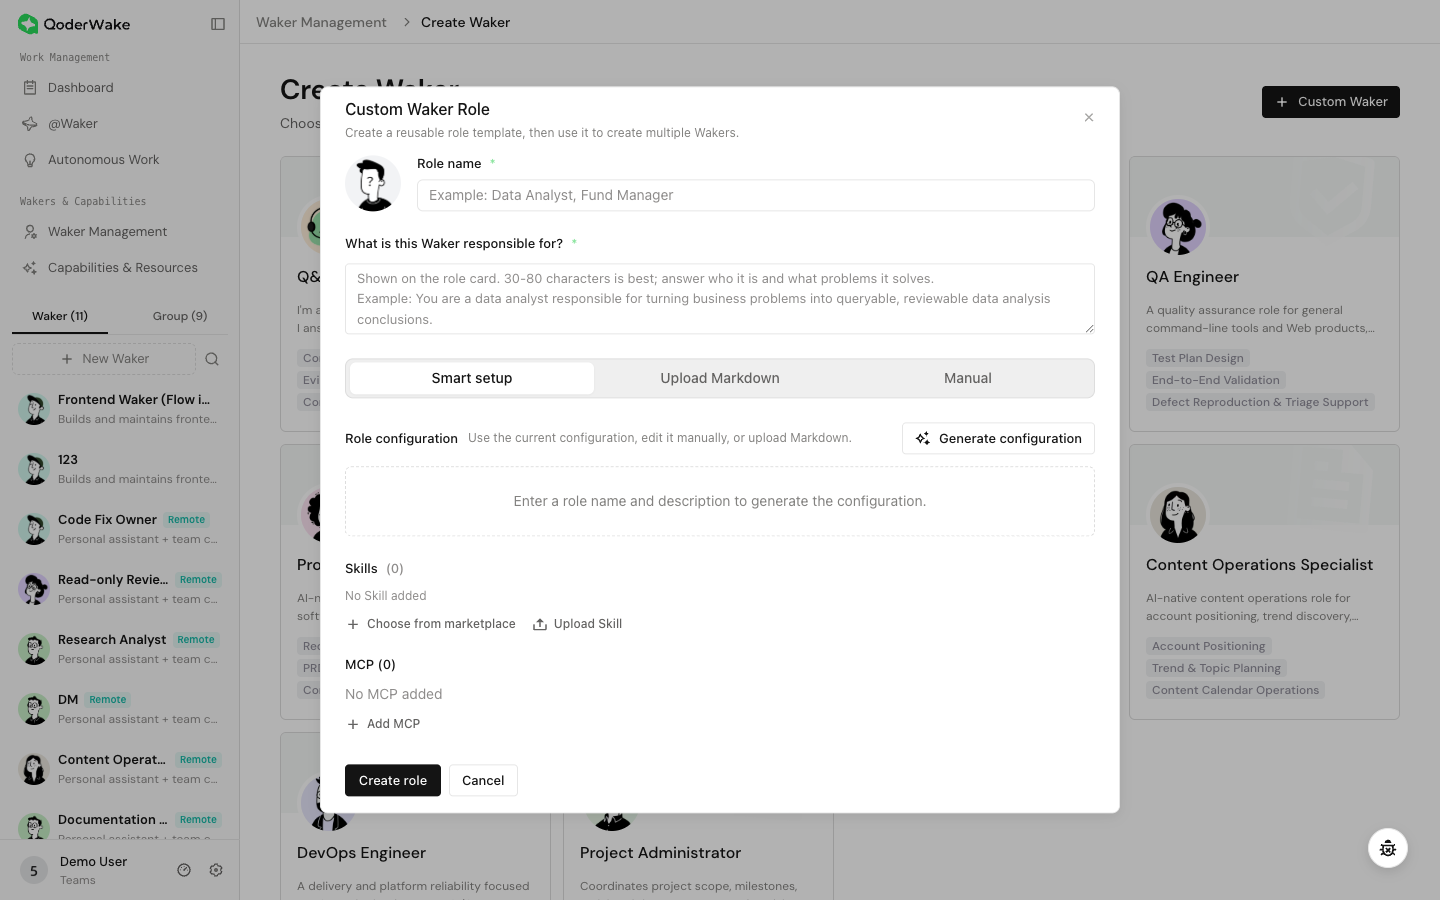
Select Custom Waker, enter a role name, description, and avatar, then choose a configuration method.
Use AI generation when you can describe the job but do not yet have complete role files.
 Use this structure:
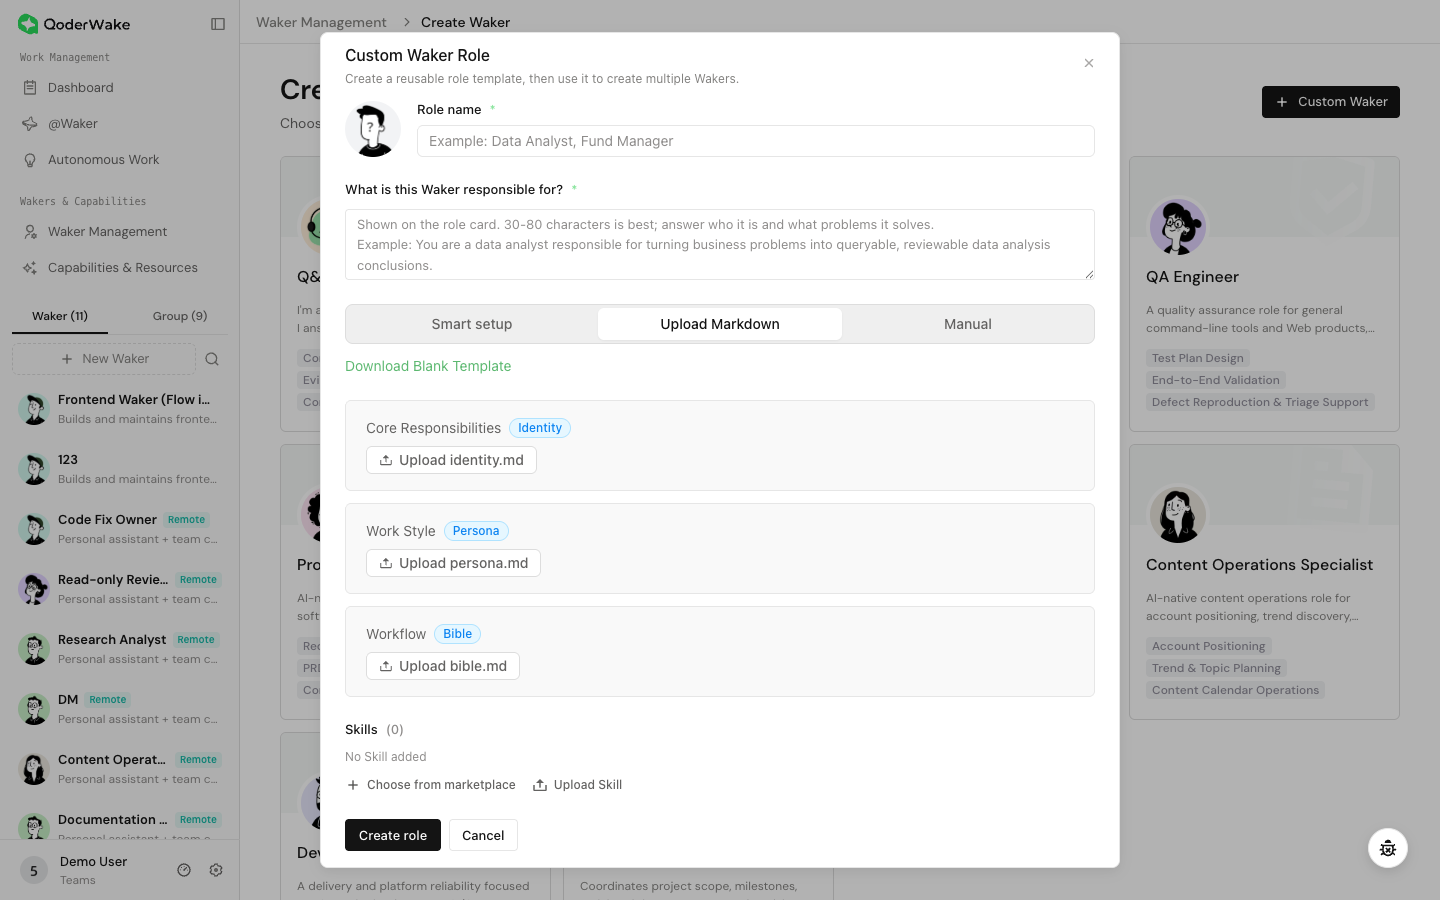
Use this method when you already have reviewed role files or are moving a role between environments.
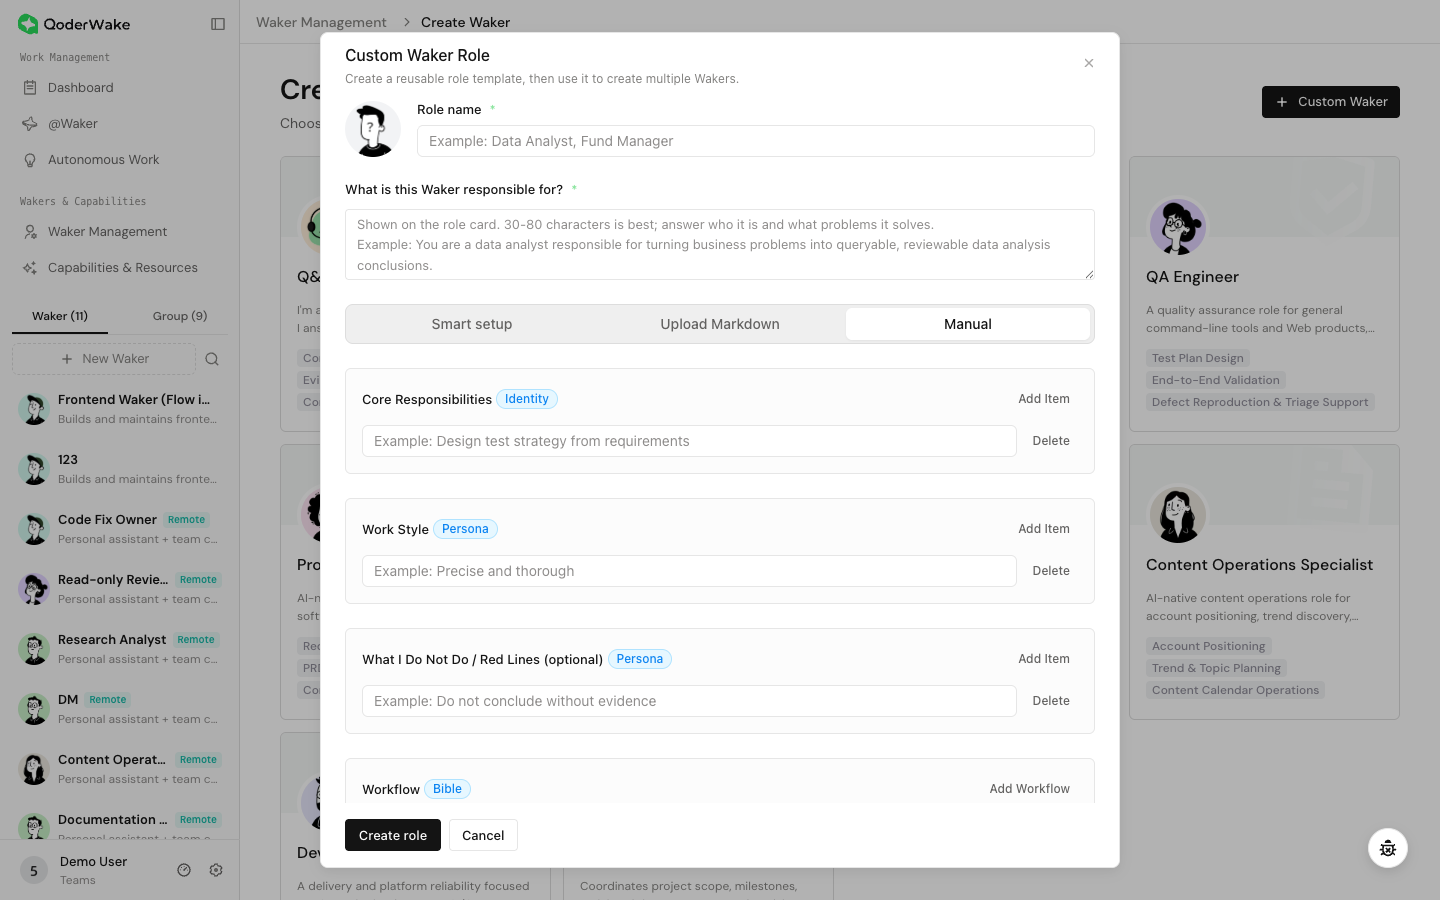
Manual entry is best for tightly controlled roles.
 If the role needs a major rewrite after creation, pause automations and external entry points first, then update and revalidate it.
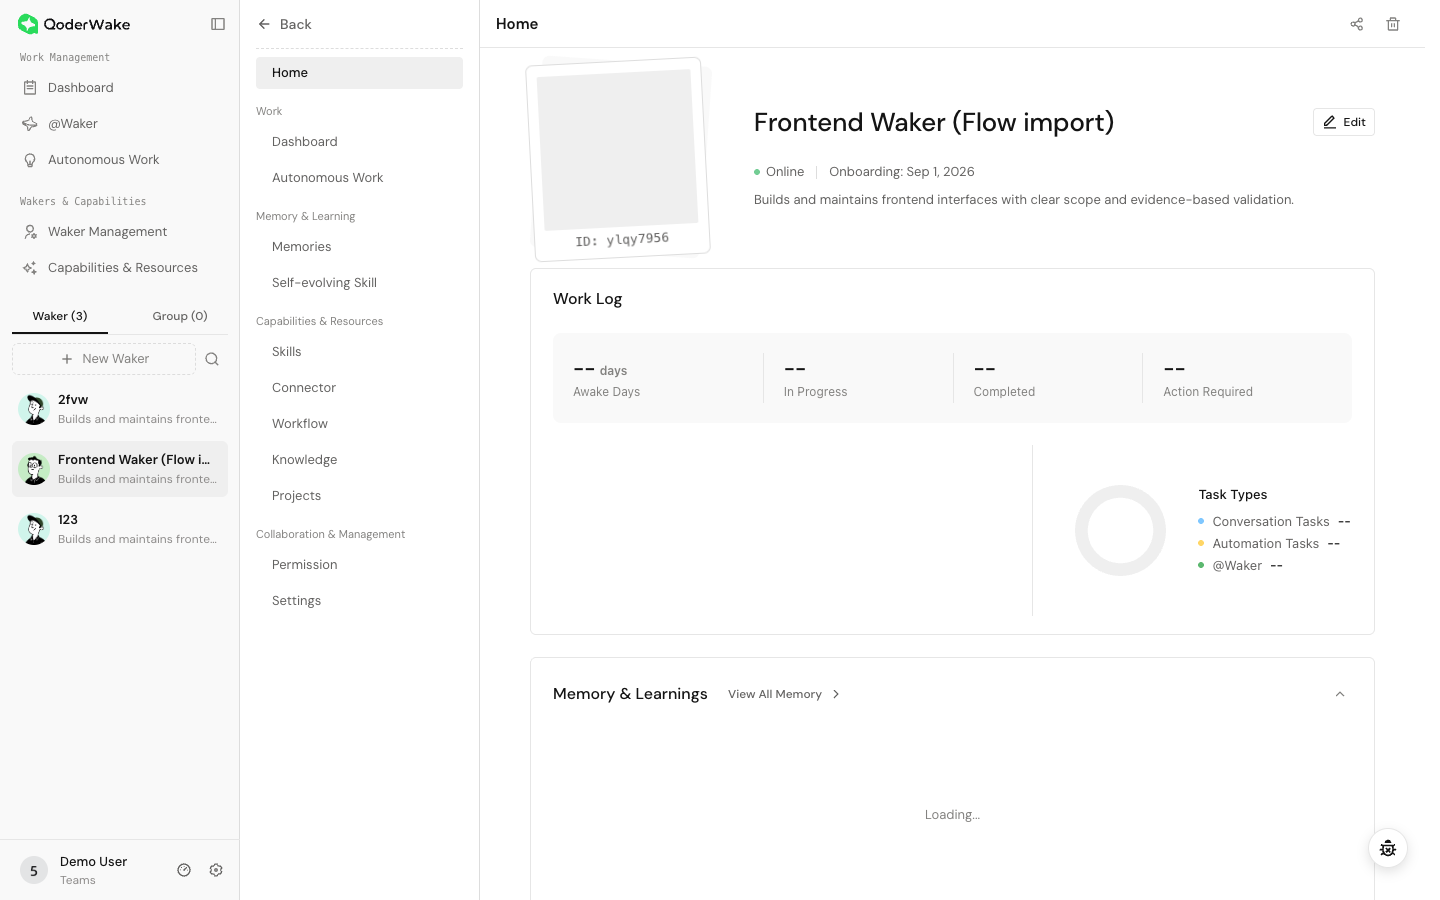
The redesigned detail page groups configuration by work stage:
Installing a resource does not automatically make it available to every Waker. Verify that the resource is assigned to the current Waker and allowed by its permissions.
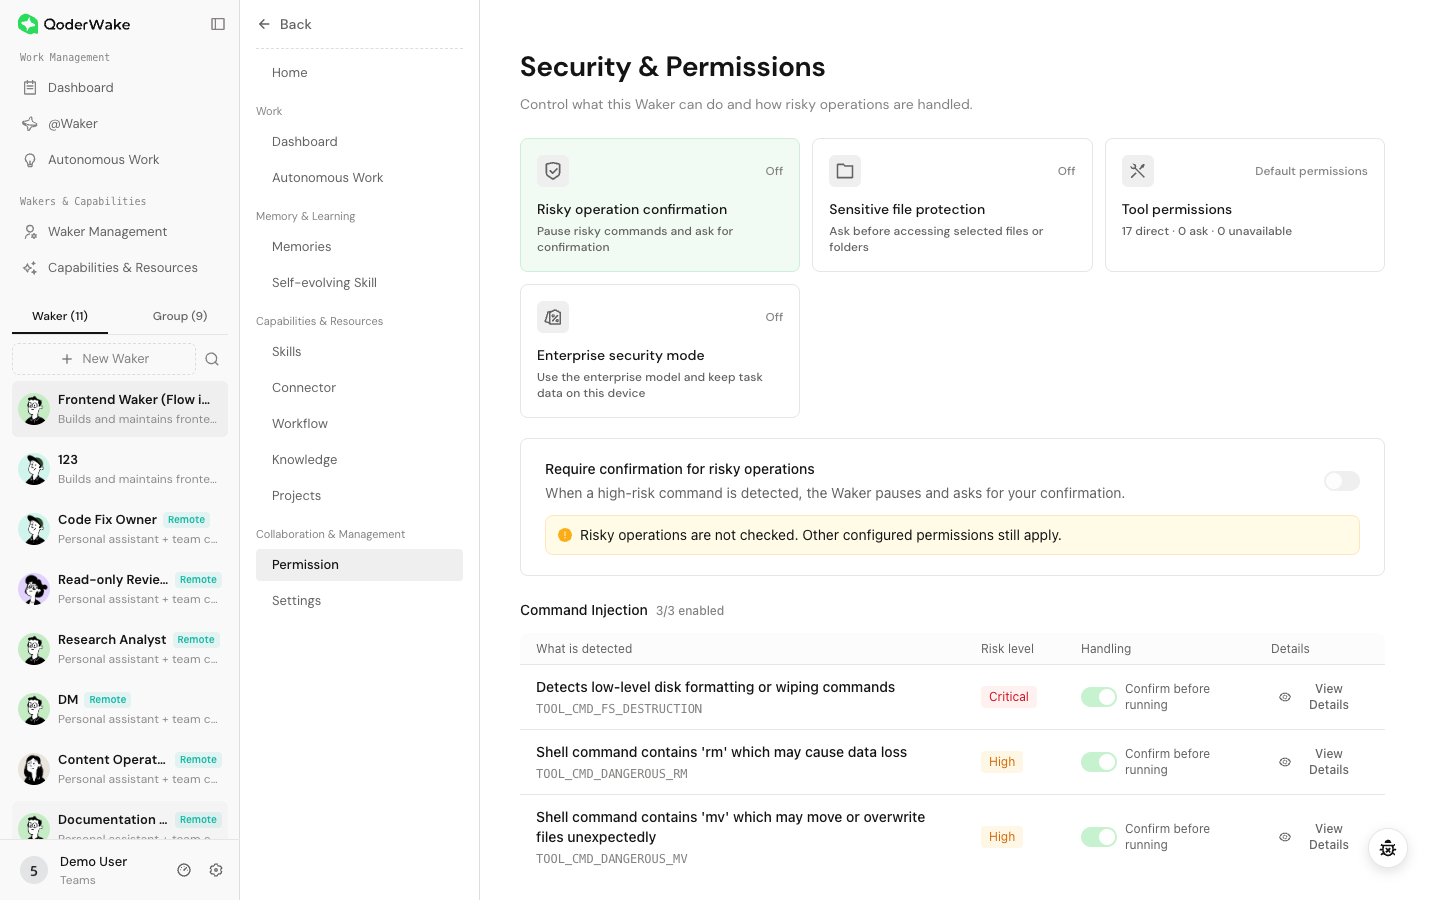
Open Permissions. Current releases organize controls into areas such as tool protection, file protection, built-in tools, and model safety.
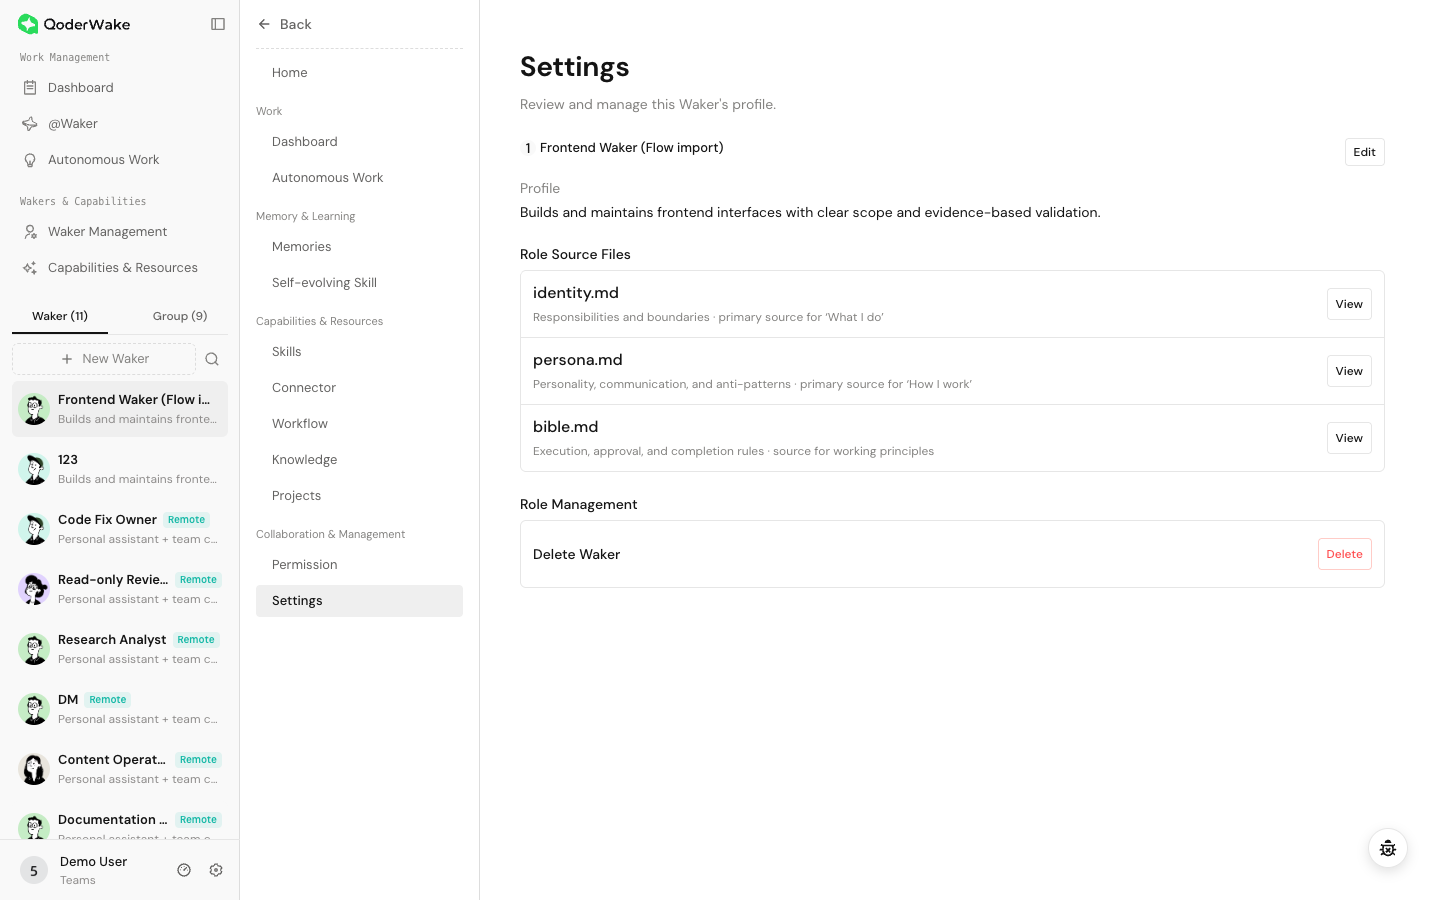
Use Settings to maintain the profile and inspect source files.
A Group lets complementary Wakers collaborate through one chat entry point. The Leader interprets the request and organizes the work; member Wakers execute according to their responsibilities, while progress and results remain in one task.
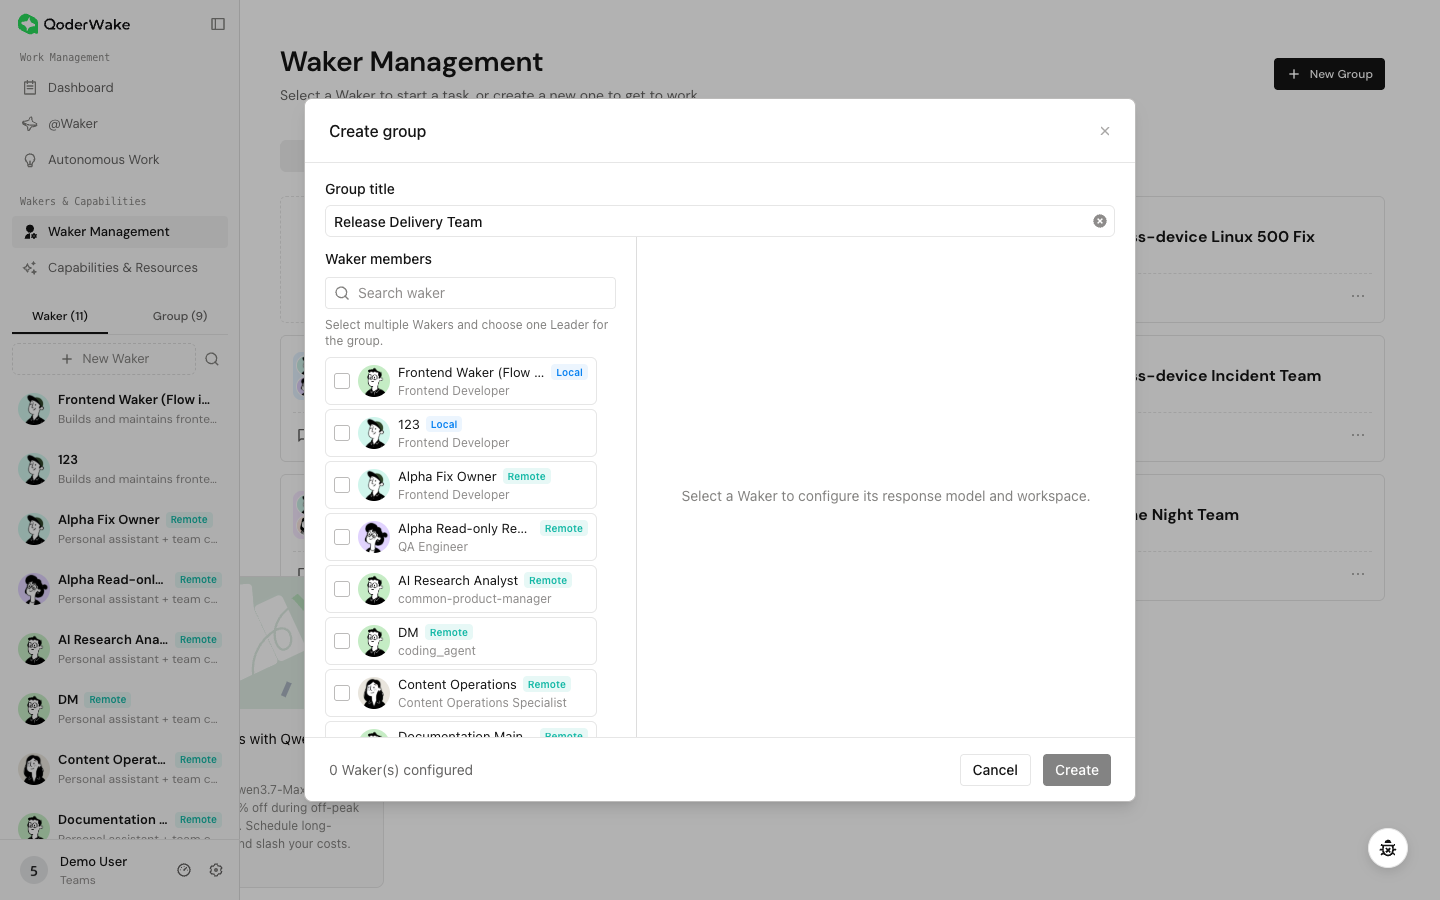 Selecting a member on the left and configuring that member on the right are separate steps. A checked member is not fully configured until its required settings are complete.
From the Group card, select New Task and run a small validation. Confirm that:
Check for running chats, pending approvals, Autonomous Work, WakerFlow references, Group membership, @Waker sessions, and artifacts that must be retained. Pause external triggers first, resolve dependencies, then disable or delete.
View Wakers and Groups
Path: left navigation → Waker Management. Use the tabs at the top of the page to switch between Waker and Group; use the employee sidebar for quick access to existing Wakers and Groups.
| Item | What to check |
|---|---|
| Name and responsibility | Names are distinct and roles do not overlap unexpectedly |
| Runtime | Local, remote, or the intended device |
| Status | Enabled and available for work |
| Recent activity | No task is unexpectedly stalled or waiting for action |
Waker tab rather than the Group tab.
The Group tab shows existing Groups. From a Group card, you can open it, start a new task, or use the action menu to maintain it. Multiple avatars indicate member Wakers.
Distinguish local and remote Wakers
Each Waker card identifies Local or Remote, the host device, and its online state. A remote Waker runs on another device visible to the same account. Its files, connector credentials, and processes remain on that device; they are not copied to the current computer.
- A local Waker can normally be managed and opened for chat directly.
- Remote chat and configuration depend on the remote device being online, remote management being enabled, and the current account having permission.
- If a card says that remote chat permission is denied, do not repeatedly retry or create a duplicate Waker. Ask the remote device owner to check the account, device state, and remote-management authorization.
- When remote tasks are allowed, select a directory or project that actually exists on the remote device. A path on the current computer is not mapped automatically.
Create a Waker from a preset
- Select New Waker.
- Browse the presets. Roles cover engineering, QA, design, product, data, content operations, group Q&A, and other common jobs, depending on the current release.
- Open a role card and review its core capabilities, work style, work methods, and bundled Skills.
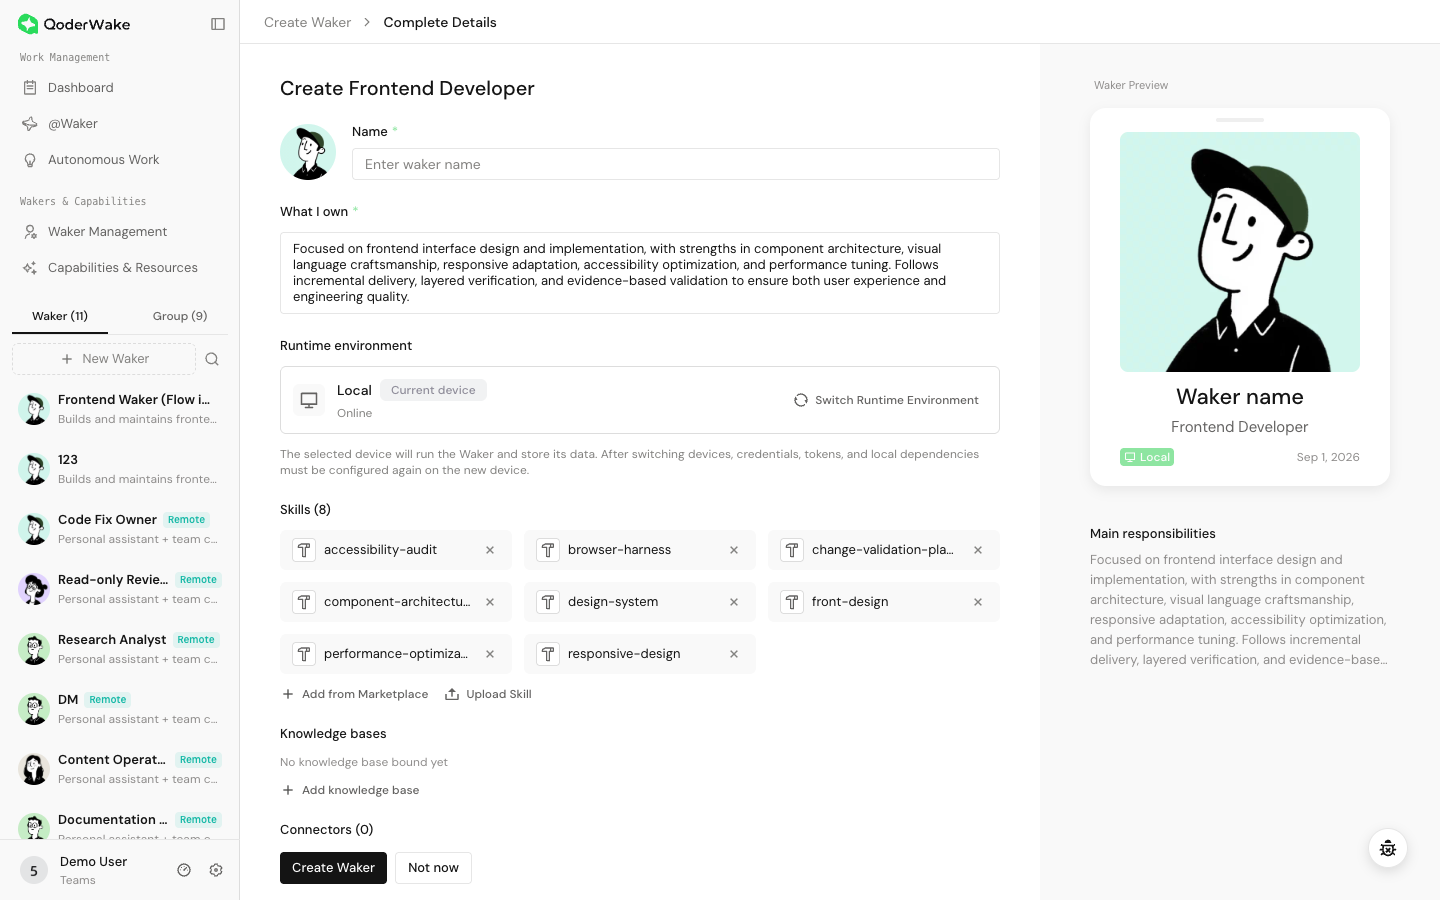
- Select Create Waker to open Complete Details, then enter a descriptive name such as “Website Frontend Maintainer.”
- Choose the runtime environment. Use the device that can access required local files and applications.
- Review preinstalled Skills, knowledge, and connectors. Keep only capabilities required for the first task.
- Select Create Waker.
- Open its home page and verify its name, role, runtime, and status.
- Run a read-only task such as: “Explain your role boundary and list the files in the selected directory without modifying them.”
Create a custom role
Select Custom Waker, enter a role name, description, and avatar, then choose a configuration method.
Generate with AI
Use AI generation when you can describe the job but do not yet have complete role files.
- Describe the audience, primary responsibilities, inputs, deliverables, prohibited actions, and when human approval is required.
- Generate the configuration.
- Review every section. Replace broad promises with explicit scope and evidence-based completion criteria.
- Add only required Skills and connectors. Never put credentials in the role description.
Upload Markdown configuration
Use this method when you already have reviewed role files or are moving a role between environments.
- Download the blank template provided by the page.
- Maintain files such as
identity.md,persona.md, andbible.mdaccording to the template. - Remove credentials, private data, internal-only addresses, and machine-specific absolute paths.
- Upload the files and inspect the parsed configuration.
- After creation, open Settings, review each source file, and validate in a new chat.
Enter configuration manually
Manual entry is best for tightly controlled roles.
| Field | Recommended content |
|---|---|
| Core responsibility | Start with an action and name the object and deliverable |
| Work style | Explain analysis, execution, validation, and reporting order |
| Red lines | Explicitly list forbidden access, modification, publishing, or sharing |
| Workflow | Define the normal path and what happens on errors |
| Skills and connectors | Add only capabilities required by the role |
Use the Waker detail page
The redesigned detail page groups configuration by work stage:
| Group | Pages | Purpose |
|---|---|---|
| Home | Home | Identity, status, activity, and resource overview |
| Work | Dashboard, Autonomous Work | Inspect tasks and automated work |
| Memory & Learning | Memory, self-evolving Skills | Maintain durable learning |
| Capabilities & Resources | Skills, Connectors, Workflows, Knowledge, Projects | Control tools and context |
| Collaboration & Management | Permissions, Settings | Control risk boundaries and role configuration |
Configure permissions
Open Permissions. Current releases organize controls into areas such as tool protection, file protection, built-in tools, and model safety.
- Start with the minimum required files and tools.
- Keep human approval for deletion, overwrite, external sending, production changes, payments, and publishing.
- If IM users may change Waker settings, restrict the allowed users and chat scope.
- Save and run a low-risk validation: guarded actions should request approval, and forbidden actions should be blocked.
Update role and basic settings
Use Settings to maintain the profile and inspect source files.
- For a name, avatar, or short description change, update basic information.
- For a responsibility or boundary change, also review role files, Skills, connectors, and permissions.
- For a runtime or directory change, revalidate file access, projects, and automations.
- For a completely different purpose, create a new Waker so the old role remains auditable.
Create and maintain a Group
A Group lets complementary Wakers collaborate through one chat entry point. The Leader interprets the request and organizes the work; member Wakers execute according to their responsibilities, while progress and results remain in one task.
Create a Group
- Open Waker Management, switch to
Group, and select New Group. - Enter a title that reflects the shared goal, such as “Release Delivery Team.” The title appears in the employee sidebar, Task Board, and chats.
- Select members on the left. Start with the Waker that can complete the primary work, then add complementary engineering, review, QA, or operations roles.
- Assign one Leader to receive Group requests, decide the order of work, coordinate members, and consolidate results.
- Select each member and confirm its response model and working directory on the right. When several members access one directory, define one primary writer and read-only reviewers.
- Confirm the configured-member count, then select Create.
Validate Group collaboration
From the Group card, select New Task and run a small validation. Confirm that:
- the Leader clarifies the goal and routes subtasks to suitable members;
- each member uses the expected model, workspace, and permissions;
- one primary writer owns shared-file changes while reviewers remain read-only;
- progress, approvals, and the final result are visible in the same task.
Before disabling or deleting
Check for running chats, pending approvals, Autonomous Work, WakerFlow references, Group membership, @Waker sessions, and artifacts that must be retained. Pause external triggers first, resolve dependencies, then disable or delete.
Go-live checklist
- Role, name, runtime, and status are correct.
- Only required Skills, connectors, knowledge, and projects are assigned.
- In-scope, out-of-scope, and approval-gated tasks have been tested.
- Chat, automation, Group, and IM entry points have each passed a small test when used.
- Test data and screenshots contain no credentials or sensitive information.