> ## Documentation Index
> Fetch the complete documentation index at: https://docs.qoder.com/llms.txt
> Use this file to discover all available pages before exploring further.
# Writing
Writing is a vertical workspace tuned for long-form prose — articles, reports, posts, technical guides, internal docs. The agent's output lands as a Markdown file in the local `outputs/` folder and every iteration is kept as a re-traceable version; switch to **Edit** at any time to revise the prose directly and the agent will pick up your changes in subsequent turns.
## Workspace
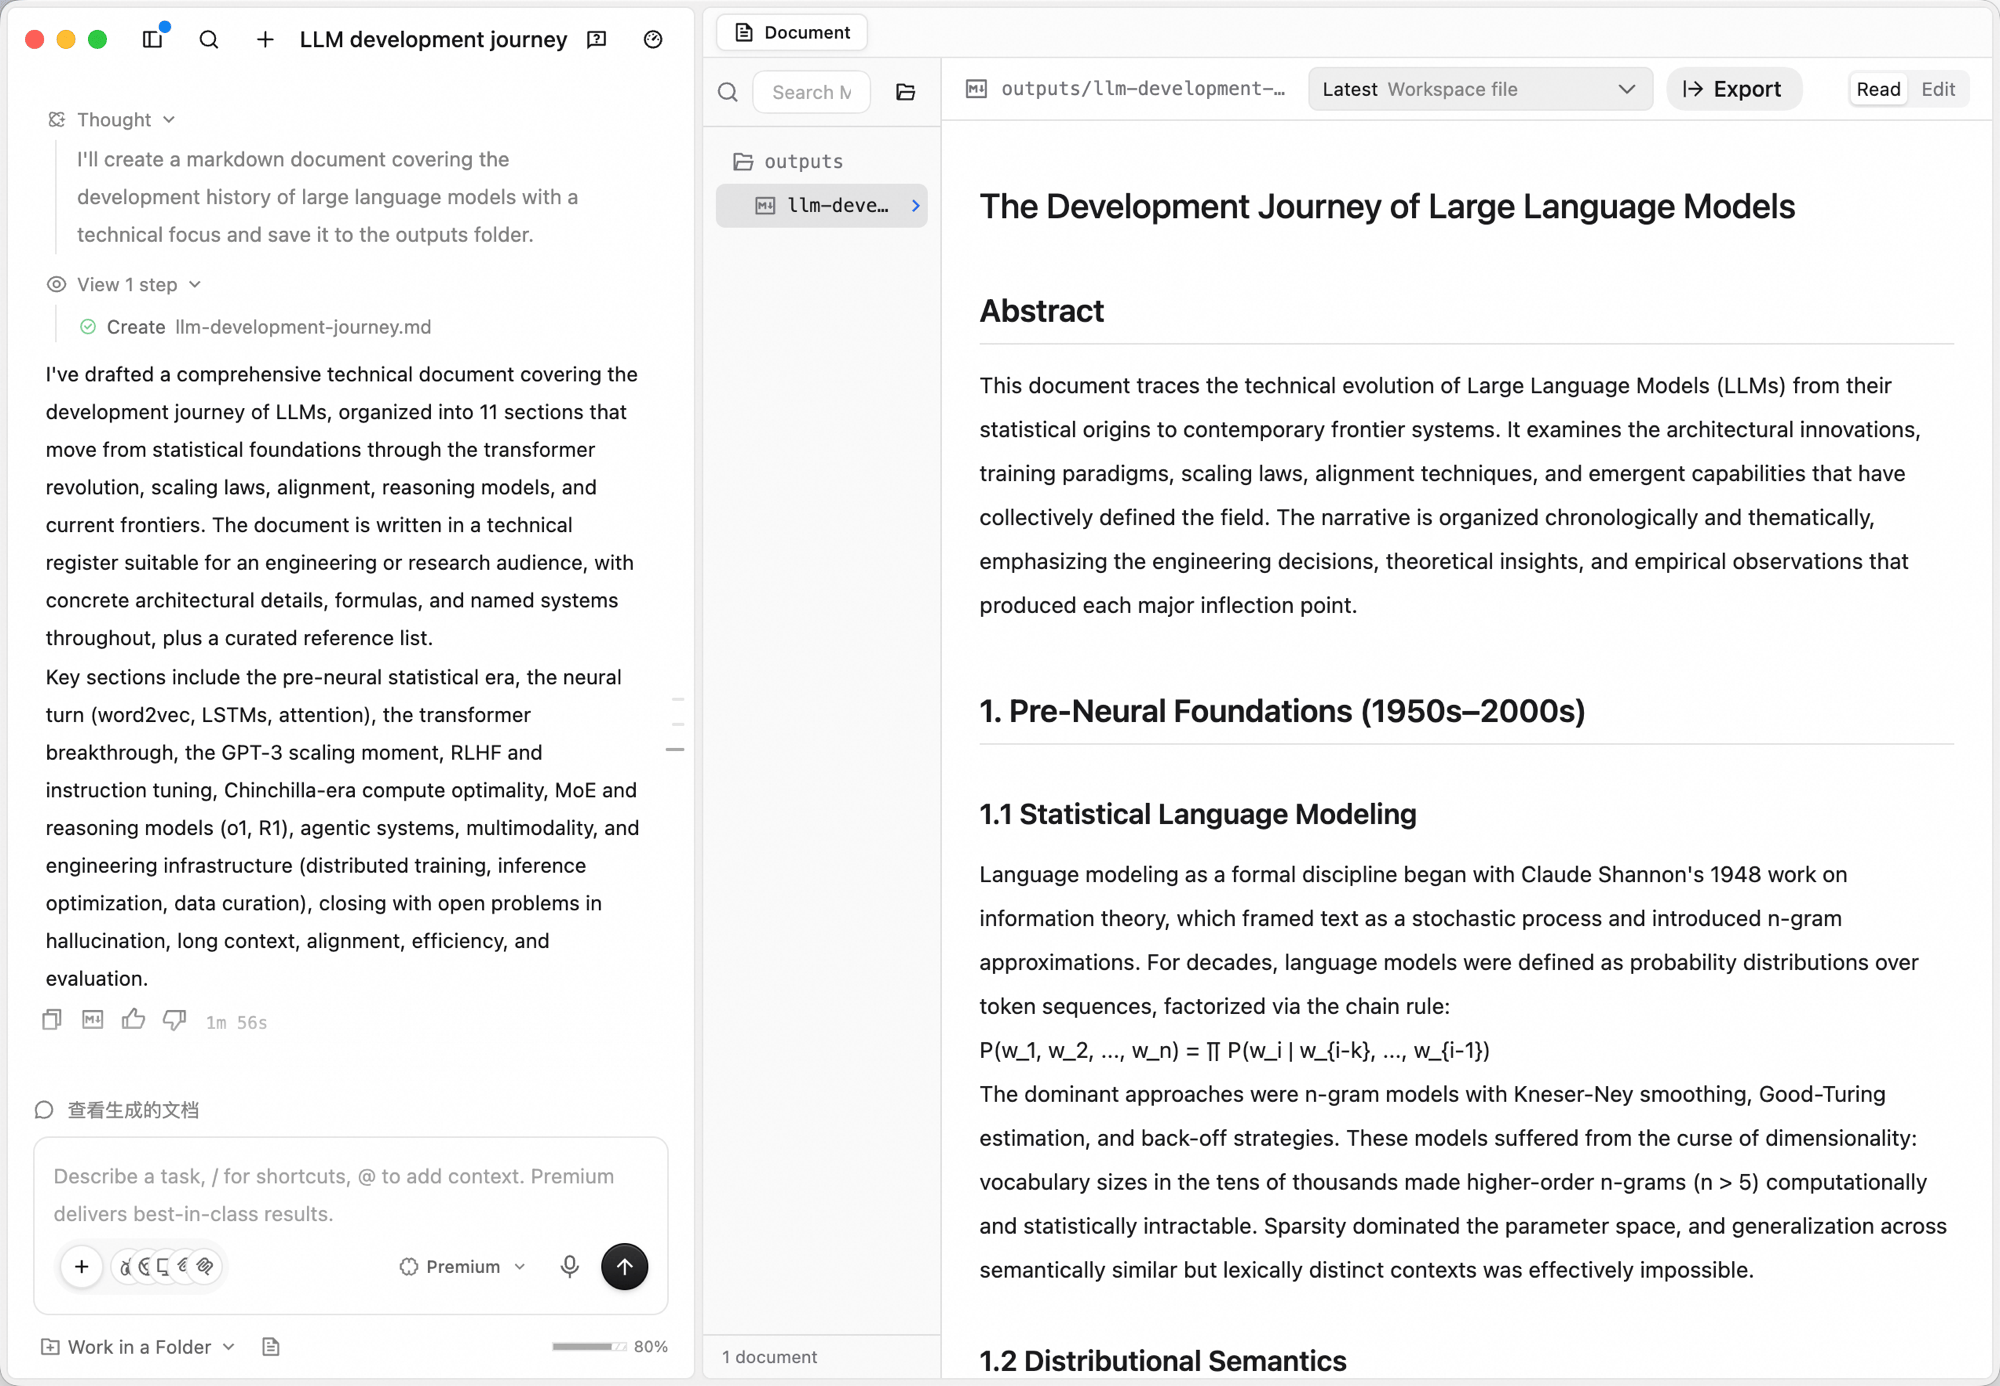 The Document workspace pairs a Markdown file tree with an editor:
| Element | What it does |
| :------------ | :-------------------------------------------------------------------------------------------------------------------------------------------------------------------------- |
| **File tree** | Outputs are organized as Markdown files (`outputs/your-doc.md`). Search by name, or open the underlying directory with the folder icon |
| **Editor** | The document content. The top-right has a **Read / Edit** toggle, a **Latest Workspace file** selector (switch between versions of the doc), and **Export** (export as PDF) |
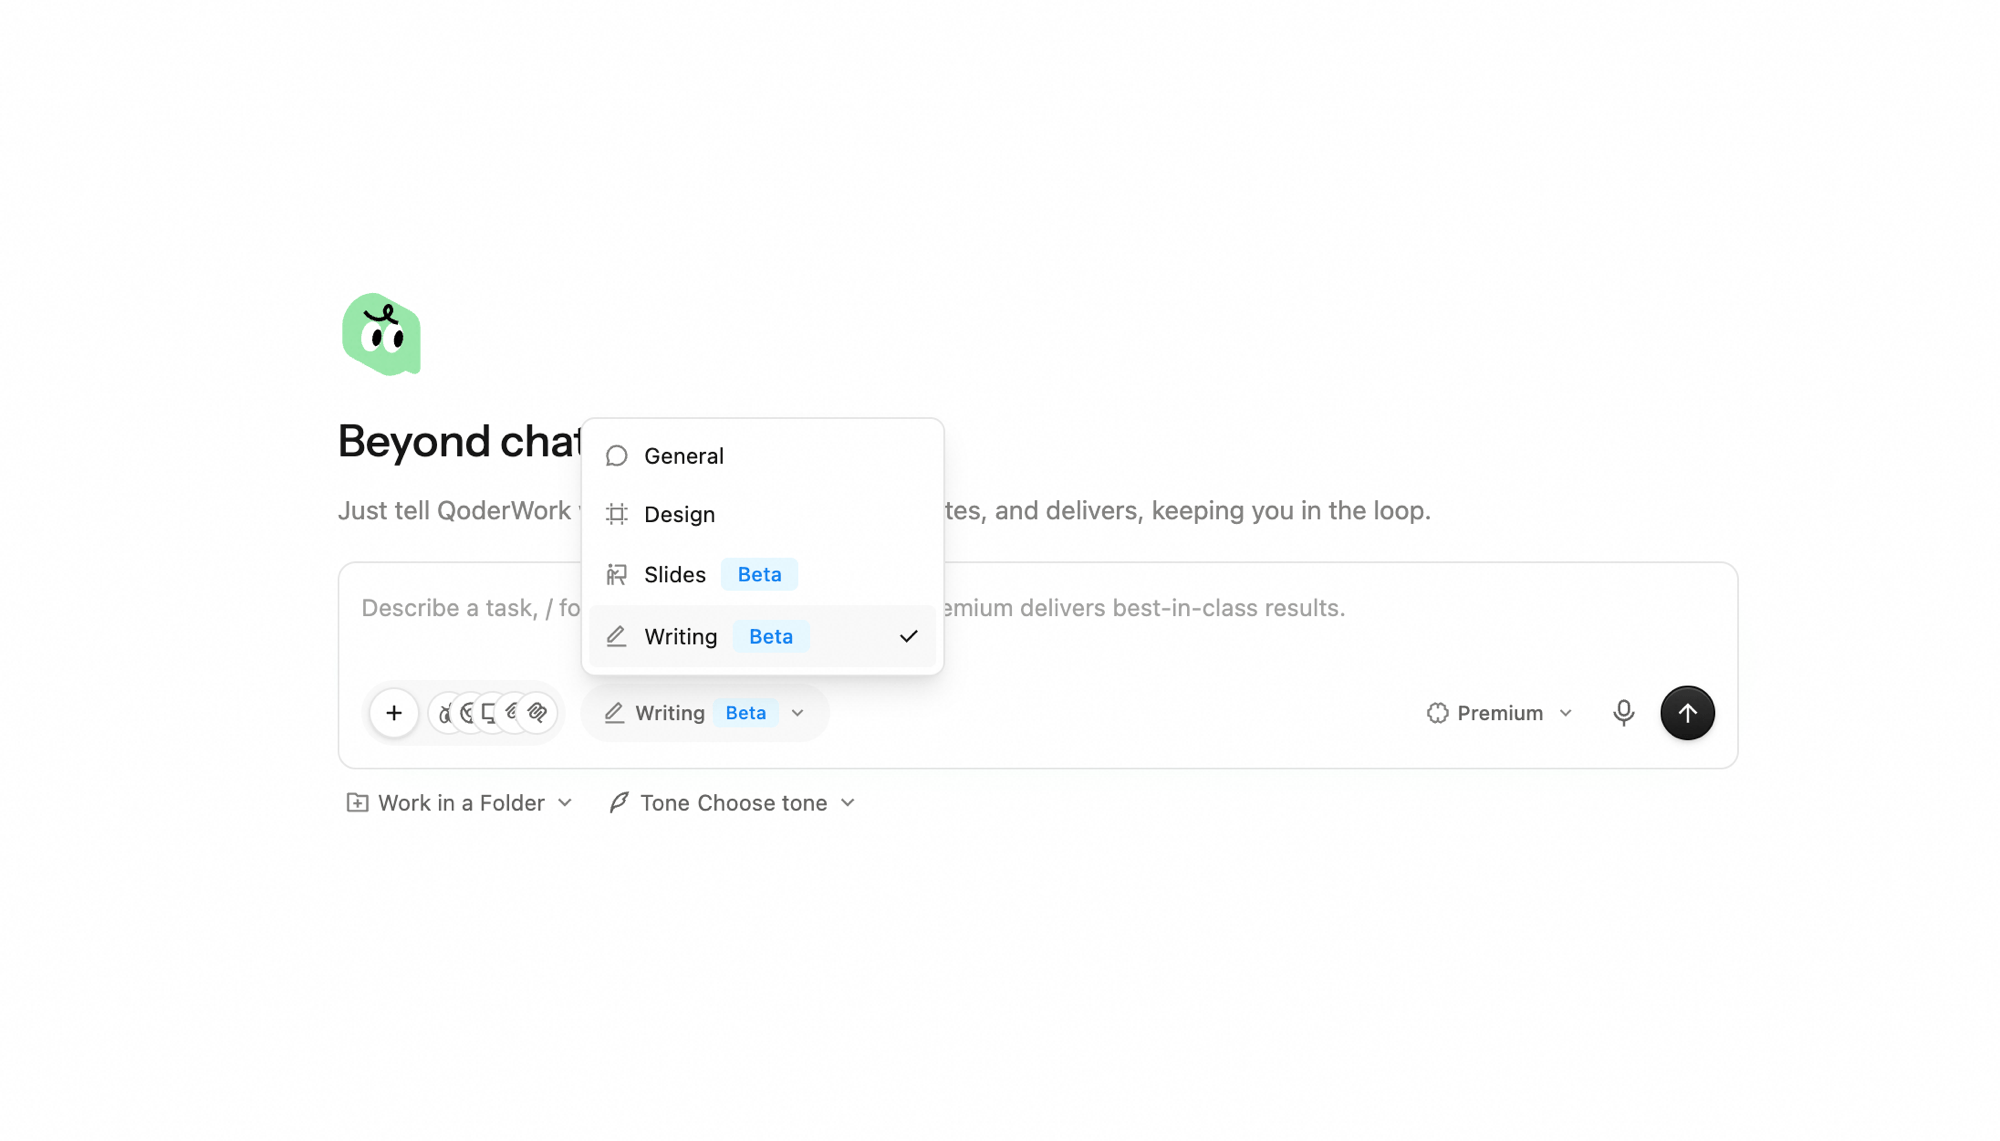
## Creating a document
In the input box, click the workspace switcher (defaults to **General**) and choose **Writing**.
The Document workspace pairs a Markdown file tree with an editor:
| Element | What it does |
| :------------ | :-------------------------------------------------------------------------------------------------------------------------------------------------------------------------- |
| **File tree** | Outputs are organized as Markdown files (`outputs/your-doc.md`). Search by name, or open the underlying directory with the folder icon |
| **Editor** | The document content. The top-right has a **Read / Edit** toggle, a **Latest Workspace file** selector (switch between versions of the doc), and **Export** (export as PDF) |
## Creating a document
In the input box, click the workspace switcher (defaults to **General**) and choose **Writing**.
 The default workspace can be changed in QoderWork settings — set Writing as your default if it's the surface you live in.
Describe the topic, audience, tone, and key points. Click the microphone for [voice input](/qoderwork/voice-input). After switching to Writing, a **Work in a Folder** option and a **Tone** option appear in the toolbar below the input — configure them as you brief the task.
The default workspace can be changed in QoderWork settings — set Writing as your default if it's the surface you live in.
Describe the topic, audience, tone, and key points. Click the microphone for [voice input](/qoderwork/voice-input). After switching to Writing, a **Work in a Folder** option and a **Tone** option appear in the toolbar below the input — configure them as you brief the task.
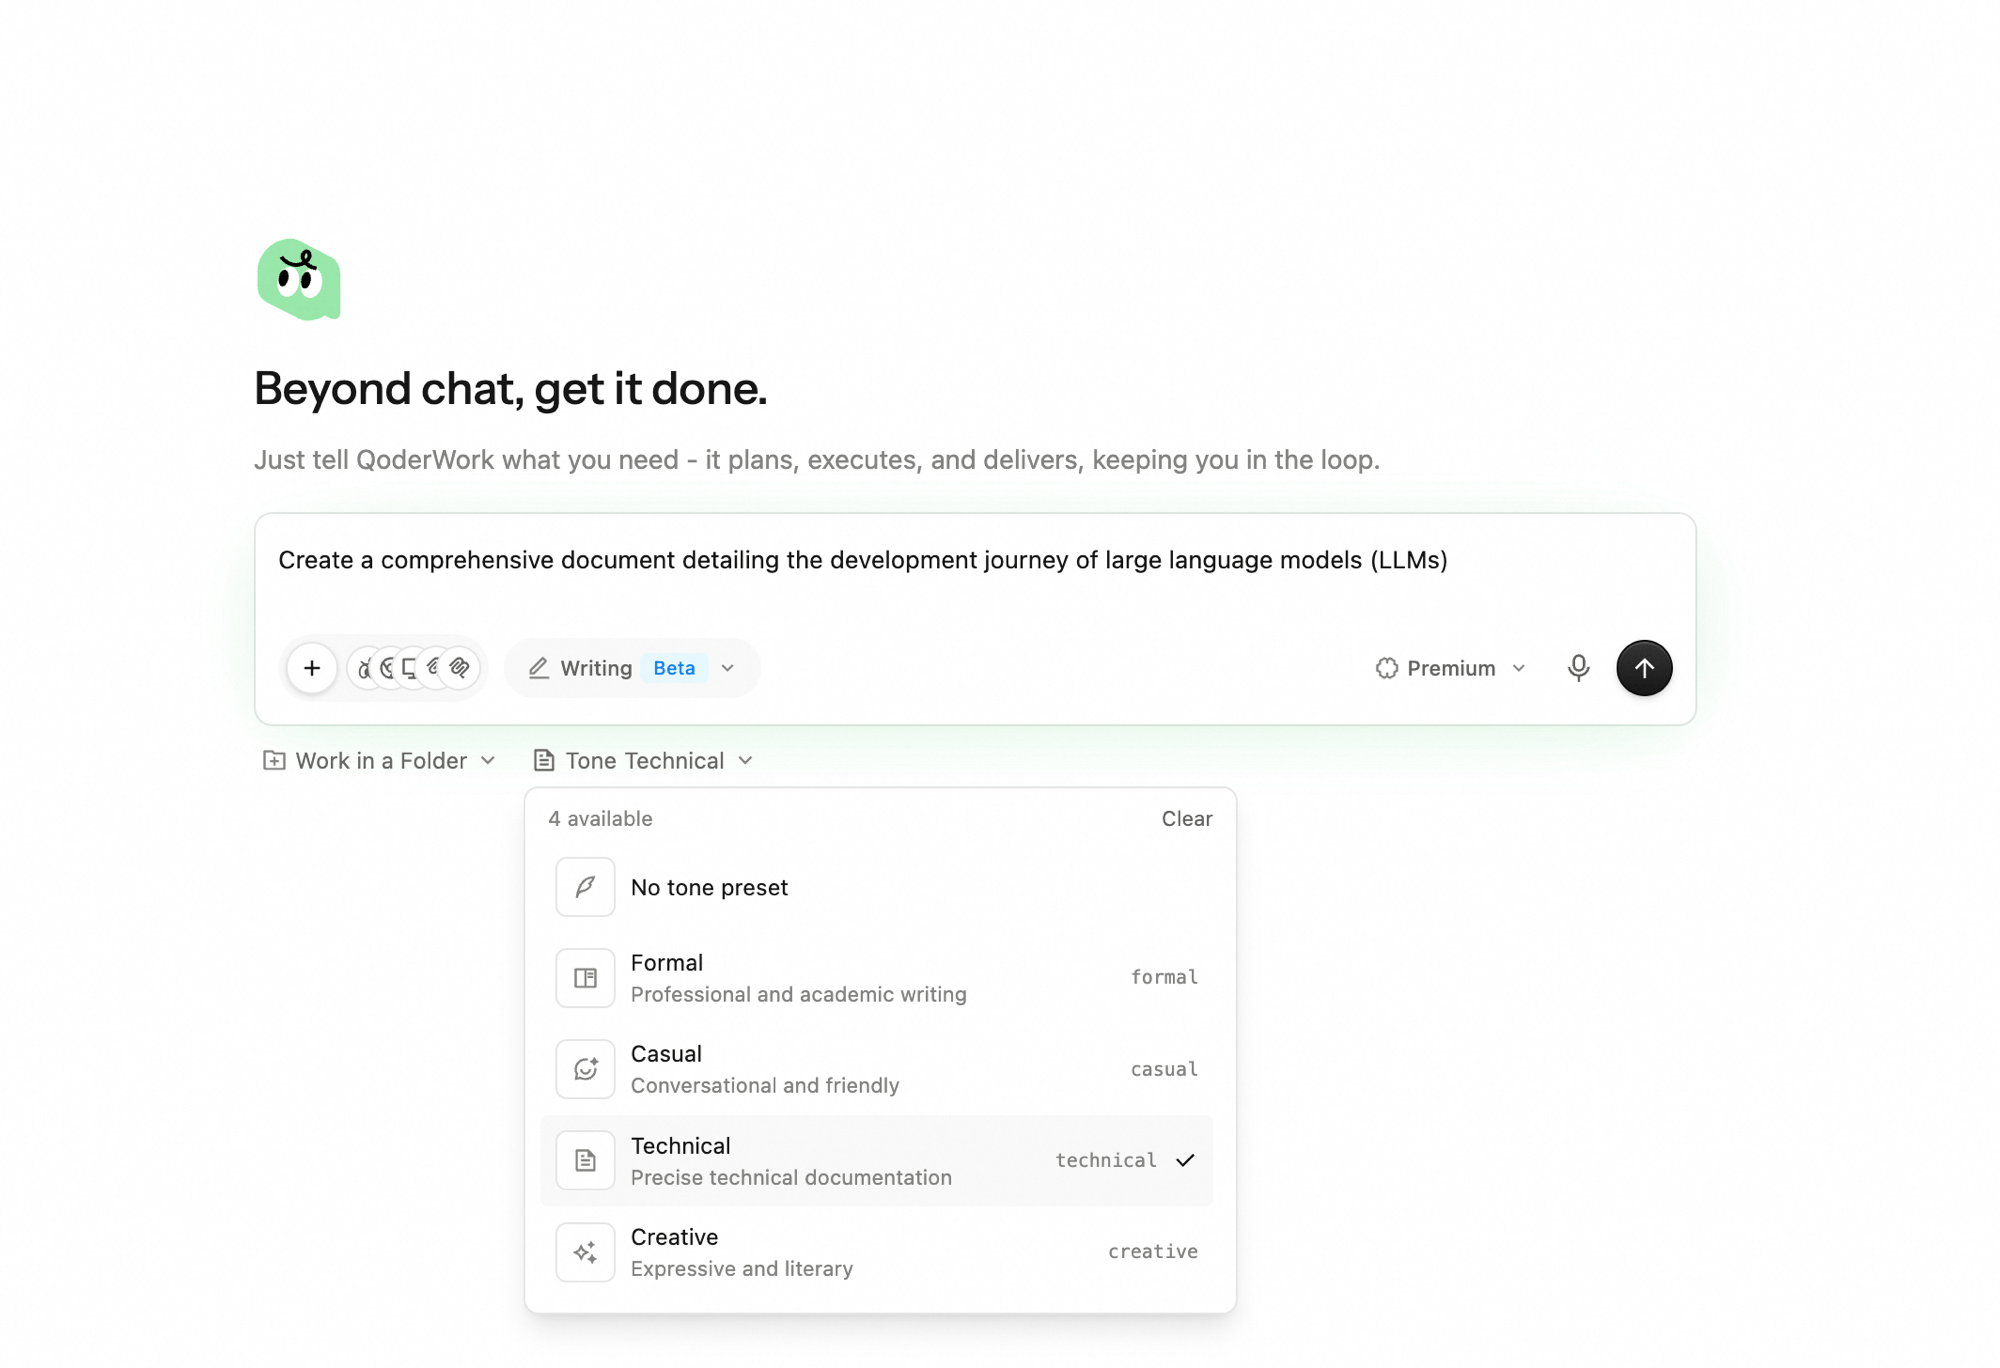
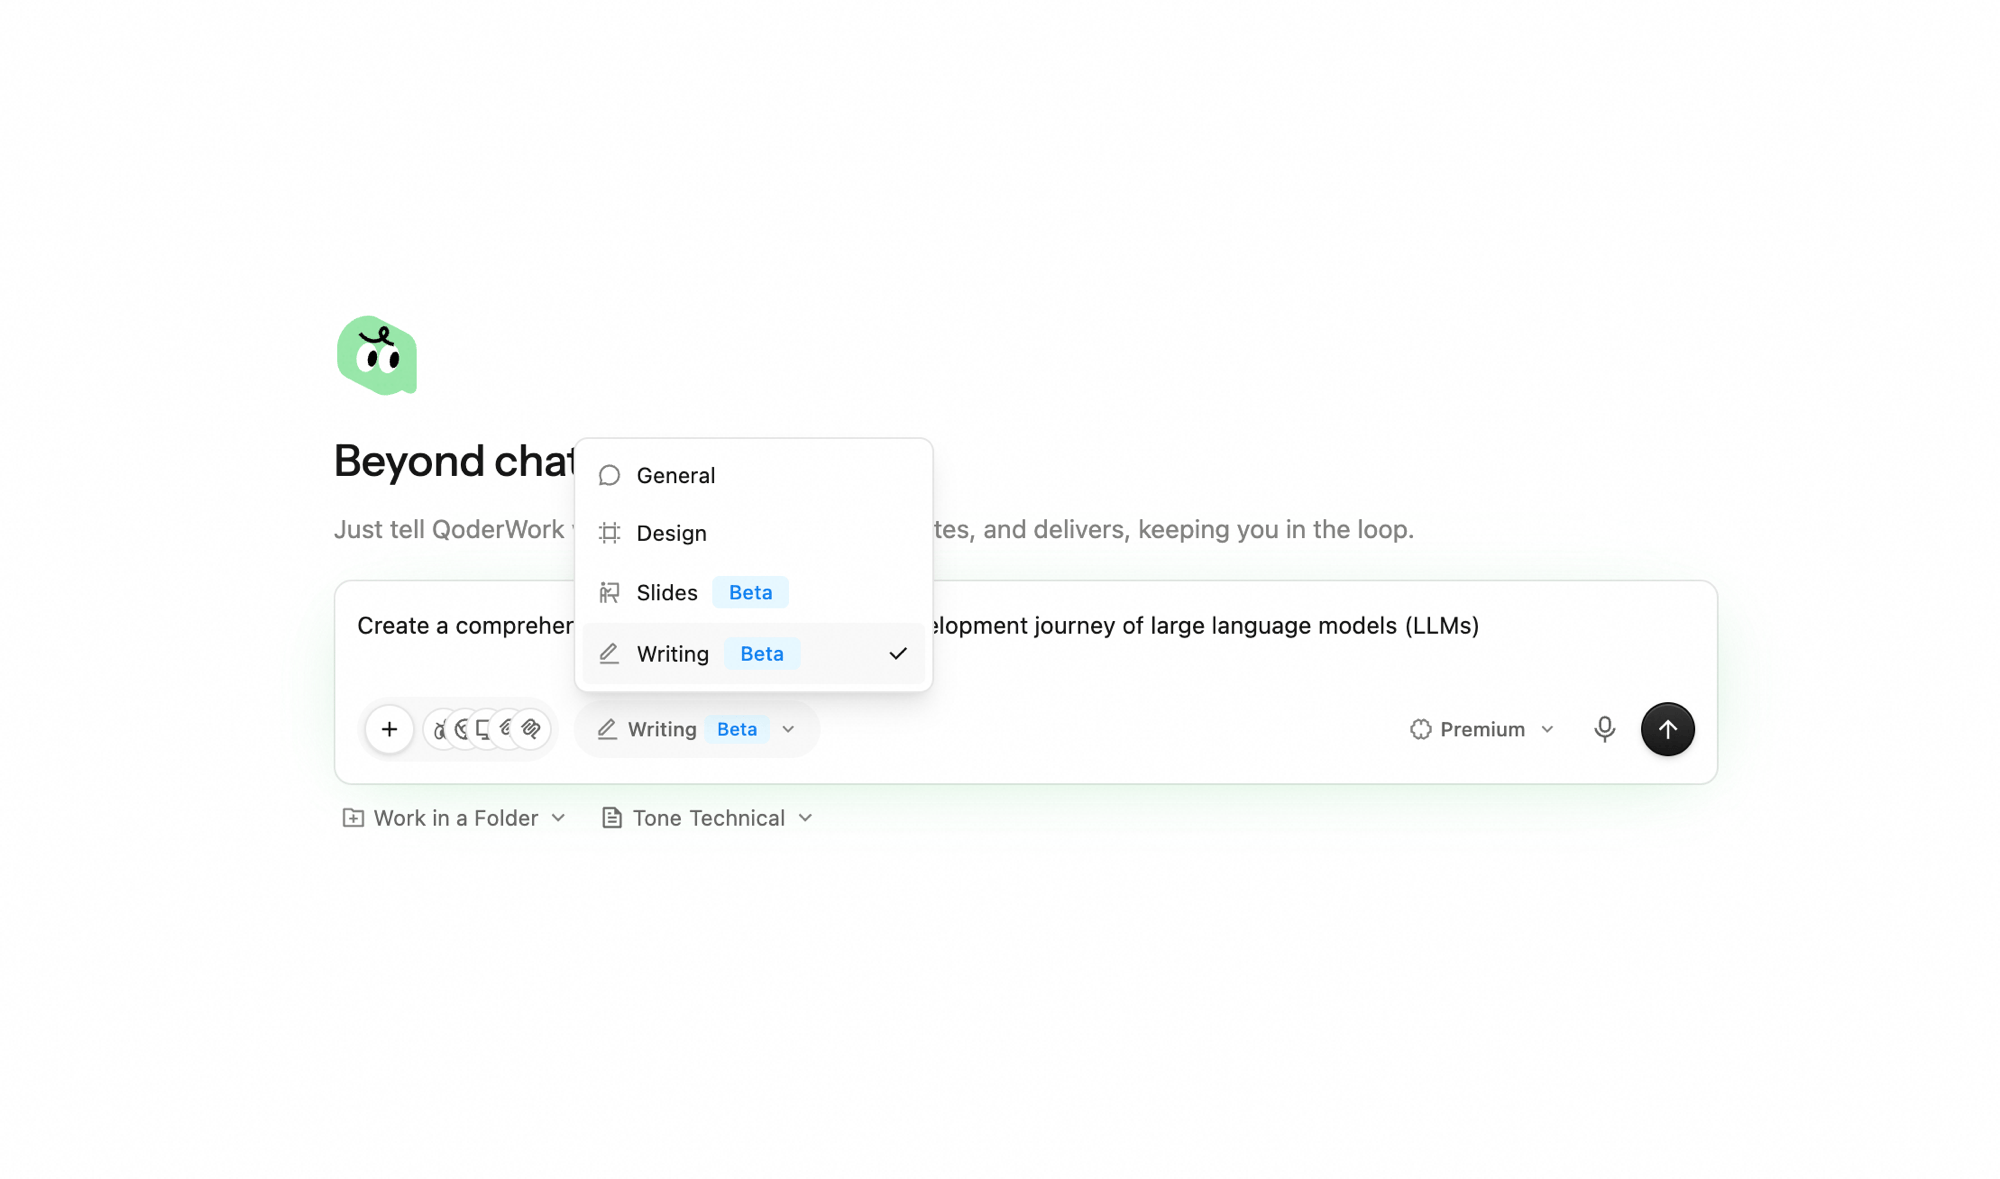 * Click **Tone** to set the overall voice — **No tone preset** / **Formal** / **Casual** / **Technical** / **Creative**. Leave it unset to let the agent infer the tone from the brief.
* Click **Work in a Folder** to pin the task to a local directory. The agent reads and writes files there, so the run is grounded against existing material and the output sticks to disk for longer iteration cycles.
* Click **Tone** to set the overall voice — **No tone preset** / **Formal** / **Casual** / **Technical** / **Creative**. Leave it unset to let the agent infer the tone from the brief.
* Click **Work in a Folder** to pin the task to a local directory. The agent reads and writes files there, so the run is grounded against existing material and the output sticks to disk for longer iteration cycles.
 The output appears as a Markdown file in the **outputs/** folder. Toggle **Read** in the top-right to review the rendered Markdown, or **Edit** to make direct changes in the editor.
## Iterating
* **Add to the queue.** Send follow-up instructions in the bottom input box — *"add a section on permissions"* — the agent updates the relevant parts of the file in place.
* **Stop a run.** Click the stop button next to the input to halt generation mid-flight.
* **Compare versions.** Use the **Latest Workspace file** dropdown to flip between the latest and earlier versions of a document — useful when you've taken multiple passes and want to compare.
* **Edit directly.** Switch to **Edit** in the editor to fix a sentence or rewrite a paragraph yourself; the agent picks up your edits in subsequent turns.
* **Switch models.** Use the model dropdown to change models for the next step.
The clearer the audience, the better the draft. *"Internal post-mortem for the platform team, lessons-learned focused, no blame"* lands far better than *"write up the incident."*
## Exporting
Click **Export** in the top-right corner to export the current document as a PDF file. You can also copy the rendered text into any downstream tool — docs, blog CMS, internal wiki, or chat.
## Use cases
### Technical guide from rough notes
```plaintext theme={null}
@oss-notes.md
Turn these rough notes into a technical guide for engineers new
to Alibaba Cloud OSS. Cover core concepts, storage classes,
permissions, upload/download mechanics, lifecycle, monitoring,
and best practices. Use code examples and comparison tables.
```
### Internal post-mortem
```plaintext theme={null}
@incident-2026-05-19-timeline.md @slack-thread.txt
Draft a blameless post-mortem for the May 19 incident.
Sections: summary, impact, timeline, root cause, what worked,
what didn't, action items with owners. Tone: neutral, factual.
```
### Release note from a PR list
```plaintext theme={null}
@merged-prs-2026-w20.md
Write a customer-facing release note covering the highlights
from these PRs. Group as Features / Improvements / Fixes.
Keep each item to one tight sentence; lead with user impact.
```
### Technical blog post
```plaintext theme={null}
Write a blog post about "Building an automated data analysis
pipeline with QoderWork."
Audience: product managers and data analysts with some technical
background.
Structure: hook (pain point) → solution overview → step-by-step
tutorial (with screenshot placeholders) → results → wrap-up
and further reading.
Keep it 1500-2500 words. Professional but accessible tone.
```
### Product user documentation
```plaintext theme={null}
@api-spec.yaml
Based on this API spec, write a developer integration guide.
Include: overview, authentication, quick start (cURL examples),
core endpoint reference (request/response examples), error code
table, and FAQ.
Style reference: Stripe docs — concise, example-driven.
```
## Next Steps
Generate designs as code on a canvas
Create presentations with AI Slides
The output appears as a Markdown file in the **outputs/** folder. Toggle **Read** in the top-right to review the rendered Markdown, or **Edit** to make direct changes in the editor.
## Iterating
* **Add to the queue.** Send follow-up instructions in the bottom input box — *"add a section on permissions"* — the agent updates the relevant parts of the file in place.
* **Stop a run.** Click the stop button next to the input to halt generation mid-flight.
* **Compare versions.** Use the **Latest Workspace file** dropdown to flip between the latest and earlier versions of a document — useful when you've taken multiple passes and want to compare.
* **Edit directly.** Switch to **Edit** in the editor to fix a sentence or rewrite a paragraph yourself; the agent picks up your edits in subsequent turns.
* **Switch models.** Use the model dropdown to change models for the next step.
The clearer the audience, the better the draft. *"Internal post-mortem for the platform team, lessons-learned focused, no blame"* lands far better than *"write up the incident."*
## Exporting
Click **Export** in the top-right corner to export the current document as a PDF file. You can also copy the rendered text into any downstream tool — docs, blog CMS, internal wiki, or chat.
## Use cases
### Technical guide from rough notes
```plaintext theme={null}
@oss-notes.md
Turn these rough notes into a technical guide for engineers new
to Alibaba Cloud OSS. Cover core concepts, storage classes,
permissions, upload/download mechanics, lifecycle, monitoring,
and best practices. Use code examples and comparison tables.
```
### Internal post-mortem
```plaintext theme={null}
@incident-2026-05-19-timeline.md @slack-thread.txt
Draft a blameless post-mortem for the May 19 incident.
Sections: summary, impact, timeline, root cause, what worked,
what didn't, action items with owners. Tone: neutral, factual.
```
### Release note from a PR list
```plaintext theme={null}
@merged-prs-2026-w20.md
Write a customer-facing release note covering the highlights
from these PRs. Group as Features / Improvements / Fixes.
Keep each item to one tight sentence; lead with user impact.
```
### Technical blog post
```plaintext theme={null}
Write a blog post about "Building an automated data analysis
pipeline with QoderWork."
Audience: product managers and data analysts with some technical
background.
Structure: hook (pain point) → solution overview → step-by-step
tutorial (with screenshot placeholders) → results → wrap-up
and further reading.
Keep it 1500-2500 words. Professional but accessible tone.
```
### Product user documentation
```plaintext theme={null}
@api-spec.yaml
Based on this API spec, write a developer integration guide.
Include: overview, authentication, quick start (cURL examples),
core endpoint reference (request/response examples), error code
table, and FAQ.
Style reference: Stripe docs — concise, example-driven.
```
## Next Steps
Generate designs as code on a canvas
Create presentations with AI Slides