> ## Documentation Index
> Fetch the complete documentation index at: https://docs.qoder.com/llms.txt
> Use this file to discover all available pages before exploring further.
# Design
Design is QoderWork's first vertical workspace — an AI-native "design as code" surface where you describe what you want and ship a runnable, editable, handoff-ready design on an infinite canvas.
Unlike traditional design tools that center on cloud-based vector editing, Design treats design output as a code asset that the team co-owns. From the very first step, designers and engineers operate on the same runnable file, and the design product can be handed off to Qoder IDE in a single click — no lossy export between design and development.
## Use cases
### Designers — targeted iteration, multi-surface collaboration
Traditional flows force designers to slice, re-export, update annotations, sync with engineers, and verify the final pixels. Design pulls iteration back into the canvas: lasso a region, mark intent, and the agent adjusts based on canvas context. Use Nudge to fine-tune color and spacing in real time. The output keeps a readable, hand-offable engineering structure.
### Product managers — high-fidelity prototypes, ready when you are
Hi-fi prototypes communicate design direction clearly but typically depend on the design team's bandwidth. With Design, structured Questions align intent, the Design Plan confirms direction, and the canvas produces a clickable, design-grade prototype you can take straight into a review or stakeholder demo.
### Marketing & operations — many directions in parallel
A single campaign needs key visuals, banners, and landing pages, but design bandwidth often forces a single direction. With Design, you describe theme and tone, confirm via the Design Plan, and switch entries under **Auto Style Reference** to generate parallel directions covering posters, banners, and landing pages.
## How it works
Design reshapes how AI produces design through three mechanisms:
* **Questions** — when input isn't enough, the agent asks structured questions to align intent first instead of guessing. Less wasted iteration.
* **Design Plan** — before generation, the agent produces a structured plan (layout, style, content hierarchy) under the **Plan** tab. You confirm, then it executes.
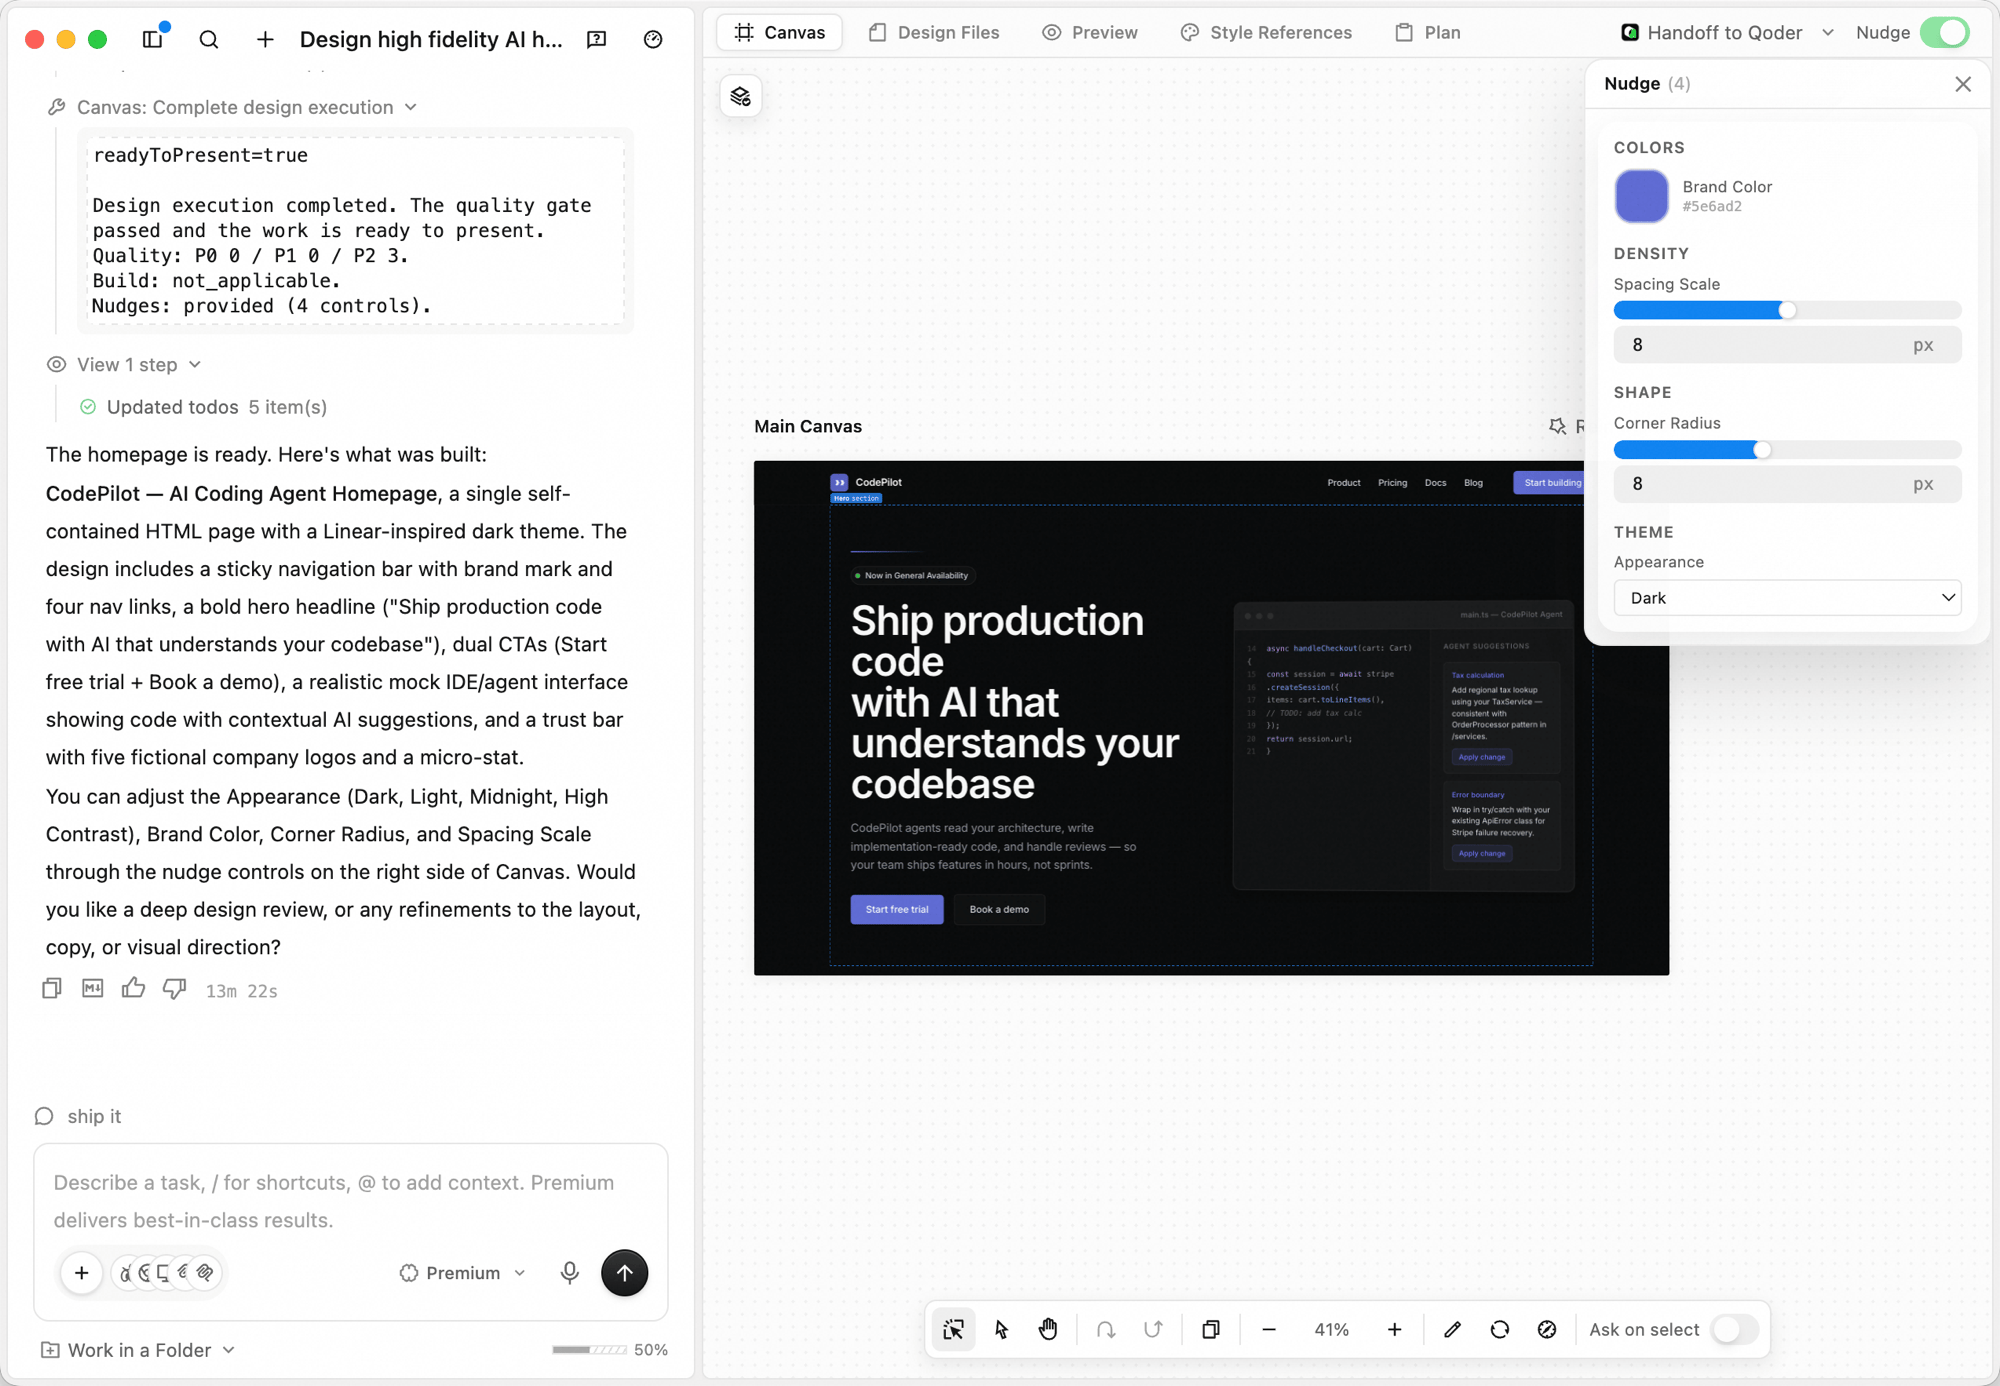
* **Nudge** — after generation, key decisions like color, spacing, and corner radius are exposed as adjustable parameters. Fine-tune them without re-describing the brief.
## Workspace
 The right side of the window has five tabs:
| Tab | What it does |
| :------------------- | :-------------------------------------------------------------- |
| **Canvas** | The infinite design surface where the agent generates and edits |
| **Design Files** | The underlying engineering files behind what's on the canvas |
| **Preview** | Preview the running design as a real interface |
| **Style References** | View and switch the active style reference used by the design |
| **Plan** | The structured Design Plan the agent uses before generating |
## Creating a design
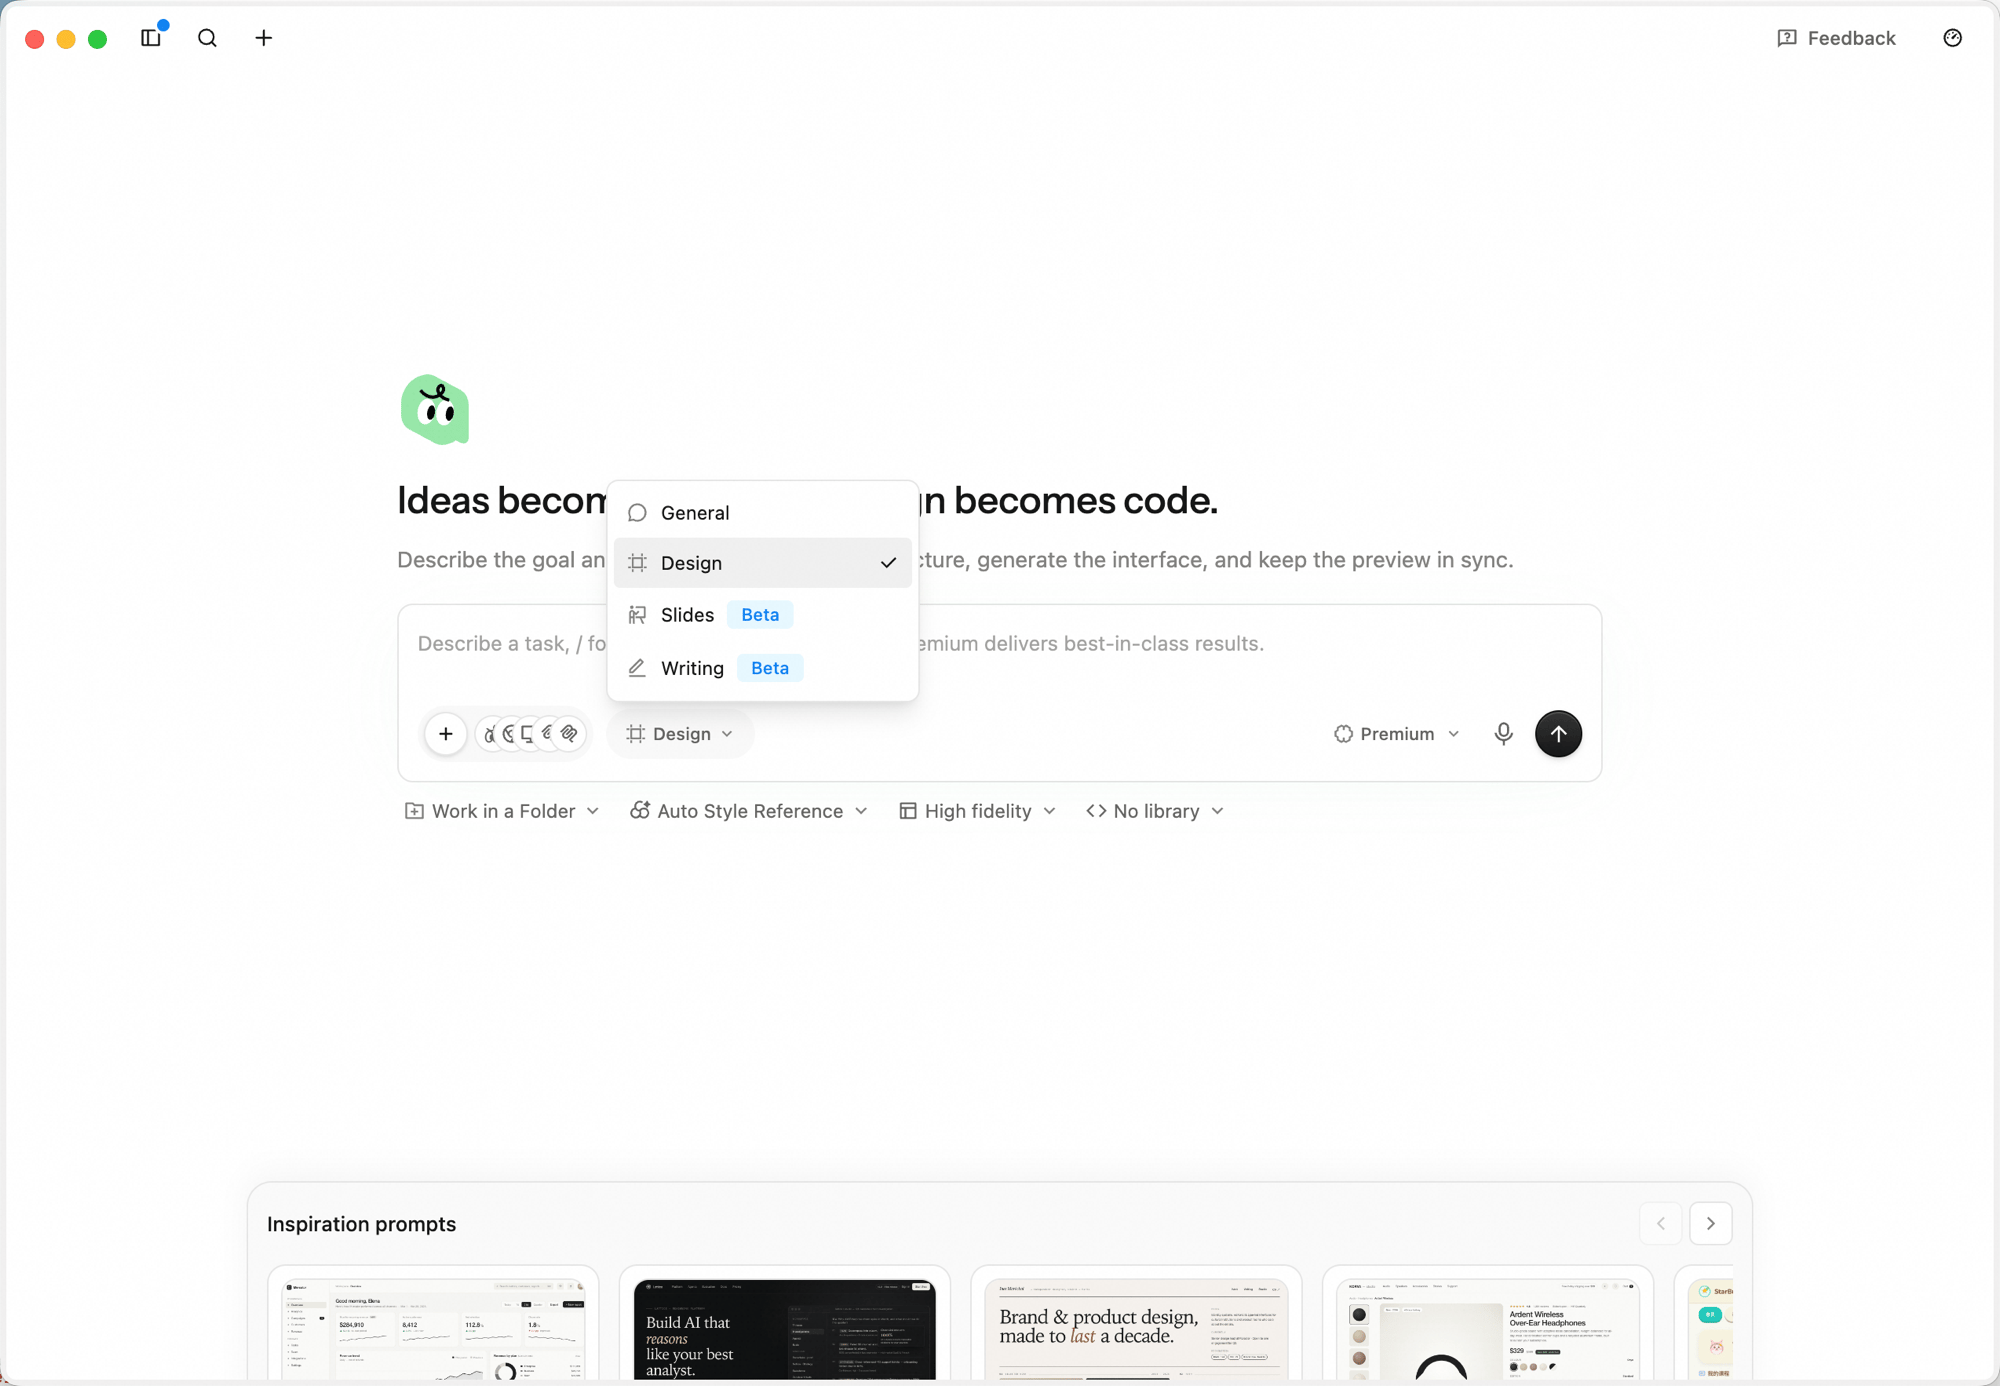
In the input box at the bottom of the QoderWork home, click the workspace switcher (defaults to **General**) and choose **Design**.
The right side of the window has five tabs:
| Tab | What it does |
| :------------------- | :-------------------------------------------------------------- |
| **Canvas** | The infinite design surface where the agent generates and edits |
| **Design Files** | The underlying engineering files behind what's on the canvas |
| **Preview** | Preview the running design as a real interface |
| **Style References** | View and switch the active style reference used by the design |
| **Plan** | The structured Design Plan the agent uses before generating |
## Creating a design
In the input box at the bottom of the QoderWork home, click the workspace switcher (defaults to **General**) and choose **Design**.
 The default workspace can be changed in QoderWork settings — set Design as your default if it's the surface you live in.
Type or dictate the brief. Be concrete about purpose, key sections, and tone — for example: *"Design a high-fidelity AI product homepage with brand navigation, a strong headline, product value proposition, primary CTA, secondary CTA, product UI preview, and customer trust proof. Make it modern, credible, and refined."*
Paste screenshots and links directly into the input. Click the microphone icon for [voice input](/qoderwork/voice-input).
The default workspace can be changed in QoderWork settings — set Design as your default if it's the surface you live in.
Type or dictate the brief. Be concrete about purpose, key sections, and tone — for example: *"Design a high-fidelity AI product homepage with brand navigation, a strong headline, product value proposition, primary CTA, secondary CTA, product UI preview, and customer trust proof. Make it modern, credible, and refined."*
Paste screenshots and links directly into the input. Click the microphone icon for [voice input](/qoderwork/voice-input).
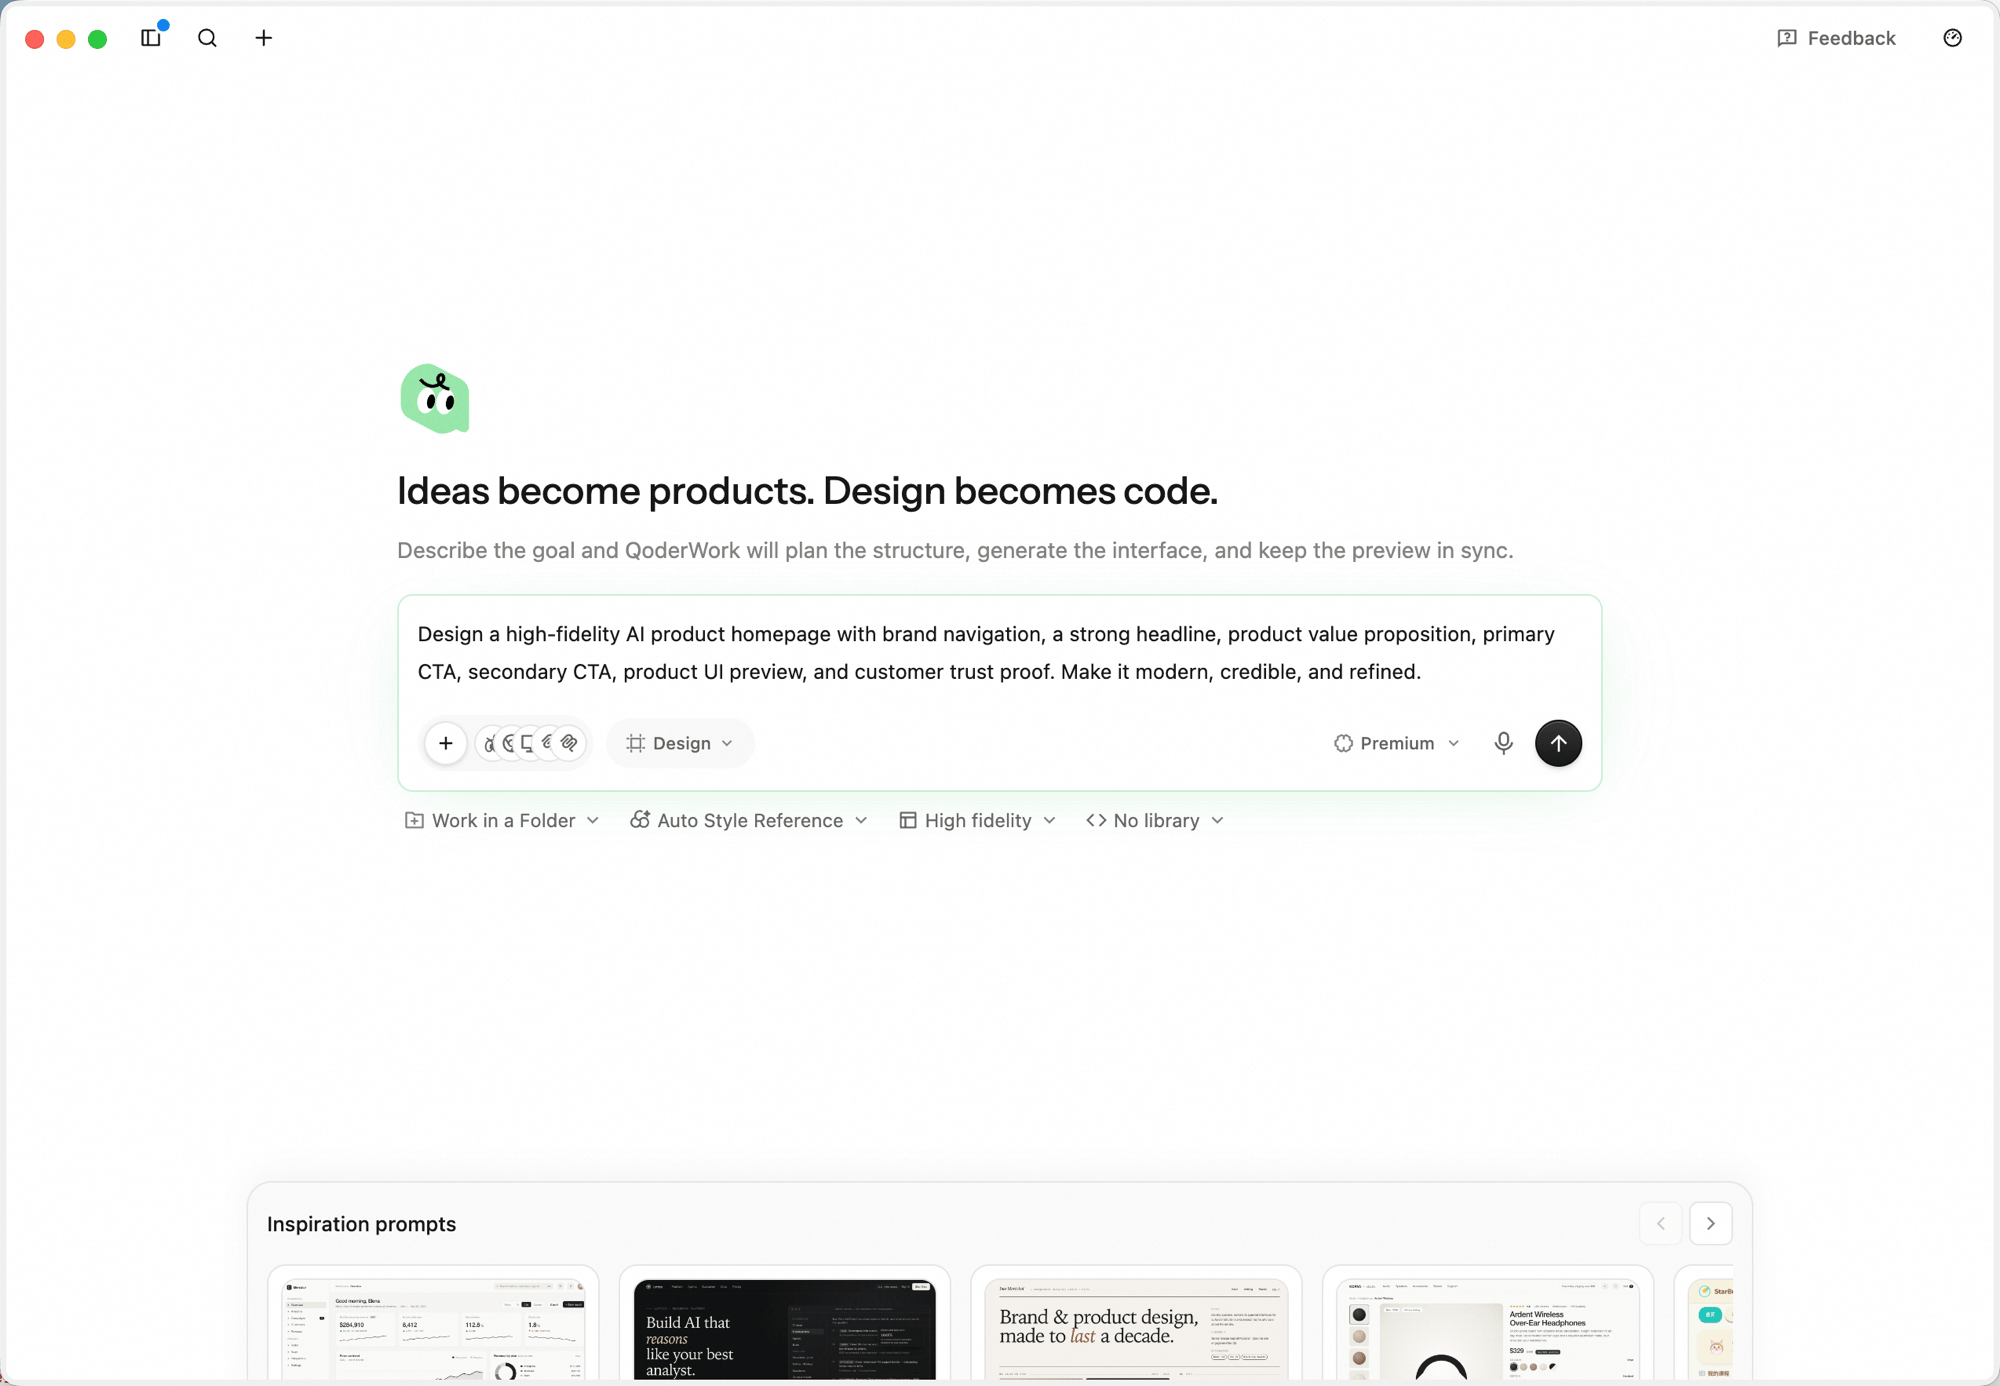 A toolbar under the input box exposes the workspace's optional setup: **Work in a Folder**, **Auto Style Reference**, **Fidelity**, and **Component library**.
* Click **Auto Style Reference** to lock the overall look-and-feel before generation — keep **Auto Style Reference** to let Canvas pick the best fit from 161 references, or pick a specific style like Airbnb, Airtable, Apple, Carbon, or Cloudscape. Use the search box at the top to filter by name.
* Click **Work in a Folder** to pin the task to a local directory — the agent writes engineering files into that folder, which keeps the project maintainable over time and ready for handoff to Qoder IDE.
* Click **Fidelity** to switch between **Wireframe** (low-fidelity layout, minimal visual styling) and **High fidelity** (production-grade visual design and detail, the default).
* Click **Component library** to pick a target — defaults to **No library** (HTML-first unless the brief explicitly calls for React or another framework). You can also pick from **shadcn/ui**, **Spark Design**, or **Ant Design** — the agent will generate against the chosen React library.
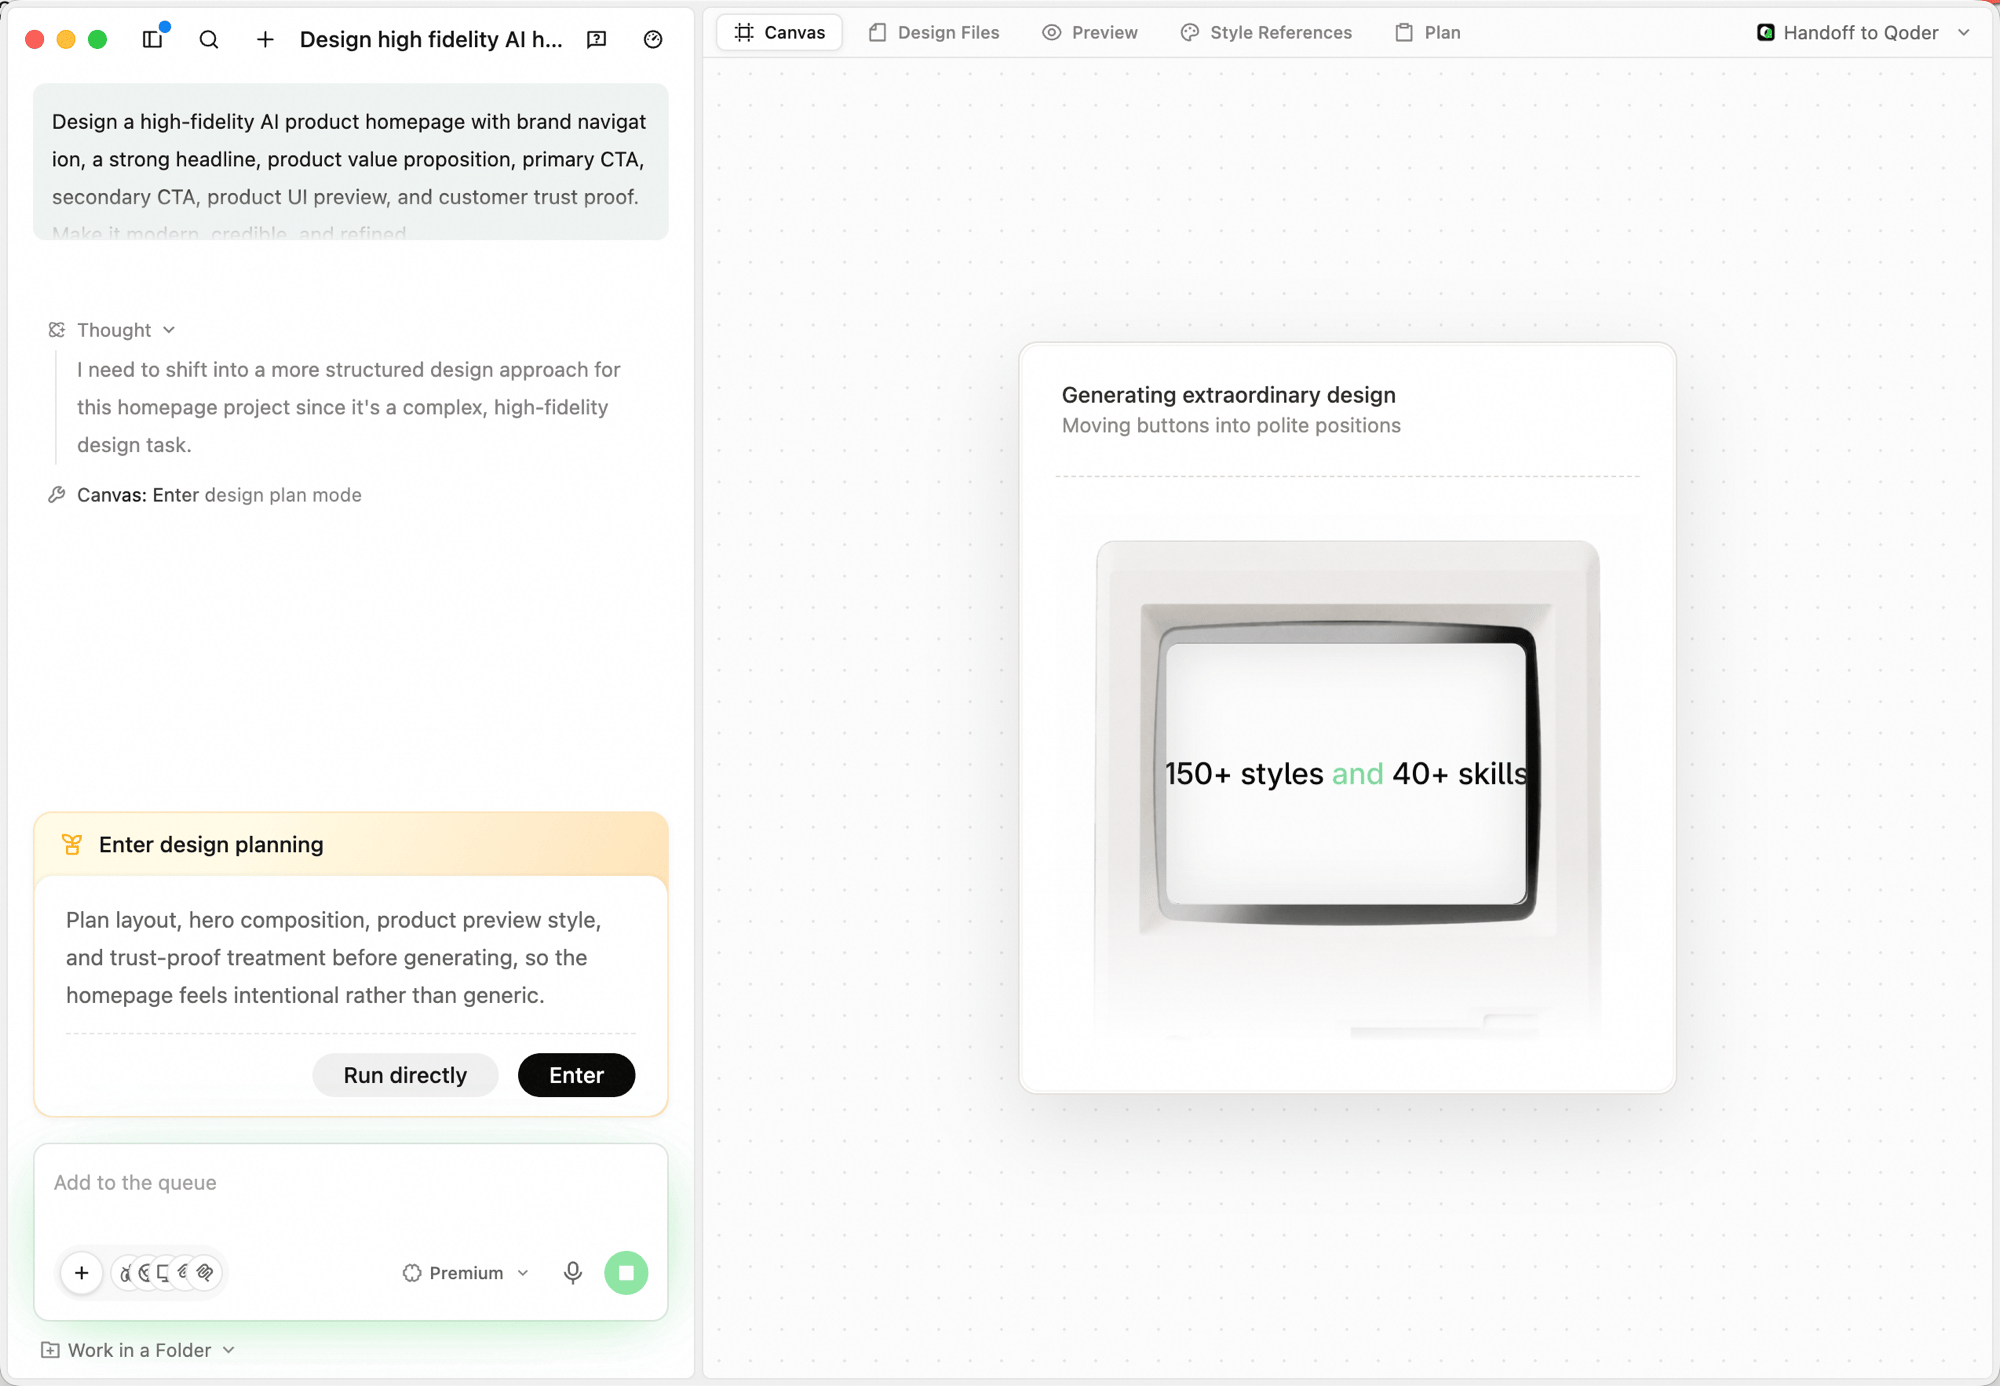
After you submit, the agent first reads the brief and does a quick analysis pass (the reasoning shows up in the left panel as **Thinking** entries), then surfaces an **Enter design planning** decision card with two buttons:
* **Run directly** — skip the structured questions and the design plan; the agent generates straight onto the canvas using whatever context it already has. Use this when the brief is small or you just want a quick exploration.
* **Enter** — turn on design planning. The agent will first ask clarifying questions, then produce a Design Plan, then generate. Recommended for high-fidelity or production-grade work.
A toolbar under the input box exposes the workspace's optional setup: **Work in a Folder**, **Auto Style Reference**, **Fidelity**, and **Component library**.
* Click **Auto Style Reference** to lock the overall look-and-feel before generation — keep **Auto Style Reference** to let Canvas pick the best fit from 161 references, or pick a specific style like Airbnb, Airtable, Apple, Carbon, or Cloudscape. Use the search box at the top to filter by name.
* Click **Work in a Folder** to pin the task to a local directory — the agent writes engineering files into that folder, which keeps the project maintainable over time and ready for handoff to Qoder IDE.
* Click **Fidelity** to switch between **Wireframe** (low-fidelity layout, minimal visual styling) and **High fidelity** (production-grade visual design and detail, the default).
* Click **Component library** to pick a target — defaults to **No library** (HTML-first unless the brief explicitly calls for React or another framework). You can also pick from **shadcn/ui**, **Spark Design**, or **Ant Design** — the agent will generate against the chosen React library.
After you submit, the agent first reads the brief and does a quick analysis pass (the reasoning shows up in the left panel as **Thinking** entries), then surfaces an **Enter design planning** decision card with two buttons:
* **Run directly** — skip the structured questions and the design plan; the agent generates straight onto the canvas using whatever context it already has. Use this when the brief is small or you just want a quick exploration.
* **Enter** — turn on design planning. The agent will first ask clarifying questions, then produce a Design Plan, then generate. Recommended for high-fidelity or production-grade work.
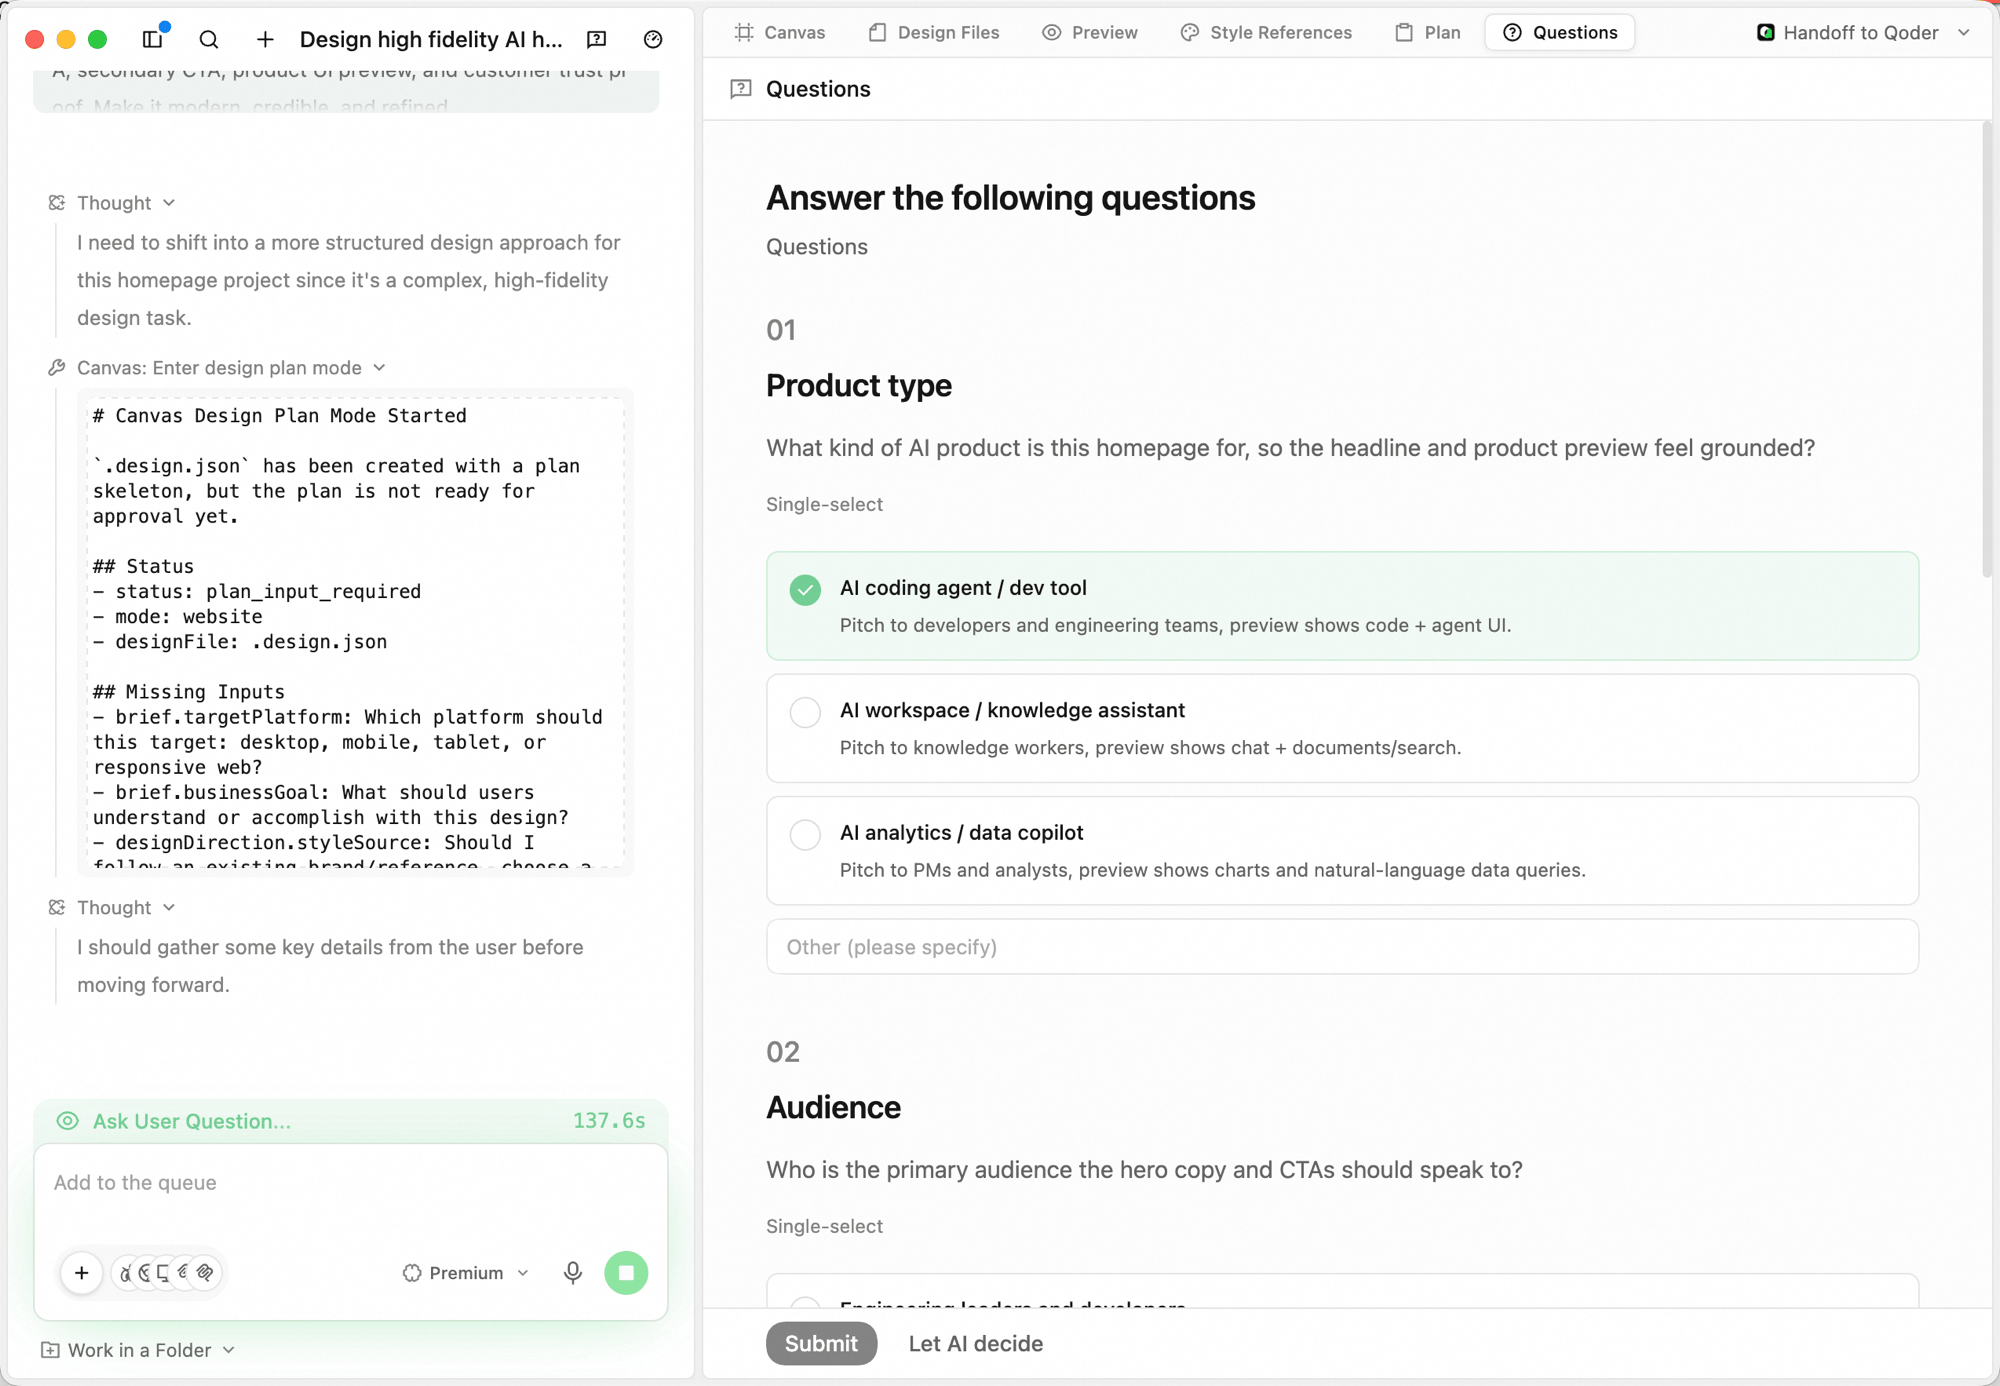
 In design planning mode, the agent opens a **Questions** tab and asks a few structured questions — product type, audience, fidelity, brand assets — each rendered as single-select options with an *Other* free-text fallback. Answer them so the plan matches your real context; click **Let AI decide** at the bottom if you'd rather skip the back-and-forth.
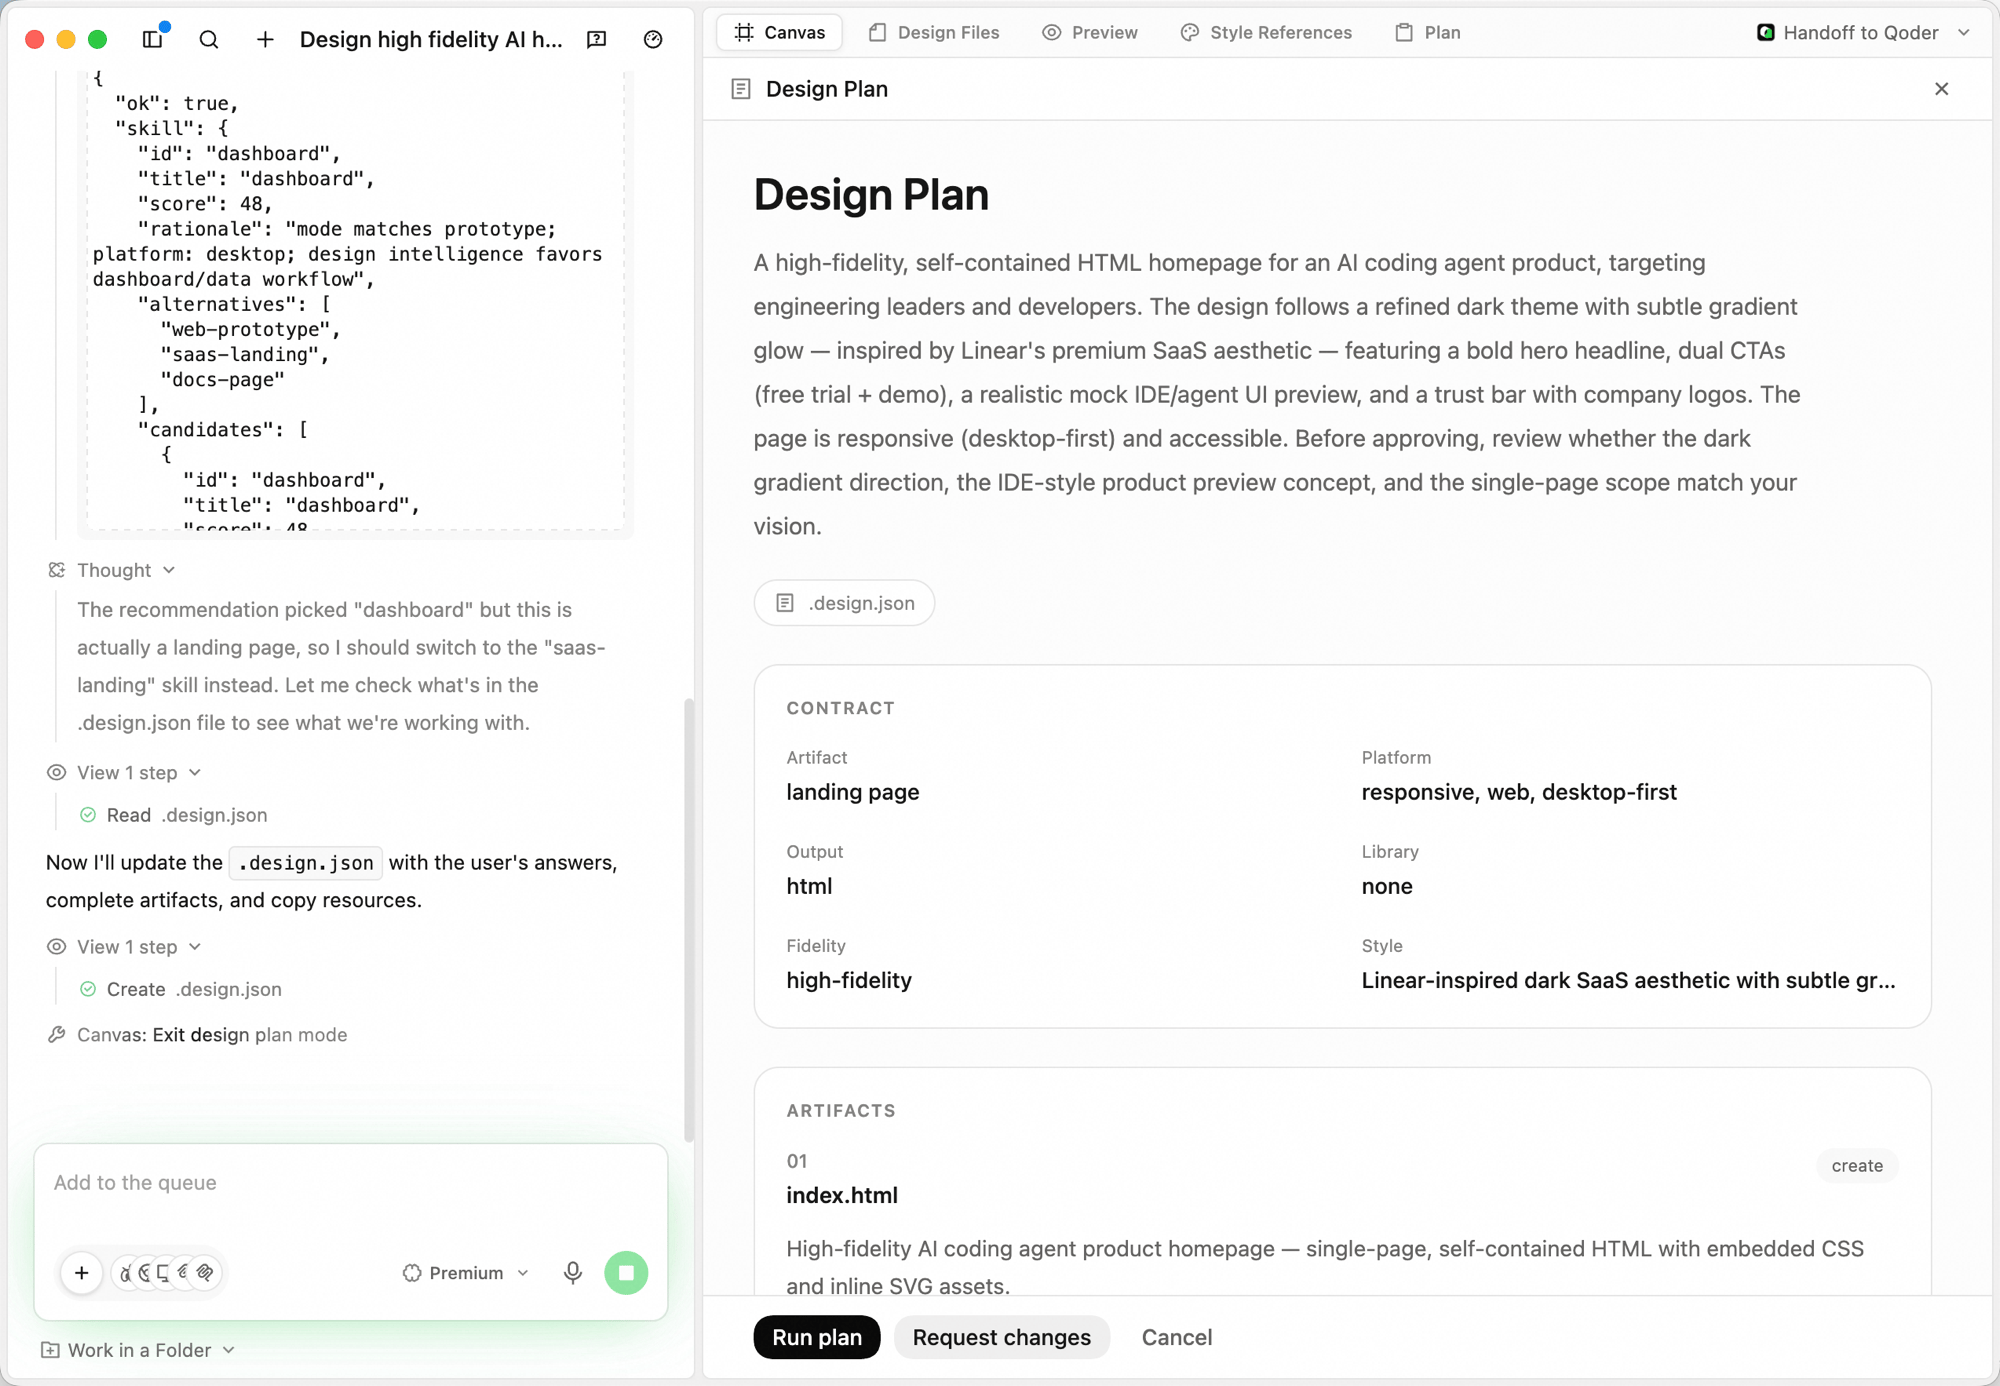
 The agent then writes a **Design Plan** under the **Plan** tab: a summary of intent and direction, a **Contract** panel (artifact, platform, output, library, fidelity, style), and the list of **Artifacts** with a one-line goal each. Hit **Run plan** to ship it, or **Request changes** to push back before any pixels are drawn.
 The agent generates on the **Canvas** tab. Reasoning appears in the left panel as **Thinking** entries; the canvas updates in place as each component lands.
Switch to **Preview** to interact with the design as a real interface — click through CTAs, hover states, and navigation.
## Iterating
You don't need to redo a brief from scratch — keep iterating in place.
* **Add to the queue.** Send follow-up instructions in the bottom input box — they're picked up after the current step.
* **Stop a run.** Click the stop button next to the input while the agent is generating to halt mid-flight.
* **Lasso and annotate on the Canvas.** Select a region and tell the agent what to change there; it adjusts based on canvas context instead of regenerating the whole frame.
* **Nudge key parameters.** After generation, the agent exposes color, spacing, and corner-radius as adjustable values — tune them without re-describing the brief.
* **Switch models mid-run.** Use the model dropdown next to the input (e.g. **Standard** / **Premium**) to change models for the next step.
* **Edit the engineering files directly.** Open **Design Files** to inspect or edit the source files when you need to drop into code.
The agent keeps full conversation context, so iterations like *"keep the layout but make the hero darker and the CTA wider"* land precisely on what's already on the canvas.
## Typical Scenarios
### Product landing page
```plaintext theme={null}
Design a SaaS product landing page targeting enterprise users.
Include: top nav, hero section (headline + subtitle + primary CTA),
three-column product advantages, customer logo bar,
pricing comparison table, bottom CTA, and footer.
Style: clean, generous white space, cool color palette.
```
### Marketing visual kit
```plaintext theme={null}
Design a marketing visual suite for an online product launch event:
1. 16:9 promo banner (headline + countdown + QR code area)
2. Square social media image (suited for Instagram and Twitter)
3. Event landing page (agenda, speakers, registration form)
Use brand color #1A73E8 throughout. Modern, tech-forward style.
```
### Dashboard redesign
```plaintext theme={null}
Redesign a data analytics dashboard.
Include: sidebar navigation, top filter bar, 4 KPI metric cards,
line trend chart, donut distribution chart, data table.
Reference Linear's design. Dark theme, high information density
but clear visual hierarchy.
```
## Handing off to Qoder
Click **Handoff to Qoder** in the top-right corner to send the current code artifact straight to Qoder IDE for downstream work. A designer comfortable with frontend code can pull the same branch, continue iterating, and submit code without ever leaving the design surface.
## Next Steps
Create presentations with AI Slides
AI-assisted writing and polishing
The agent generates on the **Canvas** tab. Reasoning appears in the left panel as **Thinking** entries; the canvas updates in place as each component lands.
Switch to **Preview** to interact with the design as a real interface — click through CTAs, hover states, and navigation.
## Iterating
You don't need to redo a brief from scratch — keep iterating in place.
* **Add to the queue.** Send follow-up instructions in the bottom input box — they're picked up after the current step.
* **Stop a run.** Click the stop button next to the input while the agent is generating to halt mid-flight.
* **Lasso and annotate on the Canvas.** Select a region and tell the agent what to change there; it adjusts based on canvas context instead of regenerating the whole frame.
* **Nudge key parameters.** After generation, the agent exposes color, spacing, and corner-radius as adjustable values — tune them without re-describing the brief.
* **Switch models mid-run.** Use the model dropdown next to the input (e.g. **Standard** / **Premium**) to change models for the next step.
* **Edit the engineering files directly.** Open **Design Files** to inspect or edit the source files when you need to drop into code.
The agent keeps full conversation context, so iterations like *"keep the layout but make the hero darker and the CTA wider"* land precisely on what's already on the canvas.
## Typical Scenarios
### Product landing page
```plaintext theme={null}
Design a SaaS product landing page targeting enterprise users.
Include: top nav, hero section (headline + subtitle + primary CTA),
three-column product advantages, customer logo bar,
pricing comparison table, bottom CTA, and footer.
Style: clean, generous white space, cool color palette.
```
### Marketing visual kit
```plaintext theme={null}
Design a marketing visual suite for an online product launch event:
1. 16:9 promo banner (headline + countdown + QR code area)
2. Square social media image (suited for Instagram and Twitter)
3. Event landing page (agenda, speakers, registration form)
Use brand color #1A73E8 throughout. Modern, tech-forward style.
```
### Dashboard redesign
```plaintext theme={null}
Redesign a data analytics dashboard.
Include: sidebar navigation, top filter bar, 4 KPI metric cards,
line trend chart, donut distribution chart, data table.
Reference Linear's design. Dark theme, high information density
but clear visual hierarchy.
```
## Handing off to Qoder
Click **Handoff to Qoder** in the top-right corner to send the current code artifact straight to Qoder IDE for downstream work. A designer comfortable with frontend code can pull the same branch, continue iterating, and submit code without ever leaving the design surface.
## Next Steps
Create presentations with AI Slides
AI-assisted writing and polishing